Call +(254) 703 030 000 / 751 483 999 / 721 704 777
.....Read More
Frequently Asked Questions
What are the different types of drill bits and their uses?
Drill bits come in various types, each designed for specific materials and applications. Twist drill bits are the most common, versatile for wood, metal, and plastic. Masonry bits, with their tungsten carbide tips, are ideal for concrete, brick, and stone. Brad-point bits are used for precise, clean holes in wood, preventing tear-out. Spade bits create large, rough holes in wood quickly. Forstner bits drill clean, flat-bottomed holes in wood, often used for concealed hinges. Hole saws cut large diameter holes in various materials. Step drill bits create multiple hole sizes with a single bit, useful for sheet metal. Finally, auger bits are designed for deep, clean holes in wood. Choosing the right drill bit for the job ensures efficiency, accuracy, and safety.
How do you choose the right drill bit for a specific material?
Please specify the topic you would like me to elaborate on.
What is the difference between a reamer and a drill bit?
A drill bit is primarily used to create holes, removing material to form a new hole or enlarge an existing one. It cuts material at its tip, and its flutes help evacuate chips. Drill bits are designed for rapid material removal and creating a hole of a specific nominal diameter, though the resulting hole may have some runout or be slightly oversized due to factors like vibration and material properties.
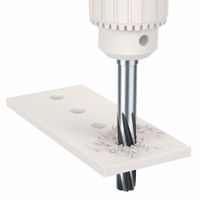
In contrast, a reamer is a precision cutting tool used to enlarge and finish an existing hole to a very specific, accurate diameter with a smooth surface finish. Reamers remove only a small amount of material, typically a few thousandths of an inch. They are used after a hole has been drilled to bring it to its final, precise size and improve its concentricity and surface quality. Reamers have multiple cutting edges and are designed to shave material rather than aggressively cut it, ensuring a highly accurate and smooth bore.
How do you properly sharpen a drill bit?
Sharpening a drill bit properly involves a few key steps to ensure it cuts efficiently and accurately. First, you'll need a grinding wheel or a dedicated drill bit sharpener. Safety is paramount, so always wear eye protection.
If using a grinding wheel, the goal is to recreate the bit's original angles. Hold the drill bit firmly, presenting the cutting edge to the wheel at the correct angle. For most general-purpose drill bits, this is around 59 degrees from the drill bit's axis. As you grind, rotate the drill bit slightly to create a relief angle behind the cutting edge. This relief allows the cutting edge to bite into the material. It's crucial to apply consistent, light pressure and keep the bit moving to prevent overheating, which can temper the steel and dull the bit. You'll work on one flute at a time, ensuring both cutting edges are symmetrical in length and angle for balanced drilling.
For a more precise and repeatable sharpening, a drill bit sharpener jig or machine is recommended. These devices typically guide the bit at the correct angles, simplifying the process and ensuring consistent results, especially for beginners.
Regardless of the method, after sharpening, visually inspect the bit for burrs or uneven edges. A properly sharpened bit will have two sharp, symmetrical cutting edges and a distinct chisel point at the center. Test the bit on a scrap piece of material to confirm its cutting performance.
What are the best practices for using punches and dies on sheet metal?
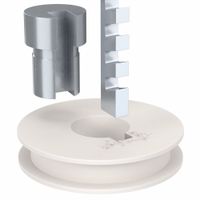
When using punches and dies on sheet metal, best practices include selecting the correct punch and die clearance for the material thickness and type, ensuring proper alignment to prevent premature wear and damage, and maintaining sharp tooling to produce clean cuts and minimize burrs. Lubrication is also crucial to reduce friction and heat buildup. Regularly inspect and clean tooling, and consider the material's properties, such as hardness and ductility, when determining the appropriate punch speed and press tonnage. Adhering to these practices helps extend tool life, improve part quality, and ensure operational safety.
How do you determine the correct size of a counterbore or countersink?
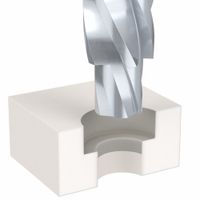
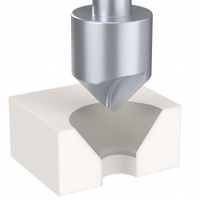
Determining the correct size for a counterbore or countersink involves considering the fastener's dimensions and the material being joined. For a counterbore, the diameter should match the head diameter of the fastener, and the depth should allow the fastener head to sit flush with or below the surface. For a countersink, the angle should match the angle of the fastener's tapered head, typically 82 degrees for flat-head screws, and the diameter at the top should be slightly larger than the maximum diameter of the fastener head. In both cases, the hole created for the fastener's body should be appropriately sized for a clearance fit.
What are the benefits of using drill bit extensions and guides?
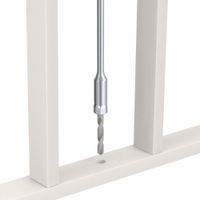
Drill bit extensions and guides offer several benefits that enhance drilling accuracy, safety, and efficiency. Extensions allow users to reach into deep or obstructed areas, making them invaluable for tasks like installing wiring in walls or working on automotive repairs where a standard drill bit might not be long enough. They provide the necessary reach without requiring complex disassemblies or awkward positioning, saving time and effort.
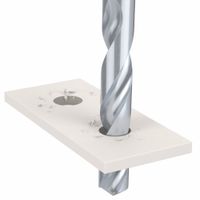
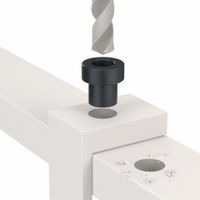
Drill guides, on the other hand, are crucial for maintaining precision. They help in drilling straight holes, preventing the bit from wandering or drifting, which is particularly important when working with delicate materials or when exact hole placement is critical, such as in cabinetry or woodworking. Guides can also help maintain a consistent angle, ensuring uniform results across multiple holes. Some guides also feature dust collection ports, which help keep the workspace clean and improve visibility.
Together, extensions and guides contribute to safer drilling by reducing the chance of the bit slipping and causing injury, and by providing better control over the drilling process. They minimize material waste due to misplaced or angled holes, ultimately leading to more professional and precise outcomes.
How do you maintain and store drilling and holemaking tools?
To maintain and store drilling and holemaking tools effectively, several practices should be followed.
Firstly, regular cleaning is crucial. After each use, tools should be thoroughly cleaned to remove chips, debris, and lubricants. A clean cloth or brush is usually sufficient for this. For tougher residue, a mild solvent can be used, ensuring proper ventilation.
Secondly, lubrication and rust prevention are vital. After cleaning, apply a thin coat of rust-inhibiting oil or a specialized tool lubricant to all metal surfaces, especially cutting edges. This protects against corrosion, which can significantly degrade tool performance and lifespan. For carbide-tipped tools, ensure the lubricant is compatible.
Thirdly, proper storage is key to preventing damage and maintaining sharpness. Tools should be stored in a dry, temperature-controlled environment to minimize the risk of rust and material degradation. Individual compartments, tool rolls, or cases are ideal for preventing tools from knocking against each other, which can chip or dull cutting edges. Ensure that cutting edges are protected, perhaps with rubber caps or sheaths, particularly for drill bits and reamers.
Fourthly, periodic inspection for wear and damage is recommended. Before and after use, visually inspect tools for signs of chipping, cracking, or excessive wear. Dull tools should be sharpened promptly by a professional or using appropriate sharpening equipment, as continuing to use a dull tool can lead to poor hole quality, increased heat, and potential tool breakage.
Finally, proper handling also contributes to tool longevity. Avoid dropping tools, as this can cause immediate damage to cutting edges or the tool body. Always use tools for their intended purpose and within their specified operating parameters to prevent undue stress and premature wear.
What safety precautions should be taken when using drilling and holemaking tools?
When using drilling and holemaking tools, always wear appropriate personal protective equipment (PPE), including safety glasses or a face shield, hearing protection, and gloves. Ensure your workpiece is securely clamped to prevent it from spinning or shifting during operation. Before starting, inspect the tool for any damage, loose parts, or frayed cords. Use the correct drill bit or hole saw for the material you are working with, and ensure it is sharp and properly installed. Avoid wearing loose clothing, jewelry, or long hair that could get caught in moving parts.
Maintain a stable stance and good balance while operating the tool. Apply steady, even pressure, and avoid forcing the drill, which can lead to kickback or breakage. If the drill binds or stalls, release the trigger immediately. For deep holes, withdraw the bit periodically to clear chips and allow the bit to cool. Always disconnect the power before changing bits, making adjustments, or performing maintenance. Store tools properly in a dry, secure location when not in use. Regular maintenance and proper handling are crucial for safe operation.
How do you troubleshoot common problems in drilling and holemaking tasks?
Troubleshooting common problems in drilling and holemaking tasks involves a systematic approach to identify and resolve issues that can affect accuracy, tool life, and surface finish. One common problem is drill bit breakage, which can be caused by excessive feed rates, incorrect speeds, insufficient chip evacuation, or workpiece material hardness. To troubleshoot, reduce feed and speed, ensure proper chip evacuation, and use a drill bit appropriate for the material.
Another frequent issue is oversized or undersized holes. This can result from worn drill bits, improper drill point angles, or insufficient rigidity in the machine or workpiece setup. Check the drill bit for wear, ensure the correct point angle, and verify the stability of the setup.
Poor surface finish in holes often indicates issues with cutting parameters, tool wear, or coolant application. Adjusting cutting speeds and feed rates, replacing worn tools, and ensuring an adequate flow of coolant can improve surface quality.
Excessive tool wear can be attributed to incorrect cutting parameters, lack of lubrication, or abrasive workpiece materials. Optimize cutting speeds and feeds, use appropriate cutting fluids, and consider tools with specialized coatings for abrasive materials.
Finally, chip evacuation problems, leading to chip packing and re-cutting, are common. This can be mitigated by adjusting feed rates, using peck drilling cycles, or selecting drill geometries designed for better chip removal. Regular inspection of tools, proper machine maintenance, and adherence to recommended cutting parameters are crucial for efficient and problem-free drilling and holemaking.
