Call +(254) 703 030 000 / 751 483 999 / 721 704 777
.....Read More


Frequently Asked Questions
What is the difference between a hand reamer and a machine reamer?
A hand reamer and a machine reamer are both tools used to finish or slightly enlarge holes to precise dimensions, but they differ in design, application, and operation.
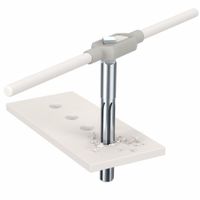
**Hand Reamer:**
- **Design:** Hand reamers typically have a longer taper at the end, which helps in aligning the tool with the hole manually. They often come with a square shank that allows for the use of a wrench or a tap handle.
- **Operation:** These are manually operated, requiring the user to turn the reamer by hand. This allows for greater control and is suitable for delicate or precise work where minimal material removal is needed.
- **Application:** Hand reamers are ideal for small-scale or low-volume tasks, repair work, or when working with softer materials. They are often used in situations where power tools are not available or practical.
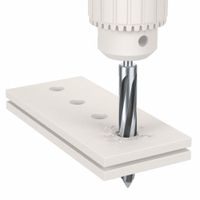
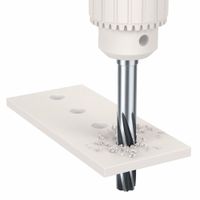
**Machine Reamer:**
- **Design:** Machine reamers have a shorter taper and are designed to be used with powered machinery, such as drill presses, lathes, or milling machines. They usually have a straight or morse taper shank for easy mounting in machine tool holders.
- **Operation:** These reamers are operated by machines, providing consistent speed and pressure, which results in a more uniform finish and faster material removal compared to hand reamers.
- **Application:** Machine reamers are suitable for high-volume production environments and are used for harder materials or when precise, repeatable results are required. They are ideal for industrial applications where efficiency and precision are critical.
In summary, the primary difference lies in their method of operation and application: hand reamers are manually operated for precision and control, while machine reamers are used with machinery for efficiency and consistency in larger-scale operations.
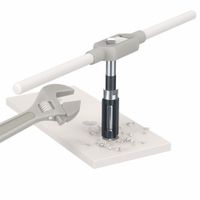
How do you properly use a hand reamer?
To properly use a hand reamer, follow these steps:
1. **Select the Right Reamer**: Choose a hand reamer that matches the size and type of hole you need to finish. Ensure it is suitable for the material you are working with.
2. **Prepare the Workpiece**: Secure the workpiece in a vise or clamp to prevent movement. The hole should be pre-drilled slightly smaller than the reamer's final size.
3. **Lubricate**: Apply a suitable cutting fluid or lubricant to the reamer and the hole to reduce friction and improve the finish.
4. **Align the Reamer**: Insert the reamer into the hole, ensuring it is perfectly aligned with the axis of the hole to avoid tapering or uneven reaming.
5. **Use a Tap Wrench**: Attach a tap wrench to the square end of the reamer for better control and leverage.
6. **Reaming Process**: Turn the reamer clockwise with steady, even pressure. Do not force it; let the tool do the work. Avoid reversing the direction as it can damage the reamer and the hole.
7. **Maintain Consistent Speed**: Keep a consistent speed and pressure to ensure a smooth finish. Slow, steady turns are preferable.
8. **Check Progress**: Periodically remove the reamer to check the hole size and finish. Clean any chips or debris from the reamer and hole.
9. **Finish and Clean**: Once the desired size and finish are achieved, carefully remove the reamer. Clean the hole and reamer of any remaining debris.
10. **Inspect**: Check the hole for accuracy in size and finish. Ensure there are no burrs or irregularities.
By following these steps, you can achieve a precise and smooth finish with a hand reamer.
What materials can be reamed with a bridge reamer?
Bridge reamers are versatile tools used to enlarge or finish holes in various materials. They are particularly effective for aligning and sizing holes in structural applications. The materials that can be reamed with a bridge reamer include:
1. **Mild Steel**: Commonly used in construction and manufacturing, mild steel is easily reamed due to its relatively low hardness.
2. **Stainless Steel**: Although more challenging than mild steel, bridge reamers can handle stainless steel with appropriate cutting speeds and lubrication.
3. **Aluminum**: Known for its softness and malleability, aluminum is easily reamed, making it a frequent choice in aerospace and automotive industries.
4. **Brass**: This material is easily machinable and can be reamed smoothly, often used in plumbing and decorative applications.
5. **Copper**: Similar to brass, copper is soft and can be reamed effectively, commonly used in electrical and plumbing applications.
6. **Cast Iron**: While more brittle, cast iron can be reamed with careful handling and appropriate tool settings.
7. **Plastics**: Various plastics, including PVC and acrylic, can be reamed, though care must be taken to avoid melting or deforming the material.
8. **Wood**: Although not a typical application, wood can be reamed for specific construction or carpentry needs.
Bridge reamers are designed to handle these materials by using high-speed steel or carbide tips, which provide durability and cutting efficiency. Proper lubrication and speed settings are crucial to prevent tool wear and achieve a smooth finish.
How do you adjust an adjustable reamer?
To adjust an adjustable reamer, follow these steps:
1. **Identify the Size Range**: Determine the size range of the reamer to ensure it can be adjusted to the desired diameter.
2. **Loosen the Lock Nut**: Locate the lock nut or screw on the reamer. Use an appropriate wrench or screwdriver to loosen it. This will allow the blades to move freely.
3. **Adjust the Blades**: The reamer consists of several blades that can be expanded or contracted. Use the adjusting nut or screw to move the blades outward or inward. Turn the adjusting nut clockwise to expand the blades and increase the diameter, or counterclockwise to contract the blades and decrease the diameter.
4. **Measure the Diameter**: Use a micrometer or caliper to measure the diameter of the reamer after adjustment. Ensure it matches the required size for your task.
5. **Tighten the Lock Nut**: Once the desired size is achieved, tighten the lock nut or screw to secure the blades in place. This prevents any movement during the reaming process.
6. **Test the Reamer**: Before using it on the actual workpiece, test the reamer on a scrap piece of material to ensure it cuts to the correct size and operates smoothly.
7. **Make Fine Adjustments if Necessary**: If the test cut is not satisfactory, make fine adjustments by repeating the above steps until the desired result is achieved.
8. **Maintenance**: After use, clean the reamer and apply a light coat of oil to prevent rust and ensure smooth operation for future use. Store it in a protective case to avoid damage.
By following these steps, you can accurately adjust an adjustable reamer to the required size for precision machining tasks.
What is the purpose of an expansion reamer?
An expansion reamer is a precision tool used in machining to slightly enlarge and finish the diameter of an existing hole to achieve a precise fit and smooth finish. The primary purpose of an expansion reamer is to allow for minor adjustments in the reaming process to accommodate wear or to achieve a specific size requirement. This is particularly useful in applications where high precision is necessary, such as in the manufacturing of engine components, aerospace parts, and other high-tolerance mechanical assemblies.
The expansion reamer consists of a set of cutting blades that can be adjusted radially outward. This adjustability is achieved through a mechanism, often a screw or wedge, that expands the blades to the desired diameter. This feature allows the reamer to be reused even as it wears down, extending its service life and providing cost efficiency.
Expansion reamers are typically used after a hole has been drilled to a size slightly smaller than the final desired diameter. The reamer is then inserted into the hole and rotated, either manually or with a machine, to shave off small amounts of material, ensuring a smooth and accurate finish. The ability to adjust the reamer's size makes it ideal for achieving precise tolerances and compensating for tool wear over time.
In summary, the purpose of an expansion reamer is to provide a versatile, adjustable tool for achieving precise hole diameters and finishes, extending tool life, and ensuring high-quality results in precision machining applications.
How do you choose the right reamer size for a specific hole?
To choose the right reamer size for a specific hole, follow these steps:
1. **Determine Final Hole Size**: Identify the exact diameter required for the finished hole. This is typically specified in the engineering drawing or design specifications.
2. **Material Consideration**: Consider the material of the workpiece. Different materials may require different reamer types and tolerances due to their hardness and machinability.
3. **Pre-Drilled Hole Size**: The pre-drilled hole should be slightly smaller than the final desired size. Typically, the pre-drilled hole is 0.010 to 0.015 inches (0.25 to 0.38 mm) smaller than the final hole size for standard reaming operations.
4. **Reamer Type**: Choose the appropriate type of reamer based on the hole characteristics and material. Options include hand reamers, machine reamers, chucking reamers, and adjustable reamers.
5. **Tolerance and Fit**: Consider the tolerance and fit required for the hole. For precision applications, select a reamer that provides the necessary tolerance, such as H7 or H8 for metric holes, or a specific class of fit for imperial sizes.
6. **Reamer Material**: Select the reamer material based on the workpiece material. High-speed steel (HSS) is common, but carbide or cobalt reamers may be needed for harder materials.
7. **Reamer Size**: Choose a reamer that matches the final hole size. Reamers are available in standard sizes, but custom sizes can be ordered if necessary.
8. **Lubrication and Speed**: Use appropriate cutting fluids and set the correct spindle speed and feed rate to ensure a smooth finish and prolong tool life.
By considering these factors, you can select the right reamer size to achieve the desired hole dimensions and quality.
What are the maintenance tips for keeping reamers in good condition?
1. **Regular Cleaning**: After each use, clean the reamer thoroughly to remove any metal shavings, debris, or coolant residues. Use a soft brush and appropriate cleaning solutions to prevent corrosion.
2. **Proper Storage**: Store reamers in a dry, clean environment. Use protective cases or sleeves to prevent physical damage and exposure to moisture, which can cause rust.
3. **Lubrication**: Apply a light coat of oil to the reamer before storage to protect against rust. Ensure that the oil used is compatible with the material of the reamer.
4. **Inspection**: Regularly inspect reamers for signs of wear, such as chipping, dullness, or uneven cutting edges. Replace or re-sharpen as necessary to maintain precision.
5. **Sharpening**: Reamers should be sharpened by a professional or using appropriate equipment to maintain the correct geometry and cutting efficiency. Avoid over-sharpening, which can reduce the tool's lifespan.
6. **Proper Handling**: Handle reamers with care to avoid dropping or knocking them against hard surfaces, which can cause damage to the cutting edges.
7. **Correct Usage**: Use reamers at the recommended speeds and feeds to prevent excessive wear. Ensure that the reamer is aligned correctly with the workpiece to avoid bending or breaking.
8. **Coolant Use**: Use appropriate coolants to reduce heat and friction during operation, which can extend the life of the reamer.
9. **Avoid Overloading**: Do not apply excessive force or use the reamer on materials it is not designed for, as this can lead to premature wear or breakage.
10. **Documentation**: Keep a maintenance log to track the usage, sharpening, and any issues encountered with each reamer. This helps in planning maintenance and replacements.