Call +(254) 703 030 000 / 751 483 999 / 721 704 777
- Home
- Machining
- Drilling Holemaking
- Reamers
- Chucking Reamers
.....Read More

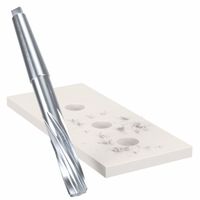
Carbide Chucking Reamers with Morse Taper Shank

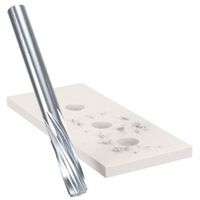
Carbide Chucking Reamers with Straight Shank

Carbide-Tipped Chucking Reamers with Straight Shank

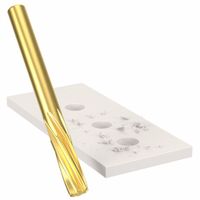
Cobalt Steel Chucking Reamers with Straight Shank

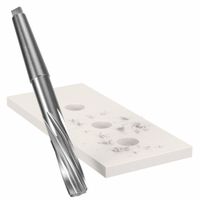
High-Speed Steel Chucking Reamers with Morse Taper Shank

High-Speed Steel Chucking Reamers with Straight Shank
Frequently Asked Questions
What is the purpose of a chucking reamer?
A chucking reamer is a precision tool used in machining to enlarge and finish pre-drilled holes to an exact size with a high degree of accuracy and a smooth finish. Its primary purpose is to ensure that holes have the correct diameter and are perfectly round, which is crucial for applications requiring tight tolerances and precise fits, such as in the assembly of mechanical components.
Chucking reamers are typically used in a machine tool, such as a drill press, lathe, or milling machine, where they are held in a chuck or collet. They are designed to remove a small amount of material, usually between 0.005 to 0.015 inches, from the inside of a hole. This minimal material removal allows for a high-quality surface finish and precise control over the hole's final dimensions.
The tool consists of a cylindrical body with multiple cutting edges along its length. These cutting edges are slightly tapered at the tip to guide the reamer into the hole and then straight along the body to ensure consistent cutting. The flutes between the cutting edges help in removing chips and debris from the hole during the reaming process.
Chucking reamers are available in various sizes and materials, such as high-speed steel or carbide, to suit different materials and applications. They can be straight or spiral-fluted, with spiral flutes being more effective for reaming holes in softer materials or for removing chips more efficiently.
In summary, the purpose of a chucking reamer is to achieve precise hole dimensions and a smooth finish, which are essential for ensuring the proper function and longevity of mechanical assemblies.
How do you use a chucking reamer?
To use a chucking reamer, follow these steps:
1. **Select the Reamer**: Choose the appropriate chucking reamer size for the hole you need to finish. Ensure it matches the desired final diameter.
2. **Prepare the Workpiece**: Secure the workpiece in a vise or fixture to prevent movement during reaming. Ensure the hole to be reamed is pre-drilled slightly undersized.
3. **Set Up the Machine**: Mount the reamer in the machine spindle or drill chuck. Ensure it is properly aligned and securely tightened to prevent wobbling.
4. **Align the Reamer**: Position the reamer so it is perfectly aligned with the pre-drilled hole. Misalignment can cause uneven reaming and damage the tool or workpiece.
5. **Lubricate**: Apply a suitable cutting fluid to the reamer and the hole to reduce friction, improve finish, and extend tool life.
6. **Reaming Process**: Start the machine at a low speed. Feed the reamer into the hole steadily and smoothly. Avoid excessive force to prevent tool breakage or workpiece damage.
7. **Maintain Consistent Speed**: Keep a consistent speed and feed rate throughout the process. Adjust as necessary based on material and reamer specifications.
8. **Complete the Reaming**: Once the reamer has passed through the hole, stop the machine and carefully withdraw the reamer while it is still rotating to avoid leaving marks.
9. **Inspect the Hole**: Check the finished hole for size accuracy and surface finish. Use appropriate measuring tools like calipers or micrometers.
10. **Clean and Store**: Clean the reamer and work area. Store the reamer properly to maintain its sharpness and condition for future use.
What materials can be reamed with a chucking reamer?
Chucking reamers are versatile tools used to finish holes to precise dimensions and improve surface finishes. They can be used on a variety of materials, including:
1. **Metals:**
- **Steel:** Both carbon and alloy steels can be reamed, including stainless steel, though harder steels may require carbide-tipped reamers.
- **Aluminum:** Easily reamed due to its softness, but care must be taken to avoid galling.
- **Brass and Bronze:** These materials ream well, providing smooth finishes.
- **Copper:** Reaming is effective, though lubrication is often necessary to prevent sticking.
- **Cast Iron:** Reaming is possible, but the abrasive nature of cast iron can wear tools quickly.
2. **Plastics:**
- **Acrylics and Polycarbonates:** These can be reamed, but require sharp tools and slower speeds to prevent melting.
- **Nylons and Other Engineering Plastics:** Reamable with appropriate speeds and feeds to avoid deformation.
3. **Composites:**
- **Fiberglass and Carbon Fiber:** Can be reamed, but require specialized reamers to handle the abrasive nature of these materials.
4. **Wood:**
- **Hardwoods and Softwoods:** Reaming is possible, though care must be taken to avoid splintering.
5. **Other Materials:**
- **Rubber and Elastomers:** Special reamers are needed due to the material's flexibility and tendency to deform.
In all cases, the choice of reamer material (high-speed steel, carbide, etc.) and the use of appropriate cutting fluids are crucial to achieving the desired finish and prolonging tool life.
What is the difference between a chucking reamer and a hand reamer?
A chucking reamer and a hand reamer are both tools used to finish holes to precise dimensions, but they differ in design, application, and operation.
Chucking Reamer:
- **Design**: Chucking reamers have a straight or helical flute design and are typically shorter and more robust. They are designed to be used with machine tools.
- **Application**: These reamers are used in machine operations where the reamer is held in a chuck or collet. They are ideal for high-speed, high-precision work.
- **Operation**: Chucking reamers are powered by machines, providing consistent speed and feed rates, which results in a smoother finish and more accurate hole size.
- **Use**: Commonly used in industrial settings for mass production where precision and efficiency are critical.
Hand Reamer:
- **Design**: Hand reamers have a longer, tapered lead and are often equipped with a square end for use with a wrench. They have a more gradual cutting action.
- **Application**: These reamers are designed for manual operation, allowing for more control and adjustment by the user.
- **Operation**: Hand reamers are turned manually, usually with a tap wrench, allowing for careful, controlled reaming. This makes them suitable for finishing holes that are slightly misaligned or require a delicate touch.
- **Use**: Ideal for maintenance, repair, and small-scale production where precision is needed but machine tools are not available or practical.
In summary, chucking reamers are used for machine-driven, high-precision tasks, while hand reamers are suited for manual, controlled operations.
How do you select the right size chucking reamer?
To select the right size chucking reamer, follow these steps:
1. **Determine Hole Size**: Identify the nominal size of the hole you need. This is the final diameter the reamer should achieve.
2. **Material Consideration**: Consider the material of the workpiece. Different materials may require different reamer types (e.g., high-speed steel, carbide) and coatings for optimal performance.
3. **Pre-Drilled Hole Size**: Ensure the pre-drilled hole is slightly smaller than the nominal size. Typically, the pre-drilled hole should be 0.005 to 0.015 inches smaller than the reamer size, depending on the material and tolerance requirements.
4. **Tolerance Requirements**: Determine the tolerance level required for the hole. This will influence the precision and type of reamer needed. For tighter tolerances, a more precise reamer is necessary.
5. **Reamer Type**: Choose between straight-flute, spiral-flute, or helical-flute reamers based on the material and application. Spiral-flute reamers are better for interrupted cuts and softer materials, while straight-flute reamers are suitable for through holes in harder materials.
6. **Reamer Length**: Select the appropriate length based on the depth of the hole. Ensure the reamer can reach the entire depth without excessive overhang, which can cause deflection and inaccuracies.
7. **Machine Compatibility**: Ensure the reamer shank is compatible with the chuck or collet of the machine tool being used.
8. **Lubrication and Speed**: Consider the lubrication and cutting speed required for the material and reamer type to ensure efficient and accurate reaming.
9. **Trial and Adjustment**: If possible, perform a trial reaming on a scrap piece to verify the size and finish before proceeding with the actual workpiece.
By considering these factors, you can select the appropriate chucking reamer size for your specific application.
What are the common sizes of chucking reamers?
Chucking reamers, also known as machine reamers, are precision tools used to enlarge or finish holes to a specific size with high accuracy. They are commonly used in metalworking and machining operations. The common sizes of chucking reamers are typically specified in terms of diameter and can be categorized into several types based on measurement systems:
1. **Fractional Sizes**: These are measured in fractions of an inch, such as 1/8", 1/4", 3/8", 1/2", etc. They are widely used in the United States and other countries that follow the imperial measurement system.
2. **Decimal Sizes**: These are specified in thousandths of an inch, such as 0.1250", 0.2500", 0.3750", 0.5000", etc. Decimal sizes provide more precision and are often used in applications requiring tight tolerances.
3. **Metric Sizes**: These are measured in millimeters, such as 3mm, 6mm, 10mm, 12mm, etc. Metric sizes are commonly used in countries that follow the metric system and are increasingly popular worldwide due to globalization.
4. **Numbered Sizes**: These are designated by numbers, such as #1, #2, #3, etc., with each number corresponding to a specific diameter. Numbered sizes are less common but still used in certain applications.
5. **Letter Sizes**: These are designated by letters, such as A, B, C, D, etc., with each letter corresponding to a specific diameter. Letter sizes are also less common but used in specific contexts.
Chucking reamers are available in a wide range of sizes to accommodate various hole diameters and are selected based on the specific requirements of the machining task.
How do you maintain and care for a chucking reamer?
To maintain and care for a chucking reamer, follow these steps:
1. **Cleaning**: After each use, clean the reamer thoroughly to remove metal shavings and debris. Use a soft brush or compressed air to clean the flutes and cutting edges.
2. **Lubrication**: Apply a light coat of oil to the reamer to prevent rust and corrosion. Ensure the oil is suitable for metal tools and does not leave a sticky residue.
3. **Storage**: Store the reamer in a dry, cool place. Use protective sleeves or cases to prevent damage to the cutting edges. Avoid storing in humid environments to prevent rust.
4. **Inspection**: Regularly inspect the reamer for signs of wear, such as dull edges or chips. Check for any bending or warping that could affect performance.
5. **Sharpening**: If the reamer becomes dull, have it professionally sharpened. Avoid attempting to sharpen it yourself unless you have the proper tools and expertise, as improper sharpening can damage the tool.
6. **Handling**: Handle the reamer with care to avoid dropping or knocking it against hard surfaces, which can damage the cutting edges.
7. **Usage**: Use the reamer at the correct speed and feed rate to prevent overheating and excessive wear. Ensure the workpiece is securely clamped to avoid chatter and uneven reaming.
8. **Coolant**: Use appropriate cutting fluids or coolants during operation to reduce heat and friction, extending the life of the reamer.
9. **Compatibility**: Ensure the reamer is suitable for the material being worked on. Using the wrong type of reamer can lead to premature wear or damage.
By following these steps, you can extend the life of your chucking reamer and maintain its performance.