Call +(254) 703 030 000 / 751 483 999 / 721 704 777
.....Read More
Frequently Asked Questions
What is a countersink used for?
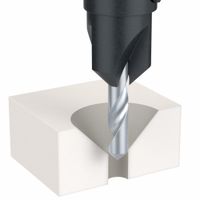
A countersink is a conical hole cut into a manufactured object, or the cutter used to cut such a hole. Its primary purpose is to allow the head of a countersunk screw or bolt to sit flush with or below the surface of the surrounding material. This is particularly important in applications where a smooth surface is desired, such as in woodworking, metalworking, and construction, to prevent snagging or to improve the aesthetic appearance of the finished product.
Countersinks are also used to remove burrs left from drilling or machining operations, which can help in reducing stress concentrations and improving the fatigue life of the component. Additionally, they can be used to create a chamfer on the edge of a hole, which can assist in guiding screws or bolts into the hole more easily.
In woodworking, countersinking is often used to ensure that screws do not split the wood or protrude above the surface, which could interfere with the finish or the function of the piece. In metalworking, countersinks are used to prepare holes for flat-head screws, which are commonly used in applications where a smooth surface is necessary, such as in aerospace or automotive industries.
Countersinks come in various sizes and angles, with the most common being 82 degrees for screws in the United States and 90 degrees for metric screws. They can be used with hand tools or power tools, and are available in different materials, such as high-speed steel or carbide, to suit different materials and applications.
How do you choose the right countersink size?
To choose the right countersink size, follow these steps:
1. **Identify Screw Size**: Determine the size of the screw or fastener you are using. This includes the diameter and the head type (flat, oval, etc.).
2. **Head Diameter**: Measure the diameter of the screw head. The countersink should match or slightly exceed this diameter to ensure the screw sits flush or slightly below the surface.
3. **Countersink Angle**: Match the countersink angle to the screw head angle. Common angles are 82°, 90°, and 100°. Most flat head screws use an 82° angle, but verify with the screw specifications.
4. **Material Consideration**: Consider the material you are working with. Softer materials like wood may require a different approach than harder materials like metal. Ensure the countersink bit is suitable for the material to avoid damage or poor results.
5. **Pilot Hole**: Drill a pilot hole before countersinking. The pilot hole should be slightly smaller than the screw's minor diameter to ensure proper threading and grip.
6. **Test Fit**: Before finalizing, test the countersink on a scrap piece of the same material. Insert the screw to check if it sits flush or to the desired depth.
7. **Adjust Depth**: If necessary, adjust the countersink depth. Some countersink bits come with adjustable stops to control depth precisely.
8. **Tool Compatibility**: Ensure the countersink bit is compatible with your drill or countersink tool. Check the shank size and type.
By following these steps, you can select the appropriate countersink size to ensure a clean, professional finish for your project.
What is the difference between a countersink and a counterbore?
A countersink and a counterbore are both types of holes used in woodworking and metalworking to allow fasteners to sit flush with or below the surface of a material, but they differ in shape and purpose.
A countersink is a conical hole cut into a material, typically to allow the head of a countersunk screw or bolt to sit flush with or below the surface. The angle of the countersink is usually 82 or 90 degrees, matching the angle of the screw head. Countersinks are used to prevent the screw head from protruding, providing a smooth finish and reducing the risk of snagging or catching on the screw head.
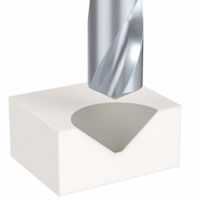
A counterbore, on the other hand, is a cylindrical flat-bottomed hole that enlarges another hole, allowing the head of a bolt or screw to sit flush with or below the surface. Counterbores are typically used for socket head cap screws or bolts with a flat underside. The counterbore allows for a larger diameter head to be recessed into the material, providing a clean and even surface. The depth of the counterbore is determined by the height of the screw or bolt head.
In summary, the main difference lies in their shapes and applications: countersinks are conical and used for screws with conical heads, while counterbores are cylindrical and used for screws or bolts with flat-bottomed heads.
How do you use a countersink drill bit?
To use a countersink drill bit, follow these steps:
1. **Select the Right Countersink Bit**: Choose a countersink bit that matches the size of the screw head you plan to use. Ensure it is compatible with the material you are working with, such as wood, metal, or plastic.
2. **Prepare the Drill**: Insert the countersink bit into the drill chuck and tighten it securely. Ensure the drill is set to the appropriate speed for the material.
3. **Mark the Drilling Spot**: Use a pencil or marker to indicate where you want to drill. If necessary, use a center punch to create a small indentation to prevent the bit from wandering.
4. **Drill the Pilot Hole**: If the countersink bit does not include a pilot drill, use a separate drill bit to create a pilot hole. The pilot hole should be slightly smaller than the screw's diameter.
5. **Position the Drill**: Align the countersink bit with the pilot hole. Hold the drill perpendicular to the surface to ensure an even countersink.
6. **Drill the Countersink**: Gently squeeze the drill trigger and apply steady pressure. Drill until the countersink is deep enough to allow the screw head to sit flush or slightly below the surface.
7. **Check the Fit**: Insert the screw into the hole to ensure it sits correctly. If necessary, adjust the depth by drilling slightly more.
8. **Clean the Area**: Remove any debris or burrs from the hole to ensure a clean finish.
9. **Install the Screw**: Once satisfied with the countersink, proceed to install the screw.
10. **Finish the Surface**: If needed, sand or finish the surface to achieve a smooth appearance.
By following these steps, you can effectively use a countersink drill bit to create clean, professional-looking holes for screws.
What materials can be countersunk?
Countersinking can be performed on a variety of materials, including:
1. **Metals**:
- **Steel**: Commonly countersunk for applications requiring flush fasteners.
- **Aluminum**: Easily countersunk due to its softness and is widely used in aerospace and automotive industries.
- **Brass**: Often used in decorative applications where countersinking is needed.
- **Copper**: Can be countersunk for electrical applications.
- **Stainless Steel**: Requires more effort due to its hardness but is frequently countersunk in construction and kitchenware.
2. **Wood**:
- **Hardwoods**: Such as oak, maple, and cherry, are often countersunk in furniture making.
- **Softwoods**: Like pine and cedar, are easily countersunk for general carpentry.
- **Plywood and MDF**: Used in cabinetry and can be countersunk for a smooth finish.
3. **Plastics**:
- **Acrylic**: Used in displays and signage, can be countersunk for aesthetic purposes.
- **Polycarbonate**: Often countersunk in protective gear and equipment.
- **PVC**: Common in plumbing and can be countersunk for secure fittings.
4. **Composites**:
- **Fiberglass**: Used in marine and automotive industries, can be countersunk for flush mounting.
- **Carbon Fiber**: Requires precision countersinking in aerospace and high-performance applications.
5. **Ceramics and Glass**:
- Though more challenging, specialized tools can countersink ceramics and glass for applications like tile installations and decorative glasswork.
6. **Concrete and Masonry**:
- With appropriate tools, countersinking is possible for anchoring systems in construction.
Each material requires specific tools and techniques to achieve a clean and precise countersink, considering factors like hardness, brittleness, and thickness.
How do you prevent tear-out when countersinking?
To prevent tear-out when countersinking, follow these steps:
1. **Use Sharp Tools**: Ensure that the countersink bit is sharp. Dull bits can cause tearing and chipping.
2. **Pre-drill a Pilot Hole**: Drill a pilot hole slightly smaller than the screw's diameter. This guides the countersink bit and reduces stress on the material.
3. **Select the Right Countersink Bit**: Use a countersink bit that matches the screw size and material type. For wood, a fluted countersink bit is effective.
4. **Clamp the Workpiece**: Secure the workpiece with clamps to prevent movement, which can cause tear-out.
5. **Use Backing Material**: Place a sacrificial piece of wood or backing material behind the workpiece. This supports the fibers and minimizes tear-out.
6. **Adjust Drill Speed**: Use a moderate drill speed. Too fast can cause overheating and tearing, while too slow can lead to chipping.
7. **Control Drill Pressure**: Apply consistent, gentle pressure. Excessive force can cause the bit to grab and tear the material.
8. **Countersink Depth**: Set the countersink depth correctly. Over-countersinking can weaken the material and increase the risk of tear-out.
9. **Use a Drill Press**: If possible, use a drill press for more control and precision, reducing the likelihood of tear-out.
10. **Test on Scrap Material**: Before working on the final piece, test the countersink on scrap material to ensure settings and techniques are correct.
11. **Consider Material Type**: Different materials require different approaches. For example, hardwoods may need slower speeds and more gradual pressure.
By following these techniques, you can effectively minimize tear-out when countersinking, ensuring a clean and professional finish.
What is the best angle for a countersink?
The best angle for a countersink is typically 82 degrees in the United States, as it matches the standard angle for flathead screws used in many applications. In Europe, a 90-degree angle is more common due to different standards. The choice of angle depends on the specific application and the type of screw being used. For general purposes, 82 degrees is widely accepted in the U.S., while 90 degrees is preferred in Europe.