.....Read More

Frequently Asked Questions

What are the benefits of using welding tables in welding operations?

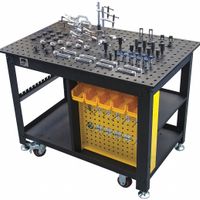
Welding tables offer numerous benefits that enhance the efficiency, precision, and safety of welding operations. Firstly, they provide a stable and flat surface, which is crucial for maintaining the accuracy of welds. This stability helps in aligning and securing workpieces, reducing the risk of errors and rework. Secondly, welding tables often come with a grid pattern or holes that allow for easy clamping and fixturing. This feature enables welders to hold workpieces securely in place, facilitating complex assemblies and ensuring consistent results. The ability to use clamps and fixtures also speeds up the setup process, increasing productivity. Additionally, welding tables are typically made from durable materials like steel, which can withstand high temperatures and resist warping. This durability ensures a long lifespan and reliable performance under the demanding conditions of welding operations. Welding tables also contribute to safety by providing a designated workspace that helps organize tools and materials, reducing clutter and the risk of accidents. Many tables are designed with features like adjustable heights and tilting surfaces, which can improve ergonomics and reduce strain on welders, further enhancing safety and comfort. Moreover, the versatility of welding tables allows them to be used for various welding techniques and projects, from small repairs to large-scale fabrications. This adaptability makes them a valuable investment for both small workshops and large industrial settings. In summary, welding tables improve the precision, efficiency, and safety of welding operations by providing a stable, durable, and versatile workspace that facilitates accurate alignment, secure clamping, and organized tool management.

How do welding magnets improve the accuracy of fixtures compared to clamps?

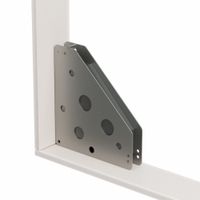
Welding magnets improve the accuracy of fixtures compared to clamps by providing a more flexible, efficient, and precise method of holding metal pieces in place during welding. Unlike clamps, which require manual adjustment and can shift during the welding process, magnets offer a stable and consistent hold. This stability is crucial for maintaining the alignment and angle of the workpieces, ensuring that the final weld is accurate and meets design specifications. Magnets can hold workpieces at various angles, including 45, 90, and 135 degrees, without the need for additional tools or adjustments. This versatility allows for quick setup and repositioning, reducing downtime and increasing productivity. The magnetic force is evenly distributed across the contact surface, minimizing the risk of distortion or movement during welding. Furthermore, welding magnets are less intrusive than clamps, which can obstruct the welder's access to the joint area. This unobstructed access allows for more precise welds and reduces the likelihood of errors. Magnets also eliminate the need for multiple clamps, simplifying the setup and reducing the potential for misalignment caused by uneven clamping pressure. In addition, welding magnets are particularly beneficial for complex or irregularly shaped workpieces, where traditional clamps may struggle to provide adequate hold. The ability to quickly and easily adjust the position of the magnets enhances the accuracy of the fixture, ensuring that all parts are correctly aligned before welding begins. Overall, welding magnets offer a more efficient and precise method for securing workpieces, leading to improved accuracy in the final welds compared to traditional clamps.

What tools are essential for pipe welding layout and preparation?

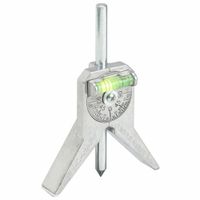
Essential tools for pipe welding layout and preparation include: 1. **Measuring Tools**: - **Tape Measure**: For accurate measurement of pipe lengths and diameters. - **Calipers**: For precise measurement of pipe thickness and diameter. 2. **Marking Tools**: - **Soapstone**: For marking on metal surfaces, visible even under high heat. - **Center Punch**: To create indentations for drilling or cutting. 3. **Cutting Tools**: - **Pipe Cutter**: For clean, straight cuts on pipes. - **Oxy-Acetylene Torch**: For cutting thicker pipes or making bevels. - **Plasma Cutter**: For fast, precise cuts on various metals. 4. **Alignment Tools**: - **Pipe Clamps**: To hold pipes in place during welding. - **Level**: To ensure pipes are aligned correctly. - **Flange Aligners**: For aligning flanges accurately. 5. **Beveling Tools**: - **Beveling Machine**: For creating beveled edges on pipes for better weld penetration. - **Grinder**: For smoothing and preparing edges. 6. **Cleaning Tools**: - **Wire Brush**: For cleaning surfaces before welding. - **Solvent Cleaner**: To remove oil and grease. 7. **Layout Tools**: - **Pipe Wraps**: Flexible rulers for marking straight lines around pipes. - **Angle Finder**: For determining and marking angles. 8. **Safety Equipment**: - **Welding Helmet**: For eye protection. - **Gloves and Apron**: For hand and body protection. - **Fire Extinguisher**: For safety in case of fire. These tools ensure precision, safety, and efficiency in pipe welding layout and preparation.

How do rotary welding positioners enhance weld quality and reduce fatigue?

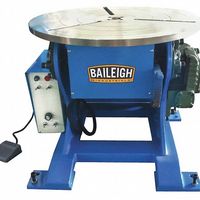
Rotary welding positioners enhance weld quality and reduce fatigue by providing precise control over the workpiece's orientation, allowing for optimal welding angles and positions. This control ensures consistent weld penetration and bead appearance, reducing the likelihood of defects such as porosity or incomplete fusion. By maintaining a stable and consistent position, rotary positioners minimize the need for manual adjustments, which can introduce errors and inconsistencies. The ability to rotate the workpiece smoothly allows welders to maintain a comfortable and ergonomic posture, significantly reducing physical strain and fatigue. This is particularly beneficial for complex or large-scale projects where manual handling would be cumbersome and tiring. By reducing fatigue, welders can maintain focus and precision over longer periods, further enhancing the quality of the welds. Additionally, rotary welding positioners can be programmed for automated or semi-automated operations, ensuring repeatability and uniformity across multiple welds. This automation reduces the reliance on manual skill, which can vary between operators, and ensures that each weld meets the same high standards. Overall, rotary welding positioners contribute to improved weld quality by providing a controlled environment that minimizes human error and physical strain, leading to more consistent and reliable welds.

What is the purpose of welding markers in welding operations?

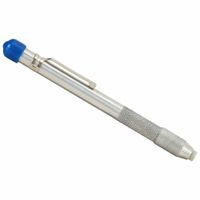
Welding markers serve several critical purposes in welding operations: 1. **Precision and Accuracy**: Welding markers are used to make precise markings on metal surfaces, ensuring that welds are placed accurately according to design specifications. This precision is crucial for maintaining the structural integrity and functionality of the welded components. 2. **Layout and Planning**: Before welding begins, markers are used to lay out the welding path and plan the sequence of operations. This helps in visualizing the work, organizing the workflow, and preventing errors during the welding process. 3. **Quality Control**: Markers help in identifying areas that require inspection or rework. By marking defects or areas of concern, welders and inspectors can easily locate and address issues, ensuring the quality of the welds. 4. **Communication**: In a team environment, markers facilitate communication among welders, engineers, and inspectors. They can be used to convey instructions, such as where to start or stop a weld, or to indicate specific welding techniques to be used. 5. **Traceability**: Markings can include information such as part numbers, welder identification, or date of welding, which aids in traceability and documentation. This is particularly important in industries where compliance with standards and regulations is mandatory. 6. **Safety**: By clearly marking hazardous areas or components that should not be welded, markers contribute to a safer working environment. They help prevent accidents and ensure that safety protocols are followed. 7. **Efficiency**: By reducing the likelihood of errors and rework, welding markers contribute to more efficient operations. They help in minimizing downtime and material wastage, leading to cost savings and improved productivity. Overall, welding markers are essential tools that enhance the precision, quality, and efficiency of welding operations.

How do electrochemical marking and etching tools work on metal surfaces?

Electrochemical marking and etching tools work on metal surfaces by using an electrochemical process that involves the transfer of ions to create a permanent mark or etch. This process typically involves three main components: an electrolyte solution, a stencil, and an electrical current. 1. **Preparation**: The metal surface is cleaned to remove any contaminants that might interfere with the process. A stencil, which contains the design or text to be marked, is placed on the metal surface. This stencil is usually made from a non-conductive material to ensure that only the exposed areas of the metal are affected. 2. **Electrolyte Application**: An electrolyte solution, which is a conductive liquid containing ions, is applied to the area of the metal surface that is exposed through the stencil. The electrolyte facilitates the flow of electrical current and the transfer of ions between the metal and the marking tool. 3. **Electrical Current**: An electrical current is applied using a marking tool, which typically consists of a conductive pad or stylus connected to a power source. The current flows through the electrolyte and the exposed metal surface, causing a controlled electrochemical reaction. 4. **Marking/Etching Process**: Depending on the polarity of the current and the type of electrolyte used, the process can either remove material from the metal surface (etching) or deposit material onto it (marking). In etching, the metal ions are oxidized and dissolved into the electrolyte, creating a recessed mark. In marking, a dark oxide layer forms on the surface, creating a visible mark without significant material removal. 5. **Finalization**: After the process, the stencil is removed, and the metal surface is cleaned to remove any residual electrolyte. The result is a permanent mark or etch that is resistant to wear and corrosion. This method is widely used for its precision, speed, and ability to mark complex designs on various metal types without causing significant damage to the material.

What is the role of antispatter in welding, and how is it applied?

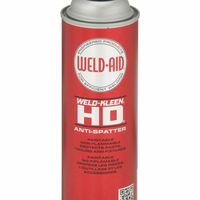
Antispatter plays a crucial role in welding by preventing the adhesion of spatter to workpieces, tools, and equipment. During welding, especially in processes like MIG and flux-cored arc welding, molten metal droplets can be ejected from the weld pool, creating spatter. This spatter can adhere to surfaces, leading to defects, poor aesthetics, and increased cleanup time. Antispatter solutions are designed to mitigate these issues. Antispatter can be applied in various forms, including sprays, gels, and liquids. These products create a protective barrier on surfaces, preventing spatter from sticking. The application process typically involves the following steps: 1. **Surface Preparation**: Clean the surfaces to remove any dirt, oil, or previous residues that might interfere with the antispatter's effectiveness. 2. **Application**: Apply the antispatter product evenly on the areas prone to spatter adhesion, such as the workpiece, welding nozzle, and fixtures. Sprays are commonly used for their ease of application and ability to cover large areas quickly. Gels and liquids can be applied with brushes or cloths for more controlled application. 3. **Welding**: Proceed with the welding process. The antispatter coating will prevent spatter from adhering to the treated surfaces. 4. **Post-Welding Cleanup**: After welding, any spatter that lands on the treated surfaces can be easily wiped or brushed off, reducing cleanup time and effort. Antispatter not only improves the quality and appearance of the weld but also extends the life of welding equipment by preventing spatter buildup. It is an essential tool for welders aiming for efficiency and high-quality results.

How does weld-through primer contribute to rust and corrosion resistance?

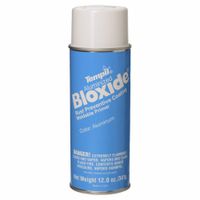
Weld-through primer is a specialized coating applied to metal surfaces before welding to enhance rust and corrosion resistance. It primarily contains zinc, which acts as a sacrificial anode. When the metal is exposed to moisture or corrosive environments, the zinc corrodes preferentially, protecting the underlying metal from rust. This process is known as galvanic protection. The primer is designed to withstand the heat of welding, maintaining its protective properties even after the welding process. It forms a thin, durable layer that adheres well to the metal surface, providing a barrier against moisture and oxygen, which are primary contributors to corrosion. This barrier effect is crucial in preventing rust formation, especially in areas that are difficult to access for post-weld coatings. Additionally, weld-through primers facilitate better weld quality by minimizing contamination at the weld site. They are engineered to burn off cleanly during welding, reducing the risk of porosity and other weld defects that could compromise the integrity of the joint and lead to corrosion. In summary, weld-through primer contributes to rust and corrosion resistance by providing galvanic protection, forming a protective barrier, and ensuring clean welds, all of which help maintain the longevity and structural integrity of metal assemblies.

What are the best practices for using weld fixturing tools to speed up work?

1. **Design for Flexibility**: Use modular fixturing systems that can be easily adjusted or reconfigured for different projects. This reduces setup time and allows for quick changes. 2. **Precision and Accuracy**: Ensure that fixtures are designed and built with high precision to maintain consistent quality and reduce rework. Use CNC machining for creating accurate fixture components. 3. **Quick-Release Mechanisms**: Incorporate quick-release clamps and fasteners to minimize the time spent on securing and releasing workpieces. 4. **Ergonomic Design**: Design fixtures to be user-friendly and ergonomic to reduce operator fatigue and increase productivity. 5. **Standardization**: Use standardized components and systems to simplify the fixturing process and reduce the need for custom solutions. 6. **Material Selection**: Choose durable materials for fixtures that can withstand the welding environment, such as heat-resistant alloys, to ensure longevity and reduce maintenance. 7. **Integration with Automation**: Design fixtures that can be easily integrated with robotic welding systems to enhance speed and consistency. 8. **Regular Maintenance**: Implement a routine maintenance schedule to ensure fixtures remain in optimal condition, preventing downtime due to equipment failure. 9. **Training and Documentation**: Provide comprehensive training for operators on the use of fixturing tools and maintain detailed documentation for setup and operation procedures. 10. **Lean Manufacturing Principles**: Apply lean principles to eliminate waste in the fixturing process, such as reducing unnecessary movements and optimizing workflow. 11. **Feedback Loop**: Establish a feedback system for operators to report issues and suggest improvements, ensuring continuous enhancement of fixturing practices.

How can marking and preparation tools improve overall weld quality?

Marking and preparation tools are essential in enhancing weld quality by ensuring precision, consistency, and efficiency in the welding process. Accurate marking tools, such as chalk, markers, or laser guides, help in delineating exact weld paths and joint locations, reducing errors and misalignments. This precision ensures that welds are placed correctly, minimizing the risk of defects and rework. Preparation tools, including grinders, cutters, and beveling machines, play a crucial role in preparing the metal surfaces for welding. Proper surface preparation is vital for achieving strong welds. These tools remove contaminants like rust, paint, and oil, which can lead to poor weld penetration and weak joints. By ensuring clean and smooth surfaces, preparation tools enhance the weld's structural integrity and appearance. Moreover, beveling tools create the appropriate edge geometry, which is critical for achieving full penetration and strong welds, especially in thicker materials. The correct bevel angle and root face ensure optimal weld pool formation and fusion between the base metals. Consistent use of these tools also contributes to improved safety and efficiency. By reducing the likelihood of defects and rework, they help in maintaining a steady workflow, saving time and resources. Additionally, they enable welders to work more safely by minimizing the need for corrective measures that can introduce hazards. In summary, marking and preparation tools are indispensable in the welding process, as they ensure precision, enhance surface conditions, and contribute to the overall quality and strength of the welds. Their use leads to fewer defects, improved safety, and greater efficiency, ultimately resulting in superior weld quality.