Call +(254) 703 030 000 / 751 483 999 / 721 704 777
.....Read More
Frequently Asked Questions
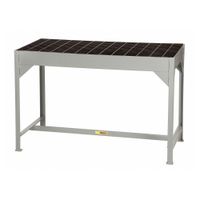
What is the best material for a welding table?
The best material for a welding table is typically steel, specifically mild steel. Mild steel is favored due to its durability, strength, and ability to withstand high temperatures without warping or melting, which is crucial during welding processes. It provides a stable and robust surface that can handle the weight of heavy metal pieces and the impact of hammering or clamping.
Mild steel is also relatively affordable and widely available, making it a cost-effective choice for both professional and hobbyist welders. Its magnetic properties are beneficial for holding magnetic clamps and fixtures, which are often used to secure workpieces during welding.
The surface of a steel welding table can be easily cleaned and maintained, ensuring a long lifespan. It can also be ground flat to provide a perfectly level working surface, which is essential for precision welding tasks.
While stainless steel is another option, it is generally more expensive and not necessary unless specific corrosion resistance is required. Aluminum is not recommended due to its lower melting point and potential to warp under high heat.
In summary, mild steel is the best material for a welding table due to its strength, heat resistance, affordability, and ease of maintenance, making it suitable for a wide range of welding applications.
How thick should a welding table be?
A welding table should typically be between 3/8 inch (approximately 9.5 mm) and 1 inch (approximately 25.4 mm) thick. The ideal thickness depends on several factors, including the type of welding work, the weight of the materials being welded, and the frequency of use.
For light to medium-duty welding tasks, a table thickness of 3/8 inch to 1/2 inch (approximately 12.7 mm) is generally sufficient. This thickness provides a stable surface for most hobbyist and small-scale professional projects, offering a good balance between durability and cost.
For heavy-duty welding tasks or industrial applications, a thicker table, ranging from 3/4 inch to 1 inch, is recommended. This thickness can support heavier materials and withstand the intense heat and stress associated with large-scale welding operations. A thicker table also minimizes warping and provides a more robust surface for clamping and securing workpieces.
In addition to thickness, the material of the table is crucial. Steel is the most common choice due to its strength, durability, and ability to withstand high temperatures. A flat, smooth surface is essential to ensure precision and accuracy in welding projects.
Ultimately, the choice of thickness should align with the specific needs of the welding tasks, considering factors such as the size and weight of the materials, the type of welding processes used, and the overall budget.
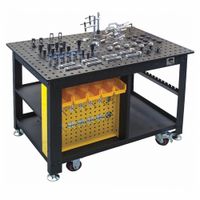
What are the benefits of a modular welding table?
A modular welding table offers several benefits that enhance efficiency, precision, and versatility in welding tasks:
1. **Flexibility and Customization**: Modular welding tables consist of interchangeable parts and accessories, allowing users to customize the table to fit specific project requirements. This adaptability makes it suitable for a wide range of welding tasks, from small-scale projects to large industrial applications.
2. **Precision and Accuracy**: These tables often come with a grid pattern and precise measurement markings, enabling welders to achieve high levels of accuracy. The modular design allows for easy alignment and clamping of workpieces, ensuring consistent and precise welds.
3. **Enhanced Productivity**: The ability to quickly reconfigure the table for different projects reduces setup time and increases productivity. Welders can efficiently switch between tasks without the need for multiple tables or extensive adjustments.
4. **Durability and Stability**: Made from high-quality materials like steel or cast iron, modular welding tables provide a stable and durable work surface that can withstand heavy loads and high temperatures, ensuring long-term reliability.
5. **Improved Safety**: The stability and secure clamping options reduce the risk of workpiece movement during welding, minimizing the chance of accidents. Additionally, the modular design allows for ergonomic adjustments, promoting a safer working environment.
6. **Cost-Effectiveness**: While the initial investment may be higher, the long-term benefits of reduced setup time, increased efficiency, and the ability to handle diverse projects make modular welding tables a cost-effective solution.
7. **Space Efficiency**: The modular nature allows for easy disassembly and storage, making it ideal for workshops with limited space. Components can be added or removed as needed, optimizing the workspace.
Overall, modular welding tables provide a versatile, efficient, and precise solution for welding professionals, enhancing both the quality and speed of their work.
How do you ground a welding table?
To ground a welding table, follow these steps:
1. **Select a Grounding Rod**: Use a copper or galvanized steel grounding rod, typically 8 to 10 feet long, to ensure effective grounding.
2. **Choose a Location**: Find a suitable spot near the welding table to drive the grounding rod into the earth. Ensure the location is free from underground utilities.
3. **Drive the Grounding Rod**: Use a sledgehammer or a post driver to drive the grounding rod into the ground. Leave about 6 inches above the ground for connection purposes.
4. **Attach Grounding Wire**: Use a heavy-gauge copper wire, typically 6 AWG or thicker, to connect the grounding rod to the welding table. The wire should be long enough to reach from the rod to the table without tension.
5. **Secure the Connection**: Use a grounding clamp to attach the wire to the grounding rod. Ensure the connection is tight and secure to maintain a good electrical path.
6. **Connect to the Welding Table**: Attach the other end of the grounding wire to the welding table. Use a bolt or a dedicated grounding lug on the table to ensure a solid connection.
7. **Check Connections**: Inspect all connections to ensure they are tight and free from corrosion. A loose or corroded connection can compromise the grounding effectiveness.
8. **Test the Ground**: Use a multimeter to test the resistance between the table and the ground. A reading of 25 ohms or less is generally considered effective for grounding.
9. **Regular Maintenance**: Periodically check the grounding system for wear, corrosion, or damage, and ensure all connections remain secure.
By following these steps, you ensure the welding table is properly grounded, enhancing safety by reducing the risk of electrical shock.
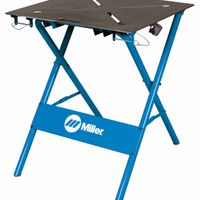
What is the difference between a portable and a mobile welding table?
A portable welding table and a mobile welding table are both designed to provide a stable surface for welding tasks, but they differ primarily in terms of mobility and design features.
A portable welding table is designed for easy transport and setup. It is typically lightweight and may have foldable legs or a collapsible design, allowing it to be carried and stored with minimal effort. These tables are ideal for welders who need to move their workspace frequently or work in various locations. The focus is on ease of transport and quick assembly, making them suitable for on-site jobs or small workshops with limited space.
In contrast, a mobile welding table is designed to be moved around a workshop or job site but is generally more robust and heavier than a portable table. It often features wheels or casters, allowing it to be rolled to different locations within a workspace. Mobile tables are typically equipped with additional features such as tool storage, clamps, and adjustable surfaces, providing a more versatile and stable work environment. They are ideal for larger workshops where the table needs to be repositioned frequently but not necessarily transported over long distances.
In summary, the key difference lies in their intended use and mobility: portable welding tables prioritize lightweight and easy transport for varied locations, while mobile welding tables focus on in-shop mobility with added features for a more comprehensive work setup.
How do you maintain a welding table?
To maintain a welding table, follow these steps:
1. **Regular Cleaning**: After each use, clean the table to remove metal debris, slag, and dust. Use a wire brush or scraper for stubborn residues and a vacuum for fine particles.
2. **Surface Protection**: Apply a light coat of anti-spatter spray or a thin layer of oil to prevent rust and spatter adhesion. Wipe off excess oil to avoid contamination of welds.
3. **Rust Prevention**: Regularly inspect for rust. If rust appears, use a wire brush or sandpaper to remove it, then reapply protective coatings.
4. **Flatness Check**: Periodically check the table for warping or unevenness. Use a straightedge or level to ensure the surface remains flat, which is crucial for accurate welding.
5. **Fixture Maintenance**: Inspect clamps, vices, and other fixtures for wear and tear. Lubricate moving parts and replace any damaged components to ensure they function correctly.
6. **Legs and Frame Inspection**: Check the stability of the table by inspecting the legs and frame for any signs of damage or looseness. Tighten bolts and repair any structural issues.
7. **Storage**: Store the table in a dry, covered area to protect it from moisture and environmental elements that can cause rust and corrosion.
8. **Tool Organization**: Keep tools and accessories organized and stored properly to prevent clutter and potential damage to the table surface.
9. **Safety Checks**: Regularly inspect for sharp edges or burrs that could cause injury. Smooth out any rough areas with a file or grinder.
10. **Documentation**: Keep a maintenance log to track cleaning, repairs, and inspections, ensuring consistent upkeep and identifying recurring issues.
What size welding table do I need?
The size of the welding table you need depends on several factors, including the type of projects you plan to undertake, the space available in your workshop, and your budget. Here are some considerations to help you determine the appropriate size:
1. **Project Size and Type**: Consider the dimensions of the materials you typically work with. For small projects or hobbyist work, a table size of 2x3 feet might suffice. For larger projects, such as fabricating frames or working on automotive parts, a table size of 4x8 feet or larger may be necessary.
2. **Workspace Size**: Measure the available space in your workshop. Ensure there is enough room to move around the table comfortably and accommodate any additional equipment or tools. A table that is too large for your space can hinder movement and workflow.
3. **Portability**: If you need to move the table frequently, consider a smaller, more portable option. Some tables come with wheels or are foldable, making them easier to transport and store.
4. **Budget**: Larger tables with more features, such as adjustable height or built-in clamps, tend to be more expensive. Determine your budget and balance it with your needs.
5. **Future Needs**: Consider potential future projects. If you anticipate working on larger projects, it might be wise to invest in a larger table now to avoid the need for an upgrade later.
6. **Ergonomics**: Ensure the table height is comfortable for you to work at, reducing strain and fatigue during long projects.
Ultimately, the right size welding table is one that fits your specific needs, allowing you to work efficiently and safely on your projects.