Call +(254) 703 030 000 / 751 483 999 / 721 704 777
.....Read More
Frequently Asked Questions
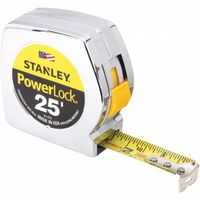
What is the best tape measure for construction?
The best tape measure for construction is the Stanley FatMax 25-Foot Tape Measure. This tape measure is renowned for its durability, accuracy, and user-friendly features, making it a favorite among professionals in the construction industry.
The Stanley FatMax is constructed with a high-impact ABS case and a top-grade rubber over-mold, providing excellent protection against drops and rough handling on job sites. Its blade is coated with Mylar polyester film, which significantly enhances its durability and extends its lifespan by resisting wear and tear.
One of the standout features of the Stanley FatMax is its 11-foot standout, which allows for extended reach and ease of measurement without the tape bending or collapsing. This is particularly useful for measuring long distances or when working alone. The tape also features a Tru-Zero hook that moves to compensate for accurate inside and outside measurements, ensuring precision in every task.
The blade is marked with large, easy-to-read numbers, and the fractional readouts simplify the process of taking measurements. Additionally, the tape measure includes a top-forward blade lock that holds the tape securely in place, preventing it from retracting unexpectedly.
The Stanley FatMax is also equipped with a belt clip for convenient carrying and accessibility, making it easy to keep on hand during projects. Its combination of robust construction, practical features, and reliable performance makes it the best choice for construction professionals seeking a dependable tape measure.
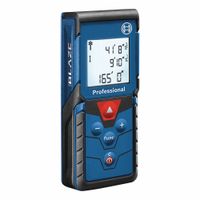
How do laser distance meters work?
Laser distance meters work by using a laser beam to measure the distance between the device and a target object. The process involves several key steps:
1. **Emission of Laser Beam**: The device emits a laser beam towards the target. This beam is typically in the form of a narrow, focused light, often in the infrared spectrum, which is invisible to the naked eye.
2. **Reflection of Laser Beam**: The laser beam travels to the target and reflects off its surface. The nature of the surface can affect the quality of the reflection, with smooth, light-colored surfaces providing better results.
3. **Detection of Reflected Beam**: The reflected laser beam returns to the device, where it is detected by a sensor. The time it takes for the beam to travel to the target and back is crucial for the measurement.
4. **Time-of-Flight Calculation**: The device calculates the time-of-flight (ToF) of the laser beam, which is the time taken for the beam to travel to the target and back. This is typically measured in nanoseconds.
5. **Distance Calculation**: Using the speed of light (approximately 299,792,458 meters per second), the device calculates the distance to the target. The formula used is: Distance = (Speed of Light x Time-of-Flight) / 2. The division by two accounts for the round trip of the laser beam.
6. **Display of Measurement**: The calculated distance is then displayed on the device’s screen, often in various units such as meters, feet, or inches, depending on user preference.
Laser distance meters are highly accurate, quick, and easy to use, making them popular in construction, surveying, and various other fields where precise distance measurements are required.
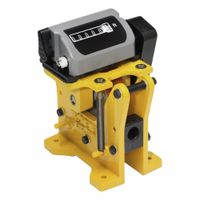
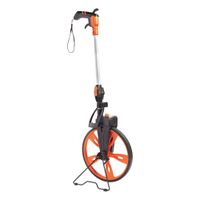
What are the advantages of using a measuring wheel?
A measuring wheel, also known as a surveyor's wheel, offers several advantages for measuring distances, particularly in outdoor and large-scale environments.
1. **Ease of Use**: Measuring wheels are simple to operate. Users can walk along the path they wish to measure, and the wheel does the work of calculating the distance. This simplicity makes it accessible for people without technical expertise.
2. **Portability**: Most measuring wheels are lightweight and often come with a telescopic handle, making them easy to carry and store. This portability is beneficial for professionals who need to measure distances in various locations.
3. **Versatility**: Measuring wheels can be used on a variety of surfaces, including grass, pavement, and uneven terrain. This versatility makes them suitable for a wide range of applications, from construction and landscaping to road maintenance and agriculture.
4. **Cost-Effective**: Compared to more sophisticated measuring tools like laser distance meters or GPS devices, measuring wheels are relatively inexpensive. This cost-effectiveness makes them an attractive option for small businesses and individuals.
5. **Immediate Results**: Measuring wheels provide real-time distance measurements, allowing users to quickly obtain the information they need without waiting for data processing or analysis.
6. **No Power Requirement**: Unlike electronic measuring devices, measuring wheels do not require batteries or charging, ensuring they are always ready for use.
7. **Durability**: Designed for outdoor use, measuring wheels are typically robust and can withstand harsh environmental conditions, ensuring longevity and reliability.
8. **Accuracy**: While not as precise as some electronic devices, measuring wheels offer sufficient accuracy for many practical applications, especially when measuring longer distances where minor discrepancies are less impactful.
These advantages make measuring wheels a practical tool for various industries and applications, providing a balance of convenience, functionality, and affordability.
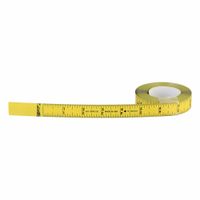
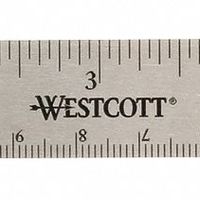
How accurate are adhesive tape measures?
Adhesive tape measures, often used for temporary or flexible measuring needs, offer varying degrees of accuracy depending on several factors. Generally, they are less accurate than rigid tape measures or precision measuring tools. The accuracy of adhesive tape measures can be influenced by the following:
1. **Material Stretch**: Adhesive tape measures are typically made from flexible materials like vinyl or polyester, which can stretch or deform under tension. This can lead to inaccuracies, especially over longer distances.
2. **Adhesive Quality**: The adhesive used can affect the tape's ability to lay flat and adhere consistently to surfaces. Poor adhesion can cause the tape to lift or shift, leading to measurement errors.
3. **Surface Irregularities**: The surface to which the tape is applied can impact accuracy. Uneven or textured surfaces may prevent the tape from lying flat, causing discrepancies in measurement.
4. **Temperature and Humidity**: Environmental conditions can affect both the adhesive properties and the material of the tape. High temperatures can cause the tape to expand, while humidity can affect adhesion and material integrity.
5. **Manufacturing Tolerances**: The precision with which the tape is manufactured also plays a role. High-quality adhesive tape measures are produced with tighter tolerances, offering better accuracy.
6. **User Application**: The method of application by the user can introduce errors. Ensuring the tape is applied straight and without wrinkles is crucial for accurate measurements.
In summary, while adhesive tape measures are convenient for quick and flexible measurements, they are generally not as accurate as more rigid measuring tools. For tasks requiring high precision, it is advisable to use more reliable instruments.
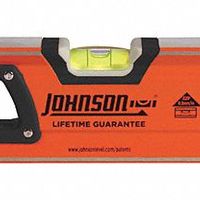
What is the difference between a level and a plumb bob?
A level and a plumb bob are both tools used in construction and carpentry to ensure accuracy in alignment, but they serve different purposes and operate on different principles.
A level is a tool used to determine whether a surface is horizontal (level) or vertical (plumb). It typically consists of a straight bar with one or more bubble vials. The vials are partially filled with liquid, leaving a bubble that moves to the highest point. When the bubble is centered between marked lines on the vial, the surface is level or plumb. Levels come in various types, including spirit levels, laser levels, and digital levels, and are used for tasks like installing shelves, aligning pictures, or setting up construction frames.
A plumb bob, on the other hand, is a simple tool used to establish a vertical reference line. It consists of a pointed weight, usually made of metal, attached to the end of a string or cord. When suspended, gravity pulls the weight straight down, creating a perfectly vertical line. Plumb bobs are used to ensure that structures like walls or columns are vertically true. They are particularly useful in situations where a level cannot be easily applied, such as when working with tall structures or in tight spaces.
In summary, the primary difference lies in their function: a level is used to check both horizontal and vertical alignment, while a plumb bob is specifically for vertical alignment. Additionally, levels are more versatile and can be used in a variety of applications, whereas plumb bobs are more specialized for vertical alignment tasks.
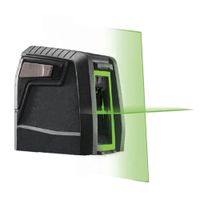
How do you use a laser level for alignment?
To use a laser level for alignment, follow these steps:
1. **Select the Right Laser Level**: Choose between a line laser, dot laser, or rotary laser based on your project needs. Line lasers are ideal for indoor tasks, dot lasers for transferring points, and rotary lasers for large outdoor projects.
2. **Set Up the Laser Level**: Place the laser level on a stable surface or mount it on a tripod. Ensure it is at the desired height for your project.
3. **Power On and Self-Level**: Turn on the laser level. Most modern laser levels are self-leveling. Allow it a few seconds to adjust and stabilize. If it’s a manual level, use the built-in bubble vials to level it manually.
4. **Adjust the Laser Beam**: For line lasers, adjust the beam to project a horizontal or vertical line as needed. For rotary lasers, set the rotation speed and direction.
5. **Mark Reference Points**: Use the laser beam as a guide to mark reference points on your work surface. For horizontal alignment, ensure the beam is level across the entire area. For vertical alignment, check that the beam is plumb.
6. **Check Alignment**: Use a measuring tape or ruler to verify that the laser line or dot is correctly aligned with your reference points. Adjust the laser level if necessary.
7. **Secure the Level**: Once aligned, ensure the laser level is secure and won’t be disturbed during the project.
8. **Complete the Task**: Use the laser line or dot as a guide to complete your alignment task, such as installing tiles, hanging pictures, or setting up construction elements.
9. **Turn Off and Store**: After use, turn off the laser level and store it safely to prevent damage.
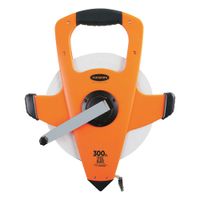
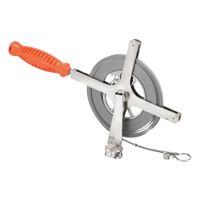
What is the purpose of an oil gauging tape?
An oil gauging tape is a specialized measuring tool used primarily in the oil and gas industry to determine the level of liquid, such as crude oil, in storage tanks. Its primary purpose is to provide accurate measurements of the liquid's depth, which is crucial for inventory management, quality control, and safety compliance.
The tape consists of a long, flexible metal strip marked with measurement units, typically feet and inches or meters and centimeters. At the end of the tape, there is a plumb bob or a weighted bob, often made of brass or stainless steel, which helps the tape remain vertical and stable when lowered into the tank. The tape is wound on a reel for easy handling and storage.
Operators use the oil gauging tape by lowering it into the tank until the bob touches the bottom. The tape is then retracted, and the liquid level is read at the point where the tape is wet. This measurement is known as the "innage" or "dip" reading. Alternatively, the "outage" method involves measuring the distance from the top of the tank to the liquid surface.
Accurate gauging is essential for several reasons: it helps in calculating the volume of oil in the tank, which is vital for inventory and financial records; it ensures compliance with regulatory requirements for environmental protection and safety; and it aids in detecting leaks or discrepancies in the tank's contents. Additionally, gauging tapes are used to measure the temperature of the liquid, as temperature variations can affect volume calculations.
Overall, the oil gauging tape is a critical tool for ensuring the efficient and safe operation of oil storage facilities.
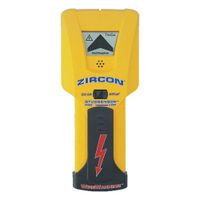
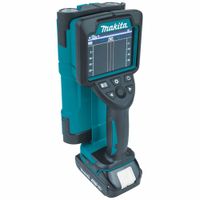
How do you find studs in a wall with a stud finder?
To find studs in a wall using a stud finder, follow these steps:
1. **Choose the Right Stud Finder**: Select a stud finder suitable for your wall type. There are magnetic stud finders, which detect metal fasteners in studs, and electronic stud finders, which sense changes in wall density.
2. **Prepare the Wall**: Remove any obstacles like pictures or shelves. Ensure the wall surface is clean and dry for accurate readings.
3. **Calibrate the Stud Finder**: Turn on the stud finder and place it flat against the wall. Press the calibration button if your model requires it, and wait for the device to indicate it's ready, usually with a beep or light.
4. **Scan the Wall**: Slowly move the stud finder horizontally across the wall. Keep it level and maintain consistent pressure. For electronic models, watch for changes in lights or listen for beeps indicating a stud's edge.
5. **Mark the Stud Location**: When the stud finder signals a stud, mark the edge with a pencil. Continue moving the device to find the other edge of the stud, marking it as well. Studs are typically 16 or 24 inches apart, so measure from your first mark to locate additional studs.
6. **Verify the Stud**: To ensure accuracy, scan vertically along the marked area to confirm the stud's presence. You can also use a small nail to gently tap and verify the stud's location.
7. **Repeat as Needed**: Continue scanning and marking to find all necessary studs for your project.
By following these steps, you can accurately locate studs in a wall using a stud finder, ensuring secure mounting for your needs.
What are the different types of squares used in construction?
In construction, various types of squares are utilized to ensure accuracy and precision in measurements and angles. Here are the main types:
1. **Framing Square**: Also known as a carpenter's square, it is a large L-shaped tool used for laying out and marking right angles in framing, roofing, and stairway work. It consists of a longer blade and a shorter tongue, typically made of metal.
2. **Speed Square**: A triangular-shaped tool that combines features of a try square, miter square, protractor, and line scriber. It is used for marking out lines, measuring angles, and as a saw guide for 45 and 90-degree cuts.
3. **Try Square**: A small, L-shaped tool used primarily for checking the squareness of small pieces of wood. It consists of a blade attached to a handle at a right angle, often used in woodworking.
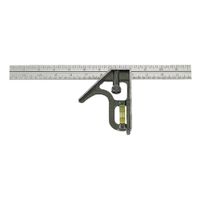
4. **Combination Square**: A versatile tool that includes a ruler with a sliding head that can be locked at any point along the ruler. It can be used to measure angles, depth, and for marking lines.
5. **T-Square**: Primarily used in drafting, it consists of a long straight edge attached to a head that is perpendicular to it. It is used to draw horizontal lines and ensure the alignment of other drawing tools.
6. **Drywall Square**: A T-shaped tool used specifically for cutting and marking drywall. It is larger than a framing square and helps in making straight cuts.
7. **Miter Square**: Used for marking and measuring angles other than 90 degrees, typically 45 degrees. It is essential for tasks involving angled cuts, such as in trim work.
These squares are essential for ensuring precision and accuracy in construction projects, aiding in the creation of structures that are both functional and aesthetically pleasing.
How do you maintain and store measuring tools properly?
To maintain and store measuring tools properly, follow these guidelines:
1. **Cleaning**: After each use, clean the tools with a soft cloth to remove dust, dirt, and any residues. For precision tools, use a mild solvent if necessary, ensuring no moisture remains.
2. **Calibration**: Regularly calibrate tools to ensure accuracy. Follow the manufacturer's recommendations for calibration intervals and use certified standards for reference.
3. **Lubrication**: Apply a light coat of oil to metal parts to prevent rust, especially for tools like calipers and micrometers. Avoid over-lubrication, which can attract dust.
4. **Storage Environment**: Store tools in a dry, temperature-controlled environment to prevent rust and damage. Avoid exposure to direct sunlight and extreme temperatures.
5. **Protective Cases**: Use protective cases or pouches for individual tools to prevent physical damage. Foam-lined cases are ideal for shock absorption.
6. **Organization**: Arrange tools systematically in toolboxes or on pegboards. Label storage areas to ensure easy access and prevent misplacement.
7. **Handling**: Handle tools with care, avoiding drops or impacts. Use both hands for larger tools to maintain control.
8. **Inspection**: Regularly inspect tools for wear and damage. Replace or repair any tools that show signs of malfunction to maintain measurement accuracy.
9. **Avoid Contamination**: Keep tools away from chemicals and corrosive substances. If exposure occurs, clean immediately.
10. **Training**: Ensure all users are trained in proper handling and maintenance procedures to extend the lifespan of the tools.
By adhering to these practices, measuring tools will remain accurate and reliable, ensuring precision in measurements and extending their service life.