Call +(254) 703 030 000 / 751 483 999 / 721 704 777
.....Read More

Frequently Asked Questions
What is a laser level and how does it work?
A laser level is a tool used in construction and surveying to project a fixed red or green beam along a horizontal or vertical axis. It is used to ensure that objects are level or plumb, aiding in tasks such as installing shelves, aligning pictures, or laying tiles.
The device typically consists of a laser diode, a leveling mechanism, and a base. The laser diode emits a beam of light, which is then directed through a lens to create a straight line. The leveling mechanism, which can be either manual or automatic, ensures that the laser is perfectly aligned. In manual models, the user adjusts the level using bubble vials, while automatic or self-leveling models use internal pendulums or electronic sensors to achieve precision.
When activated, the laser level projects a beam onto a surface, providing a visual guide. Some models can rotate 360 degrees, projecting a line around an entire room, while others may project cross lines or dots. The color of the laser, red or green, affects visibility; green lasers are generally more visible in bright conditions.
Laser levels can be mounted on tripods or attached to surfaces using clamps, allowing for hands-free operation. They are powered by batteries or rechargeable units, making them portable and convenient for various job sites.
In summary, a laser level is an essential tool for achieving accuracy in alignment and leveling tasks, utilizing laser technology to project precise lines or points for construction and DIY projects.
How do I choose the right laser level for my project?
To choose the right laser level for your project, consider the following factors:
1. **Type of Project**: Determine whether your project is indoor or outdoor. For indoor projects like installing cabinets or aligning tiles, a cross-line laser level is suitable. For outdoor projects like grading or site layout, a rotary laser level is more appropriate due to its long-range capabilities.
2. **Range and Visibility**: Assess the distance over which you need the laser to project. For small indoor tasks, a range of 30-50 feet is sufficient. For larger or outdoor projects, consider models with a range of 100 feet or more. Ensure the laser is visible in your working conditions; green lasers are generally more visible than red, especially in bright environments.
3. **Accuracy**: Check the level of precision required. Most laser levels offer accuracy within 1/8 inch at 30 feet, which is adequate for most tasks. For high-precision tasks, look for models with higher accuracy.
4. **Self-Leveling Feature**: Opt for a self-leveling laser level for ease of use and accuracy. This feature automatically adjusts the laser to ensure it is level, saving time and reducing errors.
5. **Mounting Options**: Consider how you will mount the laser level. Some models come with tripods or wall mounts, which can be crucial for stability and ease of use.
6. **Durability and Weather Resistance**: For outdoor use, ensure the laser level is durable and weather-resistant, with an IP rating that indicates protection against dust and water.
7. **Power Source**: Decide between battery-operated or rechargeable models based on convenience and project duration.
8. **Budget**: Balance your needs with your budget. Higher-end models offer more features and better durability but come at a higher cost.
By evaluating these factors, you can select a laser level that best suits your project requirements.
What are the differences between rotary, dot, cross-line, and plane laser levels?
Rotary, dot, cross-line, and plane laser levels are tools used in construction and surveying to ensure accurate alignment and leveling. Here are their differences:
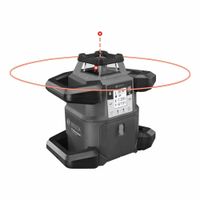
1. **Rotary Laser Levels**:
- Emit a 360-degree horizontal or vertical plane of laser light.
- Ideal for large-scale projects like grading, excavation, and foundation work.
- Can be used both indoors and outdoors.
- Often self-leveling and can be mounted on tripods.
- Suitable for long-range applications.
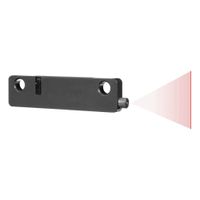
2. **Dot Laser Levels**:
- Project single or multiple laser dots onto surfaces.
- Used for transferring points from floor to ceiling or aligning fixtures.
- Best for short-range tasks like electrical installations or framing.
- Compact and portable, making them easy to use in tight spaces.
3. **Cross-Line Laser Levels**:
- Project horizontal and vertical lines that intersect to form a cross.
- Useful for tasks like tiling, cabinetry, and picture hanging.
- Typically have a shorter range compared to rotary lasers.
- Can be self-leveling and are often used indoors.
- Provide quick and easy alignment for small to medium projects.
4. **Plane Laser Levels**:
- Create a continuous laser plane, either horizontal or vertical.
- Used for precise leveling over a specific area.
- Suitable for tasks like installing drop ceilings or aligning windows.
- Can be more complex and expensive than other types.
- Often used in professional settings where high accuracy is required.
Each type of laser level serves specific purposes, with varying ranges, precision, and applications, catering to different project needs.
How do I calibrate a laser level?
To calibrate a laser level, follow these steps:
1. **Preparation**: Place the laser level on a flat, stable surface or tripod in a room with enough space. Ensure the device is fully charged or has fresh batteries.
2. **Initial Setup**: Turn on the laser level and allow it to self-level if it has an automatic leveling feature. If it's manual, adjust the level using the built-in bubble vials until it is level.
3. **Horizontal Calibration**:
- Position the laser level about 5 meters (16 feet) from a wall.
- Mark the laser line on the wall.
- Rotate the laser level 180 degrees to face the opposite wall and mark the line.
- Measure the height difference between the two marks. If the difference exceeds the manufacturer's specified tolerance, adjust the laser level according to the user manual.
4. **Vertical Calibration**:
- Place the laser level on a flat surface and project a vertical line onto a wall.
- Use a plumb bob or a known vertical reference to check the accuracy of the laser line.
- If the laser line deviates from the reference, adjust the vertical alignment as per the manual.
5. **Cross-Line Calibration** (if applicable):
- Project both horizontal and vertical lines to form a cross.
- Use a carpenter's square to check the 90-degree angle.
- Adjust if necessary to ensure the lines are perpendicular.
6. **Recheck**: After adjustments, recheck the calibration by repeating the steps to ensure accuracy.
7. **Documentation**: Record the calibration date and any adjustments made for future reference.
Regular calibration ensures precision in your projects. Always refer to the specific user manual for model-specific instructions.
What are the best practices for using a laser level?
1. **Choose the Right Laser Level**: Select a laser level that suits your project needs, whether it's a line laser, rotary laser, or dot laser.
2. **Read the Manual**: Familiarize yourself with the manufacturer's instructions and safety guidelines to ensure proper use and maintenance.
3. **Check Calibration**: Before use, verify that the laser level is properly calibrated to ensure accuracy. Recalibrate if necessary.
4. **Secure the Level**: Use a tripod or a stable surface to mount the laser level. Ensure it is firmly secured to prevent movement during operation.
5. **Level the Device**: Use the built-in bubble vials or electronic self-leveling feature to ensure the laser is perfectly level.
6. **Use Safety Gear**: Wear appropriate eye protection to prevent potential eye damage from laser exposure.
7. **Mark Reference Points**: Use the laser to mark reference points or lines on the work surface. Ensure the laser is visible and unobstructed.
8. **Avoid Direct Sunlight**: Use the laser level in shaded areas or during times of low sunlight to enhance visibility.
9. **Use a Laser Detector**: For outdoor projects or long distances, use a laser detector to locate the laser beam accurately.
10. **Regular Maintenance**: Clean the laser level regularly and store it in a protective case to prevent damage.
11. **Check Battery Life**: Ensure the batteries are fully charged or replaced to avoid interruptions during use.
12. **Test Before Use**: Conduct a test run to ensure the laser level is functioning correctly and the beam is visible.
13. **Follow Safety Protocols**: Keep the laser level away from children and avoid pointing it at reflective surfaces or people.
How do I maintain and store a laser level?
To maintain and store a laser level effectively, follow these steps:
1. **Cleaning**: After each use, clean the laser level with a soft, dry cloth to remove dust and debris. Avoid using harsh chemicals or solvents that could damage the device.
2. **Calibration**: Regularly check the calibration of your laser level. Refer to the manufacturer's instructions for calibration procedures. If the level is out of calibration, adjust it as needed or have it professionally serviced.
3. **Battery Care**: Remove batteries if the laser level will not be used for an extended period to prevent corrosion. Use high-quality batteries and replace them as needed to ensure optimal performance.
4. **Storage**: Store the laser level in its original case or a protective case to prevent damage. Keep it in a cool, dry place away from direct sunlight and extreme temperatures, which can affect its accuracy and longevity.
5. **Handling**: Handle the laser level with care. Avoid dropping or subjecting it to heavy impacts, as this can misalign the internal components.
6. **Moisture Protection**: Ensure the laser level is dry before storage. If it gets wet, dry it thoroughly to prevent internal damage.
7. **Transport**: When transporting the laser level, use a padded case to protect it from shocks and vibrations. Secure it properly to prevent movement during transit.
8. **Inspection**: Regularly inspect the laser level for signs of wear or damage. Check for cracks, loose parts, or any other issues that might affect its performance.
By following these maintenance and storage practices, you can extend the life of your laser level and ensure it remains accurate and reliable for future use.
What accessories are essential for using a laser level effectively?
To use a laser level effectively, several accessories are essential:
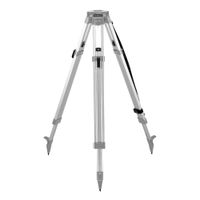
1. **Tripod**: Provides a stable platform for the laser level, ensuring accurate and level measurements. Adjustable tripods allow for height adjustments to suit different project needs.
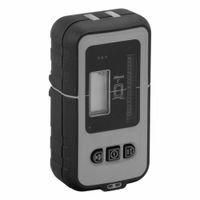
2. **Laser Detector/Receiver**: Essential for outdoor use or in bright conditions where the laser beam is hard to see. It detects the laser beam and provides visual or audio signals to indicate level.
3. **Grade Rod/Staff**: Used in conjunction with a laser detector, it helps measure elevation changes and is crucial for tasks like grading or leveling over long distances.
4. **Wall Mount/Bracket**: Allows the laser level to be mounted on walls or other vertical surfaces, useful for tasks like installing cabinets or aligning pictures.
5. **Target Plate**: Enhances the visibility of the laser beam, especially over long distances or in bright light conditions, by providing a reflective surface.
6. **Remote Control**: Offers convenience by allowing the user to operate the laser level from a distance, which is particularly useful for large-scale projects.
7. **Batteries/Charger**: Ensures the laser level has a continuous power supply. Rechargeable batteries and a charger are often preferred for cost-effectiveness and environmental reasons.
8. **Carrying Case**: Protects the laser level and its accessories during transport and storage, ensuring longevity and reliability.
9. **Protective Glasses**: Enhances the visibility of the laser beam and protects the eyes from potential laser exposure.
10. **Calibration Tools**: Necessary for maintaining the accuracy of the laser level over time, ensuring precise measurements.
These accessories enhance the functionality, accuracy, and convenience of using a laser level across various applications.