Call +(254) 703 030 000 / 751 483 999 / 721 704 777
.....Read More


Frequently Asked Questions
What is the difference between a level and a plumb bob?
A level and a plumb bob are both tools used in construction and carpentry to ensure accuracy in alignment, but they serve different purposes and operate on different principles.
A level is a tool used to determine whether a surface is horizontal (level) or vertical (plumb). It typically consists of a straight bar with one or more bubble vials. The bubble inside the vial moves to the center when the tool is perfectly horizontal or vertical. Levels come in various types, including spirit levels, laser levels, and digital levels, and are used for tasks like hanging pictures, installing shelves, or laying bricks.
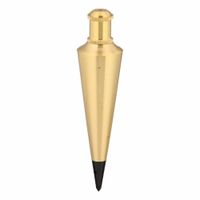
A plumb bob, on the other hand, is a weight, usually with a pointed tip on the bottom, suspended from a string. It uses gravity to establish a vertical reference line, known as a plumb line. When the string is held taut, the plumb bob points directly downward, indicating true vertical. Plumb bobs are often used in surveying, construction, and carpentry to ensure structures are vertically aligned, such as when erecting walls or checking the alignment of door frames.
In summary, the primary difference lies in their function: a level is used to find horizontal and vertical planes, while a plumb bob is used to establish a vertical line. Levels are more versatile for various alignment tasks, whereas plumb bobs are specifically for vertical alignment. Both tools are essential for ensuring precision and accuracy in construction and carpentry projects.
How do you use a spirit level to check if a surface is level?
To use a spirit level to check if a surface is level, follow these steps:
1. **Select the Right Spirit Level**: Choose a spirit level that fits the size of the surface you are checking. Longer levels provide more accuracy for larger surfaces.
2. **Clean the Surface**: Ensure the surface is clean and free from debris to avoid inaccurate readings.
3. **Position the Level**: Place the spirit level on the surface you want to check. Ensure it is aligned with the direction you want to measure, either horizontally or vertically.
4. **Check the Bubble**: Look at the bubble inside the vial. The vial is a slightly curved, transparent tube filled with liquid, leaving a bubble of air. For a surface to be level, the bubble should be centered between the two marked lines on the vial.
5. **Adjust the Surface**: If the bubble is not centered, adjust the surface accordingly. For horizontal surfaces, raise or lower one end until the bubble centers. For vertical surfaces, adjust the tilt until the bubble is centered.
6. **Recheck the Level**: After adjustments, reposition the spirit level and check the bubble again to ensure the surface is now level.
7. **Cross-Check**: For accuracy, rotate the spirit level 180 degrees and check again. The bubble should remain centered. If not, the level might be faulty.
8. **Multiple Directions**: For larger surfaces, check in multiple directions (e.g., front to back and side to side) to ensure the entire surface is level.
9. **Store Properly**: After use, store the spirit level in a safe place to maintain its accuracy.
By following these steps, you can effectively use a spirit level to ensure surfaces are perfectly level.
What are the different types of levels and their uses?
There are several types of levels, each designed for specific tasks and uses:
1. **Spirit Level**: This is the most common type, featuring a liquid-filled vial with an air bubble. It's used for general leveling tasks in construction, carpentry, and DIY projects to ensure surfaces are horizontal (level) or vertical (plumb).
2. **Laser Level**: This tool projects a laser beam to establish a straight line across a surface. It's used for tasks requiring precision over long distances, such as installing drop ceilings, aligning cabinets, or laying tiles.
3. **Digital Level**: Equipped with electronic sensors, this level provides digital readouts of angles. It's used in engineering and construction for precise measurements and can often store data for later analysis.
4. **Torpedo Level**: Compact and portable, this level is ideal for small spaces and tight areas. It's commonly used by electricians and plumbers for tasks like aligning outlets or pipes.
5. **Line Level**: A small, lightweight level that attaches to a string or line. It's used for leveling over long distances, such as when setting fence posts or laying foundations.
6. **Post Level**: Designed to fit around posts, this level ensures that posts are both level and plumb. It's used in fencing, decking, and other projects involving vertical posts.
7. **Water Level**: An ancient tool using water in a tube to find level points over long distances. It's used in landscaping and construction where traditional levels are impractical.
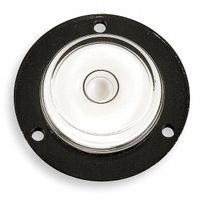
8. **Bullseye Level**: A circular level that can level in all directions at once. It's used for leveling surfaces like tables or machinery bases.
Each type of level serves a specific purpose, ensuring accuracy and efficiency in various tasks across construction, carpentry, and other fields.
How do digital levels work and what are their advantages?
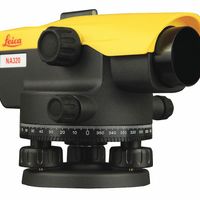
Digital levels work by using electronic sensors and digital displays to measure height differences and calculate elevations. They consist of a digital level instrument and a bar-coded staff. The instrument emits a beam of light that reads the bar code on the staff, which is placed at the point of measurement. The digital level then calculates the height difference between the instrument and the staff, displaying the result on a digital screen.
Advantages of digital levels include:
1. **Accuracy**: Digital levels provide high precision measurements, reducing human error associated with manual readings.
2. **Efficiency**: They allow for faster data collection as readings are taken and recorded automatically, saving time in the field.
3. **Ease of Use**: With user-friendly interfaces, digital levels are easier to operate, requiring less training compared to traditional optical levels.
4. **Data Storage**: They can store large amounts of data, which can be easily transferred to computers for further analysis and record-keeping.
5. **Error Reduction**: Automatic error checking features help in minimizing mistakes during data collection.
6. **Versatility**: Suitable for a variety of applications, including construction, surveying, and civil engineering projects.
7. **Integration**: Many digital levels can integrate with other digital surveying equipment, enhancing overall workflow efficiency.
8. **Environmental Adaptability**: They often come with features that allow them to function effectively in various environmental conditions, such as low light or uneven terrain.
Overall, digital levels enhance productivity and accuracy in surveying tasks, making them a valuable tool in modern construction and engineering projects.
How do you properly use a plumb bob for accurate measurements?
To use a plumb bob for accurate measurements, follow these steps:
1. **Select the Right Plumb Bob**: Choose a plumb bob that suits your project. Heavier plumb bobs are more stable in windy conditions, while lighter ones are suitable for indoor use.
2. **Attach the String**: Securely tie a non-stretchable string to the plumb bob. Ensure the string is long enough to reach the desired measurement point.
3. **Mark the Reference Point**: Identify and mark the point from which you want to take a vertical measurement. This could be a ceiling, beam, or any elevated point.
4. **Suspend the Plumb Bob**: Hold the string at the reference point and let the plumb bob hang freely. Ensure it is not touching any surfaces or objects that could interfere with its vertical alignment.
5. **Stabilize the Plumb Bob**: Allow the plumb bob to come to a complete stop. This may take a few moments, especially if there is air movement.
6. **Align the Plumb Bob**: Once stable, the plumb bob will point directly downward, indicating a true vertical line. Ensure the string is taut and straight.
7. **Mark the Measurement Point**: At the point where the plumb bob's tip hovers just above the ground or the surface, mark this spot. This is your accurate vertical alignment point.
8. **Verify Accuracy**: Double-check the alignment by ensuring the string is not twisted and the plumb bob is not swaying. Re-measure if necessary.
9. **Use for Further Measurements**: Use the marked point as a guide for further measurements or alignments, ensuring consistency and accuracy in your project.
10. **Store Properly**: After use, wind the string around the plumb bob for easy storage and to prevent tangling.
What is the best type of level for construction projects?
The best type of level for construction projects depends on the specific requirements and scale of the project. However, the laser level is often considered the most versatile and efficient choice for a wide range of construction tasks.
Laser levels project a constant, highly accurate line or dot over long distances, which is crucial for tasks requiring precision, such as setting foundations, aligning walls, or installing ceilings. They come in various types, including rotary, line, and dot laser levels, each suited for different applications. Rotary laser levels are ideal for large-scale projects as they emit a 360-degree horizontal or vertical plane, making them perfect for grading and site layout. Line laser levels are excellent for indoor tasks like aligning cabinets or tiles, while dot laser levels are used for transferring points from floor to ceiling.
The advantages of laser levels include their ease of use, time efficiency, and the ability to work in various lighting conditions. They often come with self-leveling features, reducing human error and ensuring accuracy. Additionally, many models are equipped with remote controls and can be mounted on tripods for stability and flexibility.
For smaller projects or tasks requiring less precision, traditional spirit levels or bubble levels can be sufficient. These are simple, cost-effective tools that rely on a bubble in a liquid-filled vial to indicate levelness. They are best for quick checks and smaller tasks like hanging pictures or shelves.
In summary, while traditional levels have their place, laser levels are generally the best choice for construction projects due to their precision, versatility, and efficiency, making them indispensable for modern construction needs.
How do you calibrate a level to ensure accurate readings?
To calibrate a level for accurate readings, follow these steps:
1. **Preparation**: Place the level on a flat, stable surface. Ensure the surface is clean and free from debris to avoid interference with the calibration process.
2. **Initial Reading**: Note the bubble's position in the vial. The bubble should be centered between the marked lines. If not, adjustments are needed.
3. **Reverse the Level**: Rotate the level 180 degrees on the same spot. This checks for consistency. If the bubble remains centered, the level is accurate. If not, proceed to adjust.
4. **Adjustment**: Most levels have adjustment screws near the vial. Use a screwdriver to gently turn these screws. If the bubble was off-center to the right, turn the screw to the left, and vice versa. Make small adjustments and recheck the bubble's position.
5. **Recheck**: After adjustments, place the level back in its original position and note the bubble's position. Then, reverse it again to ensure the bubble remains centered in both orientations.
6. **Repeat if Necessary**: If the bubble is still not centered, repeat the adjustment process until the bubble is consistently centered in both positions.
7. **Final Verification**: For additional accuracy, test the level on a known flat surface or against a calibrated level. Ensure the readings match.
8. **Documentation**: Record the calibration date and any adjustments made for future reference.
Regular calibration checks are recommended to maintain accuracy, especially if the level is frequently used or subjected to rough handling.