Call +(254) 703 030 000 / 751 483 999 / 721 704 777
.....Read More

Frequently Asked Questions
What is the purpose of using a die for threading?
A die is a specialized tool used in the process of threading, which involves creating threads on the exterior of a cylindrical or conical workpiece, such as a rod or bolt. The primary purpose of using a die for threading is to cut or form external threads with precision and consistency. This is essential for ensuring that the threaded component can securely mate with a corresponding internally threaded part, such as a nut or a tapped hole, to form a reliable mechanical connection.
Dies are typically made from hardened steel or other durable materials to withstand the forces involved in cutting threads. They come in various sizes and thread pitches to accommodate different standards and specifications, such as metric or imperial threads. The use of a die ensures that the threads are uniform in depth, pitch, and angle, which is crucial for the proper fit and function of the threaded assembly.
In addition to cutting new threads, dies can also be used to clean or repair damaged threads on existing components. This is particularly useful in maintenance and repair operations where threads may have become worn or corroded over time.
Overall, the use of a die for threading is essential in manufacturing, construction, and repair industries, where precise and reliable threaded connections are required for the assembly and operation of machinery, equipment, and structures.
How do you use a die to cut external threads?
To cut external threads using a die, follow these steps:
1. **Select the Die**: Choose the appropriate die size and type for the thread you need. Ensure it matches the diameter and thread pitch of the rod or bolt.
2. **Prepare the Rod**: Ensure the rod is clean and free of burrs. If necessary, file a chamfer on the end of the rod to help start the die.
3. **Secure the Rod**: Clamp the rod securely in a vise, leaving enough length exposed for threading. Ensure it is perpendicular to the vise to maintain straight threads.
4. **Lubricate**: Apply cutting oil to the rod to reduce friction and heat, which helps in achieving cleaner threads and prolongs the life of the die.
5. **Mount the Die**: Place the die in a die stock or holder. Ensure the die is oriented correctly, with the chamfered side facing the rod.
6. **Start Cutting**: Position the die over the rod and apply even pressure. Turn the die stock clockwise to start cutting the threads. Ensure the die is aligned straight to avoid crooked threads.
7. **Cut the Threads**: Continue turning the die stock, applying steady pressure. After every full turn, reverse the die slightly to break the chip and clear debris. This prevents binding and ensures clean threads.
8. **Check Progress**: Periodically check the threads for accuracy and depth. Adjust as necessary to maintain alignment.
9. **Finish and Clean**: Once the desired length of thread is cut, remove the die. Clean the threads with a brush to remove any metal shavings.
10. **Inspect**: Check the threads with a thread gauge to ensure they meet the required specifications.
By following these steps, you can effectively cut external threads using a die.
What are the differences between round dies and hex dies?
Round dies and hex dies are both tools used for cutting or forming threads on cylindrical workpieces, but they have distinct differences in design and application:
1. **Shape and Design**:
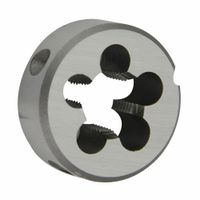
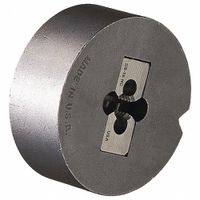
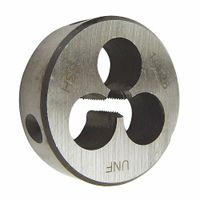
- **Round Dies**: These are circular in shape and typically have a split design, allowing for slight adjustments in the diameter of the threads being cut. They are often used in die stocks or holders.
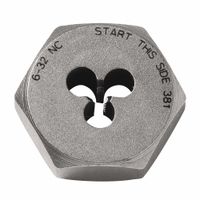
- **Hex Dies**: These have a hexagonal shape, similar to a nut, which allows them to be turned with a wrench. They are usually solid and do not have a split design.
2. **Adjustability**:
- **Round Dies**: The split design allows for minor adjustments to the thread size, providing flexibility in achieving the desired fit.
- **Hex Dies**: Generally non-adjustable, offering a fixed thread size, which can be a limitation if precision adjustments are needed.
3. **Application**:
- **Round Dies**: Commonly used in machine shops and for professional applications where precision and adjustability are important. They are suitable for creating new threads or repairing existing ones.
- **Hex Dies**: Often used for maintenance and repair work, especially in situations where a quick fix is needed. They are convenient for fieldwork due to their compatibility with standard wrenches.
4. **Ease of Use**:
- **Round Dies**: Require a die stock or holder for operation, which can make them slightly more cumbersome to use in tight spaces.
- **Hex Dies**: Can be easily turned with a wrench, making them more user-friendly for quick tasks and in confined areas.
5. **Durability and Strength**:
- **Round Dies**: Typically more robust and durable, suitable for heavy-duty threading tasks.
- **Hex Dies**: While convenient, they may not be as durable as round dies for extensive or heavy-duty use.
How do you repair existing threads with a die?
To repair existing threads with a die, follow these steps:
1. **Select the Correct Die**: Identify the thread size and pitch of the damaged threads using a thread gauge. Choose a die that matches these specifications.
2. **Prepare the Workpiece**: Clean the threads to remove dirt, grease, or debris. Use a wire brush or solvent if necessary. Secure the workpiece in a vise to prevent movement during the repair process.
3. **Lubricate the Threads**: Apply cutting oil or lubricant to the threads. This reduces friction and heat, ensuring a smoother cutting process and prolonging the life of the die.
4. **Position the Die**: Place the die into a die stock or holder. Ensure it is properly secured. Align the die with the existing threads on the workpiece. The die should be perpendicular to the axis of the threads to avoid cross-threading.
5. **Start Cutting**: Gently turn the die clockwise onto the threads. Apply even pressure to ensure the die engages the threads correctly. If resistance is felt, back off slightly and re-align.
6. **Cut and Back Off**: Turn the die a full turn forward, then back it off a quarter turn to break the chip and clear debris. Repeat this process until the die has passed over the entire length of the damaged threads.
7. **Inspect the Threads**: Once the die has passed through, remove it and inspect the threads. They should be clean and well-defined. If necessary, repeat the process for better results.
8. **Clean and Protect**: Clean the repaired threads with a brush or compressed air. Apply a light coat of oil to protect against rust and ensure smooth operation.
By following these steps, you can effectively repair damaged threads using a die.
What is the difference between pipe thread dies and regular thread dies?
Pipe thread dies and regular thread dies are tools used for cutting threads, but they serve different purposes and have distinct characteristics.
Pipe Thread Dies:
1. **Purpose**: Specifically designed for cutting threads on pipes, typically used in plumbing and gas fitting.
2. **Thread Type**: Create tapered threads, such as NPT (National Pipe Tapered) threads, which ensure a tight seal when pipes are joined.
3. **Taper**: The taper allows for a wedging action, which is essential for sealing fluids or gases.
4. **Material**: Often made from high-speed steel or alloy steel to handle the demands of cutting through thicker, tougher materials like pipe.
5. **Size**: Generally larger to accommodate the diameter and thickness of pipes.
6. **Application**: Used with pipe threading machines or manually with a ratchet handle.
Regular Thread Dies:
1. **Purpose**: Used for cutting threads on bolts, rods, and other cylindrical objects, primarily for fastening purposes.
2. **Thread Type**: Produce straight or parallel threads, such as UNC (Unified National Coarse) or UNF (Unified National Fine) threads.
3. **Taper**: Typically have no taper, as the primary function is to create threads for fastening rather than sealing.
4. **Material**: Also made from high-speed steel or carbon steel, but designed for less demanding applications compared to pipe threading.
5. **Size**: Smaller and more varied in size to accommodate different bolt and rod diameters.
6. **Application**: Used with die stocks or wrenches for manual threading.
In summary, the main differences lie in their intended use (sealing vs. fastening), thread type (tapered vs. straight), and the materials and sizes they are designed to work with.
How do you select the correct die size for threading?
To select the correct die size for threading, follow these steps:
1. **Determine the Thread Size**: Identify the thread size you need, which includes the diameter and the thread pitch (distance between threads). This information is often specified in the project requirements or engineering drawings.
2. **Material Consideration**: Consider the material of the workpiece. Softer materials may require a different die type or cutting speed compared to harder materials.
3. **Check Standards**: Refer to threading standards such as ISO, ANSI, or DIN to ensure compatibility. These standards provide guidelines on thread dimensions and tolerances.
4. **Select the Die Type**: Choose between adjustable dies, solid dies, or split dies based on the precision required and the material being threaded. Adjustable dies allow for minor size adjustments, while solid dies are fixed.
5. **Match the Die to the Thread Size**: Use a die that matches the nominal diameter of the thread size. For example, for an M10 x 1.5 thread, select a die labeled M10 x 1.5.
6. **Consider Die Material**: Choose a die made from a suitable material, such as high-speed steel (HSS) for general purposes or carbon steel for softer materials.
7. **Check Die Holder Compatibility**: Ensure the die fits into the die holder or stock you plan to use. The holder should securely grip the die to maintain alignment during threading.
8. **Test Fit**: If possible, perform a test fit on a scrap piece to ensure the die produces the correct thread size and quality.
9. **Adjust if Necessary**: If using an adjustable die, make fine adjustments to achieve the desired thread fit.
By following these steps, you can select the appropriate die size for your threading needs, ensuring accurate and efficient thread cutting.
What tools are needed to use a die for threading?
To use a die for threading, you will need the following tools:
1. **Die**: A die is a specialized tool used to cut or form threads on the outside of a rod or shaft. It is typically made of hardened steel and comes in various sizes and thread pitches.
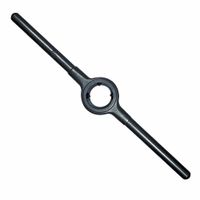
2. **Die Stock**: This is a handle or holder that securely holds the die. It provides the necessary leverage and control to turn the die while threading. Die stocks come in adjustable and fixed sizes to accommodate different die sizes.
3. **Workpiece**: The rod or shaft that you intend to thread. It should be of the appropriate diameter for the die being used.
4. **Cutting Fluid**: A lubricant that reduces friction and heat during the threading process. It helps achieve a smoother finish and prolongs the life of the die.
5. **Vise or Clamp**: Used to securely hold the workpiece in place while threading. This ensures stability and precision during the operation.
6. **File or Chamfering Tool**: Before threading, the end of the workpiece should be chamfered or slightly beveled to help the die start cutting the threads more easily.
7. **Calipers or Micrometer**: These measuring tools are used to ensure the workpiece is of the correct diameter before threading and to check the accuracy of the threads after cutting.
8. **Thread Gauge**: A tool used to verify the thread pitch and ensure it matches the specifications required.
9. **Safety Gear**: Safety glasses and gloves to protect against metal shavings and sharp edges during the threading process.
These tools collectively ensure that the threading process is efficient, accurate, and safe.