Call +(254) 703 030 000 / 751 483 999 / 721 704 777
.....Read More

Frequently Asked Questions
What are pin gauges used for?
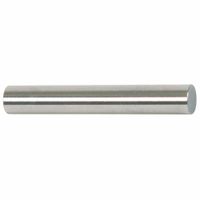
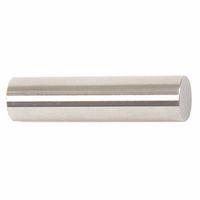
Pin gauges are precision tools used to measure the diameter of holes, slots, and other spaces in manufacturing and engineering applications. They are cylindrical rods made from hardened steel or carbide, with diameters that are highly accurate and consistent. Pin gauges are essential for quality control and inspection processes, ensuring that components meet specified tolerances.
In practice, pin gauges are used to verify the size of drilled holes, ensuring they are within the required tolerance limits. They are often employed in the automotive, aerospace, and machining industries, where precision is critical. Pin gauges can also be used to calibrate other measuring instruments, such as micrometers and calipers, by providing a known standard for comparison.
Pin gauges come in sets, typically ranging from small to large diameters, and are available in both metric and imperial units. They are classified into "go" and "no-go" gauges. A "go" gauge should fit into the hole if it is within the acceptable size range, while a "no-go" gauge should not fit if the hole is within tolerance. This binary approach simplifies the inspection process, allowing for quick and efficient verification.
Additionally, pin gauges are used in the assembly process to ensure that parts fit together correctly. They help identify issues such as misalignment or incorrect hole sizes before final assembly, reducing the risk of defects and rework. Overall, pin gauges are vital tools for maintaining high standards of precision and quality in manufacturing processes.
How do you use a pin gauge?
To use a pin gauge, follow these steps:
1. **Select the Pin Gauge**: Choose the appropriate pin gauge size from the set, which typically ranges from 0.010 inches to 1.000 inches or equivalent in metric sizes. Ensure the pin gauge is clean and free from damage.
2. **Prepare the Workpiece**: Clean the hole or slot in the workpiece to remove any debris or burrs that might affect the measurement.
3. **Insert the Pin Gauge**: Gently insert the pin gauge into the hole or slot. Do not force it; the gauge should slide in smoothly. If it does not fit, try a smaller size.
4. **Check the Fit**: Assess the fit of the pin gauge:
- **Go Gauge**: If the pin gauge fits snugly without excessive force, it indicates the hole is at least as large as the pin gauge diameter.
- **No-Go Gauge**: If the pin gauge does not fit, the hole is smaller than the pin gauge diameter.
5. **Determine Tolerance**: Use a combination of "Go" and "No-Go" gauges to determine if the hole is within specified tolerances. A "Go" gauge should fit, while a "No-Go" gauge should not.
6. **Record Measurements**: Document the results for quality control and verification purposes.
7. **Repeat as Necessary**: If multiple holes or slots need checking, repeat the process for each one.
8. **Store Properly**: After use, clean the pin gauges and store them in their designated case to prevent damage and ensure accuracy for future use.
By following these steps, you can effectively use a pin gauge to measure hole diameters and ensure they meet specified tolerances.
What is the difference between Class ZZ and Class X pin gauges?
Class ZZ and Class X pin gauges differ primarily in their tolerance levels and intended applications:
1. **Tolerance**:
- **Class ZZ**: These pin gauges have a looser tolerance, typically around ±0.0002 inches. They are suitable for general-purpose applications where extreme precision is not critical.
- **Class X**: These gauges have a tighter tolerance, usually around ±0.00004 inches. They are used in high-precision applications where exact measurements are crucial.
2. **Applications**:
- **Class ZZ**: Commonly used in workshops and for general inspection tasks. They are cost-effective and sufficient for most standard manufacturing processes.
- **Class X**: Employed in industries requiring high precision, such as aerospace, automotive, and high-end manufacturing. They ensure components meet stringent specifications.
3. **Cost**:
- **Class ZZ**: Generally less expensive due to their broader tolerance and suitability for less critical tasks.
- **Class X**: More costly because of the precision manufacturing required to achieve tighter tolerances.
4. **Material and Finish**:
- Both classes are typically made from high-grade tool steel or carbide, but Class X may undergo more rigorous finishing processes to ensure precision.
5. **Usage**:
- **Class ZZ**: Ideal for quick checks and non-critical measurements.
- **Class X**: Used for calibration, quality control, and applications where measurement accuracy is paramount.
In summary, the choice between Class ZZ and Class X pin gauges depends on the precision requirements of the task, with Class X being the preferred option for high-precision needs.
How do you measure a hole with a pin gauge?
To measure a hole with a pin gauge, follow these steps:
1. **Select the Pin Gauge Set**: Choose a pin gauge set that covers the expected diameter range of the hole. Pin gauges are available in incremental sizes, often in thousandths of an inch or hundredths of a millimeter.
2. **Clean the Hole and Pin Gauges**: Ensure both the hole and the pin gauges are clean and free from debris or oil, as these can affect the measurement accuracy.
3. **Start with a Smaller Pin**: Begin with a pin gauge that is slightly smaller than the estimated diameter of the hole. This ensures that the pin will fit into the hole without forcing it.
4. **Insert the Pin Gauge**: Gently insert the pin gauge into the hole. The correct size pin will slide in smoothly without excessive force. If the pin is too loose, move to the next larger size.
5. **Find the Snug Fit**: Continue testing with progressively larger pins until you find one that fits snugly. The correct pin should enter the hole with slight resistance but should not require force.
6. **Verify the Fit**: Once you find a pin that fits snugly, verify by trying the next larger size. If the larger pin does not fit, the snug pin is the correct measurement.
7. **Record the Measurement**: Note the size of the pin gauge that fits snugly. This size represents the diameter of the hole.
8. **Double-Check**: For accuracy, repeat the process to ensure consistent results.
9. **Consider Tolerances**: If the hole has specific tolerance requirements, ensure the pin gauge measurement falls within these limits.
This method provides a quick and reliable way to measure hole diameters, especially in quality control and manufacturing settings.
What materials are pin gauges made from?
Pin gauges are typically made from the following materials:
1. **Tool Steel**: This is the most common material used for pin gauges due to its excellent hardness, wear resistance, and ability to maintain a precise diameter. Tool steel pin gauges are often hardened and ground to achieve the required precision.
2. **Carbide**: Tungsten carbide pin gauges are used when extreme hardness and wear resistance are required. They are more durable than tool steel and are ideal for high-volume or abrasive applications.
3. **Ceramic**: Ceramic pin gauges offer excellent wear resistance and are non-magnetic, making them suitable for applications where magnetic interference must be avoided. They are also resistant to corrosion and thermal expansion.
4. **Stainless Steel**: Stainless steel pin gauges are used in environments where corrosion resistance is important. They are less hard than tool steel or carbide but offer good durability and resistance to rust.
5. **Chromium-Plated Steel**: These pin gauges have a layer of chromium plating to enhance corrosion resistance and reduce friction. They are used in applications where a smooth surface finish is critical.
6. **Invar**: Invar pin gauges are used in applications requiring minimal thermal expansion. Invar is an alloy known for its low coefficient of thermal expansion, making it suitable for precision measurements in varying temperatures.
Each material offers specific advantages depending on the application, such as hardness, wear resistance, corrosion resistance, and thermal stability. The choice of material depends on the specific requirements of the measurement task, including the environment in which the pin gauges will be used and the level of precision needed.
How do you maintain and store pin gauges?
To maintain and store pin gauges effectively, follow these steps:
1. **Cleaning**: After each use, clean the pin gauges with a lint-free cloth to remove any debris, oil, or residue. Use a mild solvent if necessary, ensuring the gauges are completely dry afterward to prevent corrosion.
2. **Inspection**: Regularly inspect the pin gauges for wear, damage, or corrosion. Check for any deviations in diameter using a micrometer or a calibrated measuring tool. Replace any gauges that are out of tolerance.
3. **Calibration**: Schedule periodic calibration to ensure accuracy. This should be done by a certified calibration service. Keep records of calibration dates and results for quality control purposes.
4. **Lubrication**: Apply a thin layer of rust-preventive oil to the gauges after cleaning and before storage. This helps protect against moisture and corrosion.
5. **Storage**: Store pin gauges in a dedicated, organized storage box or cabinet with individual slots or compartments to prevent contact and damage. Ensure the storage area is clean, dry, and free from temperature fluctuations and humidity.
6. **Handling**: Handle pin gauges with care, using gloves if necessary to prevent oils and moisture from your hands from transferring to the gauges. Avoid dropping or knocking them against hard surfaces.
7. **Environment**: Maintain a controlled environment for storage, ideally with low humidity and stable temperature. Use desiccants or dehumidifiers if necessary to control moisture levels.
8. **Documentation**: Keep detailed records of each pin gauge, including purchase date, calibration history, and any maintenance performed. This helps track the lifespan and usage of each gauge.
By following these practices, you can ensure the longevity and accuracy of your pin gauges, maintaining their reliability for precise measurements.
What are the tolerances for pin gauges?
Pin gauges, also known as gauge pins, are precision tools used to measure the diameter of holes or the distance between surfaces. The tolerances for pin gauges depend on the class of the gauge, which indicates its precision level. The most common classes are:
1. **Class ZZ**: This is the least precise class, with a tolerance of ±0.0002 inches (±0.00508 mm). It is suitable for general-purpose applications where high precision is not critical.
2. **Class Z**: This class offers a tighter tolerance of ±0.0001 inches (±0.00254 mm). It is used in applications requiring moderate precision.
3. **Class Y**: With a tolerance of ±0.00005 inches (±0.00127 mm), Class Y pin gauges are used in more precise applications, such as quality control and inspection processes.
4. **Class X**: This class provides a tolerance of ±0.00004 inches (±0.001016 mm). It is used in high-precision applications, including tool and die making.
5. **Class XX**: The most precise class, with a tolerance of ±0.00002 inches (±0.000508 mm). Class XX pin gauges are used in the most demanding applications, such as aerospace and high-precision engineering.
These tolerances ensure that pin gauges can accurately measure dimensions within the specified range, providing reliable and repeatable results. The choice of class depends on the specific requirements of the application, including the level of precision needed and the acceptable margin of error.