.....Read More

Frequently Asked Questions

What are the best paint brushes for cutting in edges?

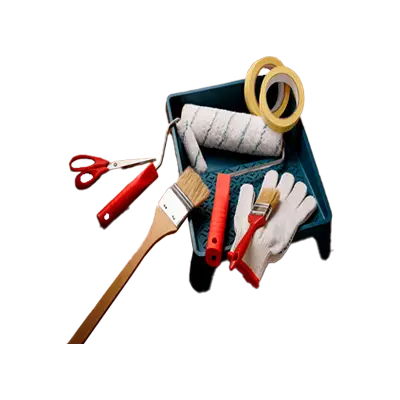
When "cutting in" edges with paint, precision and control are key. For this task, angled sash brushes are generally considered the best choice. These brushes have bristles cut at an angle, which allows for a sharper, more defined line when painting along trim, ceilings, or corners. The angle also helps in holding more paint and releasing it smoothly, reducing the need for frequent reloads and ensuring a consistent finish. Look for brushes with synthetic bristles, as they tend to hold their shape better and are easier to clean, especially with water-based paints. Natural bristles are often preferred for oil-based paints. A comfortable handle and a well-balanced brush can also significantly improve the painting experience and the quality of your cut-in lines. Popular sizes for cutting in range from 1.5 inches to 2.5 inches, depending on the size of the area you are working on and your personal preference.

How do I choose the right roller for my project?

Choosing the right roller for your project depends on several factors, including the type of surface, the kind of paint or coating you're using, and the desired finish. For smooth surfaces like drywall or plaster, a short-nap roller (1/4" to 3/8") is ideal. This type of roller provides a smooth finish with minimal texture. When working with semi-smooth surfaces, such as lightly textured walls or wood, a medium-nap roller (3/8" to 1/2") offers a good balance, providing sufficient coverage while still allowing for a relatively smooth appearance. For rough surfaces like stucco, brick, or heavily textured walls, a long-nap roller (3/4" to 1 1/4") is necessary. The longer fibers can reach into crevices and ensure adequate paint transfer. The type of paint also influences roller choice. For oil-based paints and enamels, natural fiber rollers (like lambskin or mohair) are often preferred as they hold and release these thicker paints effectively. For water-based or latex paints, synthetic fiber rollers (polyester or nylon blends) are more suitable as they resist matting and offer excellent durability. Consider the core material of the roller as well. Phenolic cores are durable and reusable, while cardboard cores are more economical for single-use projects. Finally, ensure the roller frame is sturdy and comfortable to hold for prolonged use. By considering these elements, you can select the optimal roller for a professional-looking finish.

What type of paint sprayer is best for home use?

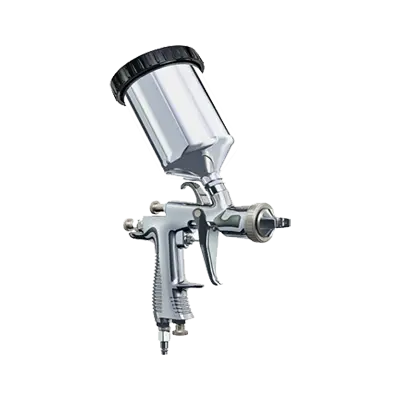
For home use, the best type of paint sprayer often depends on the specific projects you'll be tackling. For general interior walls and larger outdoor surfaces like fences or decks, an airless paint sprayer is highly recommended. These sprayers work by pumping paint at very high pressure through a small tip, which atomizes the paint into a fine, even spray. This allows for fast coverage and a smooth finish with various types of paints and stains, including latex and oil-based. For more detailed work, such as furniture, cabinets, or trim, a High-Volume Low-Pressure (HVLP) sprayer is a better choice. HVLP sprayers use a higher volume of air at a lower pressure, resulting in less overspray and a finer finish. This precision makes them ideal for achieving professional-looking results on smaller, intricate items. They are also more efficient with paint, wasting less material. Consider the types of projects you'll be doing most frequently, the types of materials you'll be spraying, and your budget when making your decision.

How do I properly clean and maintain paint brushes and rollers?

Properly cleaning and maintaining paint brushes and rollers is crucial for their longevity and performance. Immediately after painting, remove as much excess paint as possible from the tools. For water-based paints, rinse brushes and rollers thoroughly under warm running water until the water runs clear. You can use a brush comb to help remove paint residue from bristles. For oil-based paints, you'll need a paint thinner or mineral spirits. Pour a small amount into a container, and gently swirl the brush or roller in it. Repeat with clean thinner until the paint is dissolved. Once most of the paint is removed, wash brushes with a mild soap and warm water, working the lather into the bristles. Rinse thoroughly. For rollers, gently squeeze out any remaining paint and wash with soap and water, massaging the nap to release paint. After washing, reshape brush bristles to their original form. For rollers, stand them upright to dry to prevent flattening of the nap. Store brushes by hanging them or laying them flat to prevent bristles from bending. Rollers should also be stored upright or in their original packaging to maintain their shape. Proper cleaning and storage will ensure your tools are ready for your next project and provide smooth, even results.

What is the difference between synthetic and natural bristle brushes?

Synthetic bristle brushes, typically made from nylon or polyester, are ideal for water-based paints like acrylics and latex. They are durable, easy to clean, and maintain their shape well, even when wet. Natural bristle brushes, usually made from animal hair like hog or ox, are best suited for oil-based paints, varnishes, and stains. They excel at holding and distributing thicker paints evenly, but they can swell and lose their shape when used with water-based products. Natural bristles also tend to be more absorbent and can be harder to clean thoroughly.

How do I prevent paint from bleeding under painter's tape?

To prevent paint from bleeding under painter's tape, first ensure the surface is clean, dry, and smooth. Apply high-quality painter's tape firmly, pressing down along the edges to create a tight seal. For best results, use a putty knife or a credit card to press down the tape edges. Next, apply a thin coat of the base color or a clear sealant (like Mod Podge or clear caulk) along the edge of the tape where the paint will be applied. This creates a barrier, filling any tiny gaps under the tape. Once this seal coat is dry to the touch, apply your desired paint color in light, even coats. Remove the tape while the paint is still slightly wet, pulling it at a 45-degree angle away from the painted surface for a crisp line. If the paint dries completely, the tape might pull off dried paint, creating a jagged edge.

What is the best way to prepare a surface before painting?

Preparing a surface before painting is crucial for a smooth, durable, and professional-looking finish. The best approach typically involves several key steps. First, thoroughly clean the surface. Use a degreaser or mild detergent and warm water to remove dirt, grime, grease, and any other contaminants. For walls, a mixture of trisodium phosphate (TSP) and water can be effective. Rinse the surface well with clean water to remove any soap residue and allow it to dry completely. Next, address any imperfections. Fill holes or cracks with spackle or wood filler, sanding smooth once dry. For rough or glossy surfaces, light sanding (with fine-grit sandpaper, typically 120-220 grit) is necessary to create a profile that the paint can adhere to. After sanding, wipe away all dust with a tack cloth or damp cloth. Finally, prime the surface. Priming is essential for consistent color, improved adhesion, and blocking stains. Choose a primer appropriate for your surface type (e.g., stain-blocking primer for water stains, bonding primer for challenging surfaces like laminate or tile). Apply one or two thin, even coats of primer, allowing adequate drying time between coats as per the manufacturer's instructions. Once the primer is dry, the surface is ready for paint.

How do I choose the right type of sandpaper for my project?

Choosing the right type of sandpaper is crucial for a successful project. Different grits and types of sandpaper are designed for specific tasks. For rough removal of material, start with a coarse grit (e.g., 40-80 grit). This will quickly shape and level surfaces. For general sanding and preparing surfaces for finish, medium grits (e.g., 100-150 grit) are suitable. To achieve a smooth finish, move to fine grits (e.g., 180-220 grit and higher). For very fine finishing or polishing, extra-fine grits (e.g., 320 grit and higher) are used. Beyond grit, consider the abrasive material. Aluminum oxide is a common and versatile abrasive, good for wood, metal, and painted surfaces. Silicon carbide is sharper and excellent for wet sanding, plastics, and metals. Garnet is softer and ideal for woodworking as it leaves a finer finish. Zirconia alumina is durable and effective for aggressive sanding of wood and metal. Lastly, ceramic abrasives are very tough and best for heavy material removal on hard surfaces. Always test a small, inconspicuous area first to ensure you achieve the desired result.

What are the benefits of using a paint sprayer over a roller or brush?

Using a paint sprayer offers several advantages over traditional rollers or brushes, particularly for larger projects or achieving a professional finish. One significant benefit is speed. Paint sprayers can cover large surfaces much more quickly than manual methods, significantly reducing project time. This is especially true for walls, ceilings, and fences. Another key advantage is the smooth and even finish. Sprayers atomize the paint into a fine mist, resulting in a consistent, streak-free coat without brush marks or roller textures. This is ideal for achieving a high-quality appearance on furniture, cabinets, and doors. Sprayers also excel at coating uneven or intricate surfaces, such as detailed trim, lattice work, or textured walls, where brushes and rollers might struggle to provide full coverage. Furthermore, sprayers can often apply a thicker, more durable coat of paint in fewer passes, leading to better protection and longevity for the painted surface. While there's a learning curve to mastering a paint sprayer and proper masking is essential to prevent overspray, the benefits of efficiency, finish quality, and versatility often make it the preferred tool for many painting projects.

How do I safely dispose of leftover paint and supplies?

Please provide the topic you would like me to elaborate on.