Call +(254) 703 030 000 / 751 483 999 / 721 704 777
- Home
- Floor Wall Other Surface Finishes
- Paint Equipment Supplies
- Spray Paint Systems
.....Read More
Frequently Asked Questions
What surfaces can spray paint be used on?
Spray paint is a versatile medium that can be used on a wide range of surfaces, making it a popular choice for both artistic and practical applications. Here are some common surfaces where spray paint can be effectively used:
1. **Metal**: Spray paint adheres well to metal surfaces, making it ideal for painting items like bicycles, cars, and metal furniture. Proper surface preparation, such as cleaning and priming, enhances adhesion and durability.
2. **Wood**: Both raw and finished wood can be spray painted. Sanding the surface and applying a primer can help achieve a smooth, even finish. It's commonly used for furniture, crafts, and home decor.
3. **Plastic**: Specialized spray paints are available for plastic surfaces, which often require a primer to ensure proper adhesion. This is useful for items like outdoor furniture, toys, and household items.
4. **Glass**: Spray paint can be used on glass for decorative purposes. Frosted or stained glass effects can be achieved with specific types of spray paint designed for glass surfaces.
5. **Ceramic and Porcelain**: These surfaces can be spray painted for decorative purposes, such as updating tiles or pottery. A primer may be necessary for better adhesion.
6. **Fabric**: Fabric spray paints are available for textiles, allowing for customization of clothing, upholstery, and other fabric items. These paints are formulated to be flexible and washable.
7. **Concrete and Masonry**: Spray paint can be used on concrete surfaces like walls, floors, and statues. It is often used for graffiti art and outdoor projects.
8. **Paper and Cardboard**: Ideal for art projects, spray paint can be used on paper and cardboard, though care must be taken to prevent warping.
9. **Canvas**: Artists often use spray paint on canvas for creating murals and artworks, taking advantage of its quick application and vibrant colors.
Proper surface preparation and the use of appropriate primers and sealers are crucial for achieving the best results on any surface.
How long does spray paint take to dry?
Spray paint typically takes about 10 to 30 minutes to become dry to the touch, depending on factors such as the type of paint, the surface being painted, and environmental conditions. However, for a full cure, which means the paint has completely hardened and is ready for handling or further coats, it can take anywhere from 8 to 24 hours.
Different types of spray paint have varying drying times. For instance, enamel spray paints generally dry faster than lacquer-based paints. The surface material also plays a role; porous surfaces like wood may absorb paint and dry quicker than non-porous surfaces like metal or plastic.
Environmental conditions significantly affect drying times. High humidity and low temperatures can slow down the drying process, while warm, dry conditions can speed it up. It's advisable to spray paint in a well-ventilated area with temperatures between 65°F and 85°F (18°C to 29°C) and low humidity for optimal drying.
Applying thin, even coats rather than thick layers can also help the paint dry faster. It's recommended to wait at least 5 to 10 minutes between coats to allow the paint to set properly. Always follow the manufacturer's instructions on the spray paint can for the best results.
In summary, while spray paint may be dry to the touch within 10 to 30 minutes, allowing a full 24 hours for curing is ideal to ensure the paint is fully set and durable.
Can spray paint be used on metal surfaces?
Yes, spray paint can be used on metal surfaces. It is a popular choice for painting metal due to its ease of application and ability to provide a smooth, even finish. Before applying spray paint, it is important to prepare the metal surface properly to ensure good adhesion and a long-lasting finish. This involves cleaning the surface to remove any dirt, grease, or rust, and sanding it to create a slightly rough texture for better paint adherence. Using a primer specifically designed for metal surfaces is also recommended, as it helps the paint bond better and provides additional protection against rust and corrosion.
When selecting spray paint, choose one that is formulated for use on metal. These paints often contain rust inhibitors and are designed to withstand the expansion and contraction of metal surfaces. Applying the paint in thin, even coats is crucial to avoid drips and runs. It is advisable to hold the spray can at a consistent distance from the surface, usually about 8-12 inches, and to use smooth, sweeping motions.
Allow each coat to dry completely before applying the next one, and consider applying a clear topcoat for added durability and protection. Spray painting should be done in a well-ventilated area or outdoors to avoid inhaling fumes, and protective gear such as masks and gloves should be worn.
In summary, spray paint is an effective and convenient option for painting metal surfaces, provided that proper preparation and application techniques are followed.
What is the difference between spray paint and spray primer?
Spray paint and spray primer serve different purposes in the painting process. Spray paint is a type of paint that comes in an aerosol can, designed to provide a smooth, even coat of color on a surface. It is available in a wide range of colors and finishes, such as matte, gloss, and metallic. Spray paint is typically used for the final coat on a project, providing the desired aesthetic appearance and protection to the surface.
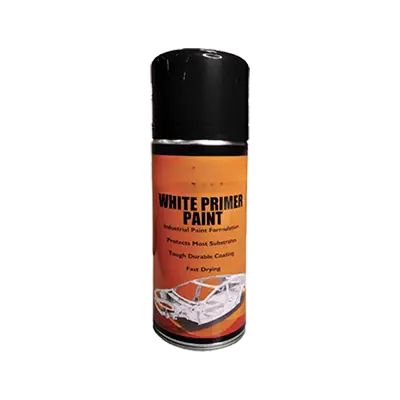
Spray primer, on the other hand, is a preparatory coating applied before the application of paint. It is also available in aerosol form and is used to create a uniform surface for the paint to adhere to. Primers are essential for improving the adhesion of paint, ensuring better durability and longevity of the finish. They can also help in covering imperfections, sealing porous surfaces, and preventing stains or rust from bleeding through the paint.
The key differences between the two lie in their functions and compositions. Spray primer is formulated to bond well with the surface and provide a suitable base for the paint, often containing ingredients that enhance adhesion and surface preparation. Spray paint, however, is formulated to provide color and finish, with a focus on appearance and protection.
In summary, spray primer is used as a base coat to prepare the surface, while spray paint is used as a topcoat to provide color and finish. Using both in conjunction ensures a more durable and visually appealing result.
How do I prevent spray paint from dripping?
To prevent spray paint from dripping, follow these steps:
1. **Surface Preparation**: Ensure the surface is clean, dry, and free of dust, grease, or rust. Sand the surface lightly to create a texture for better paint adhesion.
2. **Use Primer**: Apply a suitable primer to the surface. This helps the paint adhere better and reduces the likelihood of drips.
3. **Shake the Can**: Shake the spray paint can vigorously for at least one to two minutes. This ensures the paint is well-mixed and provides an even spray.
4. **Test Spray**: Before applying to the main surface, test the spray on a piece of cardboard or scrap material to ensure the nozzle is working correctly and the paint is flowing evenly.
5. **Distance and Angle**: Hold the can 8-12 inches away from the surface. Maintain a consistent distance and angle to ensure even coverage.
6. **Thin Coats**: Apply several thin coats rather than one thick coat. This reduces the risk of drips and allows each layer to dry properly.
7. **Steady Movement**: Move the can in a steady, sweeping motion, either horizontally or vertically. Start spraying slightly before the edge of the surface and continue past the opposite edge to avoid buildup at the start and stop points.
8. **Drying Time**: Allow each coat to dry completely before applying the next. Follow the manufacturer's recommended drying times.
9. **Environmental Conditions**: Avoid painting in high humidity or extreme temperatures, as these can affect drying time and paint consistency.
10. **Nozzle Maintenance**: Clean the nozzle regularly during use to prevent clogging, which can cause uneven spray and drips.
By following these steps, you can achieve a smooth, drip-free finish with spray paint.
Is it necessary to use a primer before spray painting?
Using a primer before spray painting is generally recommended but not always necessary. The necessity depends on the surface material, the type of paint, and the desired finish.
Primers serve several purposes: they create a uniform surface, improve paint adhesion, and enhance durability. For porous surfaces like wood, a primer is crucial as it seals the surface, preventing the paint from soaking in unevenly. On metal surfaces, primers help prevent rust and corrosion, especially if the metal is exposed to moisture. For plastic, a primer designed for plastic surfaces ensures better adhesion, as paint alone may not stick well.
If you're painting over a previously painted surface, a primer might not be necessary unless the existing paint is glossy, in which case a primer can help the new paint adhere better. When changing from a dark to a light color, a primer can help cover the dark color more effectively, reducing the number of paint coats needed.
Some spray paints come with built-in primers, which can eliminate the need for a separate priming step. However, these may not be as effective on challenging surfaces or for projects requiring high durability.
In summary, while not always mandatory, using a primer can significantly improve the outcome of a spray painting project by ensuring better adhesion, coverage, and longevity of the paint.
How do I clean spray paint nozzles?
To clean spray paint nozzles effectively, follow these steps:
1. **Immediate Cleaning After Use**: After using the spray paint, turn the can upside down and press the nozzle until only clear gas comes out. This helps clear the paint from the nozzle.
2. **Remove the Nozzle**: Carefully pull the nozzle off the spray can. Be gentle to avoid breaking it.
3. **Soak in Solvent**: Place the nozzle in a small container filled with a solvent like mineral spirits, acetone, or paint thinner. Let it soak for 15-30 minutes to dissolve any paint residue.
4. **Use a Pin or Needle**: After soaking, use a pin or needle to gently clear any remaining paint from the nozzle's opening. Be careful not to enlarge or damage the nozzle hole.
5. **Rinse and Dry**: Rinse the nozzle with warm water to remove any solvent and loosened paint. Shake off excess water and let it air dry completely.
6. **Reattach and Test**: Once dry, reattach the nozzle to the spray can. Test it by spraying on a scrap surface to ensure it’s clear and functioning properly.
7. **Regular Maintenance**: For frequent users, consider keeping a spare set of nozzles and cleaning them regularly to ensure optimal performance.
8. **Storage**: Store spray cans with the nozzle facing upwards to prevent clogging.
By following these steps, you can maintain the functionality of spray paint nozzles and ensure a smooth, even spray for future projects.


