Call +(254) 703 030 000 / 751 483 999 / 721 704 777
.....Read More
Frequently Asked Questions
What are the different types of automotive paints and coatings?
Automotive paints and coatings are essential for vehicle aesthetics, protection, and durability. The primary types include:
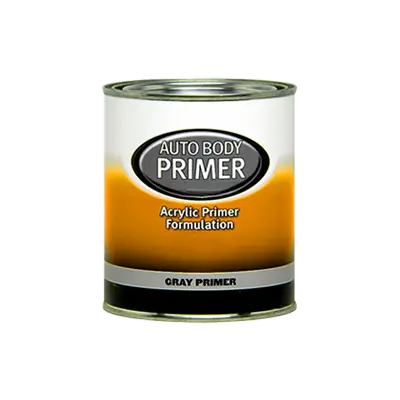
1. **Primer**: This is the initial layer applied to the vehicle's surface. It ensures better adhesion of paint, increases durability, and provides additional protection against corrosion and rust. Primers can be epoxy, urethane, or polyester-based.
2. **Base Coat**: This is the colored layer that provides the vehicle's aesthetic appeal. Base coats come in various finishes:
- **Solid Paints**: These are single-color paints without any special effects.
- **Metallic Paints**: Contain small metal flakes that reflect light, giving a sparkling effect.
- **Pearlescent Paints**: Use ceramic crystals to create a shimmering effect, changing color under different lighting.
3. **Clear Coat**: This is a transparent layer applied over the base coat. It provides gloss and depth, enhancing the vehicle's appearance. It also offers protection against UV rays, scratches, and environmental damage.
4. **Specialty Coatings**: These include:
- **Matte Finishes**: Provide a non-glossy, flat appearance.
- **Anti-Chip Coatings**: Protect areas prone to stone chips and debris.
- **Anti-Graffiti Coatings**: Allow easy removal of graffiti without damaging the underlying paint.
5. **Electrocoat (E-coat)**: Used primarily for corrosion resistance, this is an electrically-applied paint layer that ensures even coverage, especially in hard-to-reach areas.
6. **Powder Coatings**: Used for parts like wheels and trims, these coatings are applied as a dry powder and then cured under heat, providing a durable and uniform finish.
Each type of paint and coating serves a specific purpose, contributing to the vehicle's overall performance, longevity, and visual appeal.
How do I choose the right automotive paint for my vehicle?
1. **Determine the Purpose**: Identify if the paint is for a full repaint, touch-up, or custom design. This will influence the type and quantity of paint needed.
2. **Understand Paint Types**:
- **Acrylic Lacquer**: Easy to apply and gives a glossy finish but less durable.
- **Acrylic Enamel**: More durable than lacquer, with a hard finish.
- **Acrylic Urethane**: Offers a durable finish and is easier to apply than enamel.
- **Water-Based Paints**: Environmentally friendly and increasingly popular.
3. **Consider the Finish**:
- **Solid**: Single color, no effects.
- **Metallic**: Contains small metal flakes for a sparkling effect.
- **Pearlescent**: Uses ceramic crystals for a shimmering effect.
- **Matte**: Non-reflective, flat finish.
4. **Color Matching**: Use the vehicle’s VIN or paint code to find an exact match. Consider the age and condition of the existing paint, as it may have faded.
5. **Quality and Brand**: Opt for reputable brands known for durability and color accuracy. Higher quality paints often provide better coverage and longevity.
6. **Budget**: Balance between cost and quality. Higher-end paints may be more expensive but offer better results and longevity.
7. **Application Method**: Decide if you will use spray cans, spray guns, or professional services. This affects the type of paint and equipment needed.
8. **Environmental Considerations**: Check local regulations for VOC (Volatile Organic Compounds) compliance and choose eco-friendly options if required.
9. **Consult Professionals**: If unsure, seek advice from automotive paint professionals or body shops for recommendations based on your specific needs.
What is the process for applying automotive paint and coatings?
The process for applying automotive paint and coatings involves several key steps:
1. **Surface Preparation**: The vehicle's surface must be thoroughly cleaned and sanded to remove any old paint, rust, or debris. This ensures a smooth base for the new paint. Any dents or imperfections are filled with body filler and sanded down.
2. **Priming**: A primer is applied to the prepared surface to enhance paint adhesion and provide a uniform base. It also helps in rust prevention. The primer is allowed to dry and is then sanded to ensure smoothness.
3. **Base Coat Application**: The base coat, which contains the vehicle's color, is applied in multiple thin layers. Each layer is allowed to dry before the next is applied. This step may involve different types of paint, such as metallic or pearlescent, depending on the desired finish.
4. **Clear Coat Application**: A clear coat is applied over the base coat to provide gloss and protection against environmental damage. Like the base coat, it is applied in multiple layers, with drying time between each.
5. **Curing**: The painted vehicle is then cured, often in a heated booth, to harden the paint and ensure durability.
6. **Polishing and Buffing**: Once the paint is fully cured, the surface is polished and buffed to remove any imperfections and enhance the shine.
7. **Quality Inspection**: The final step involves a thorough inspection to ensure the paint job meets quality standards, checking for color consistency, smoothness, and any defects.
This process requires precision and attention to detail to achieve a high-quality finish.
How do I prevent rust on my vehicle with coatings?
To prevent rust on your vehicle using coatings, follow these steps:
1. **Clean the Vehicle**: Thoroughly wash your vehicle to remove dirt, grime, and existing rust. Use a degreaser for stubborn spots and ensure the surface is completely dry before proceeding.
2. **Inspect for Rust**: Check for any existing rust spots. If found, sand them down to bare metal using sandpaper or a wire brush. Clean the area again to remove any dust or debris.
3. **Apply Rust Converter**: For areas with minor rust, apply a rust converter. This chemical treatment transforms rust into a stable compound, preventing further corrosion.
4. **Primer Application**: Use a rust-inhibiting primer on bare metal areas. This provides a protective layer and ensures better adhesion of the topcoat.
5. **Choose the Right Coating**: Select a high-quality automotive paint or rust-preventive coating. Options include epoxy, polyurethane, or specialized rust-proofing sprays. Ensure the product is compatible with your vehicle's existing paint.
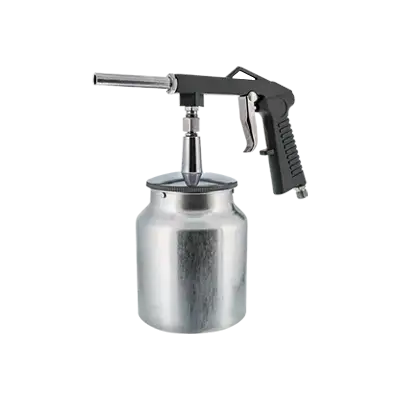
6. **Apply the Coating**: Use a spray gun or brush to apply the coating evenly. Follow the manufacturer's instructions for the number of coats and drying times. Ensure complete coverage, especially on vulnerable areas like wheel wells, undercarriage, and seams.
7. **Seal with a Clear Coat**: For added protection, apply a clear coat over the painted areas. This provides an additional barrier against moisture and environmental elements.
8. **Regular Maintenance**: Regularly wash and wax your vehicle to maintain the integrity of the coating. Inspect for chips or scratches and touch up as needed to prevent rust from forming.
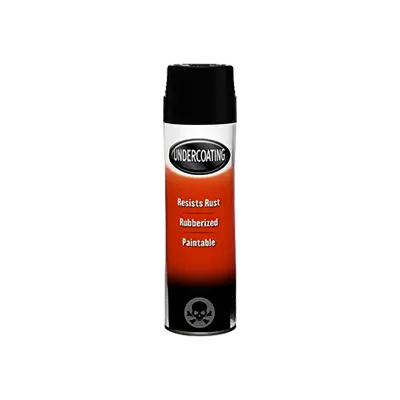
9. **Undercoating**: Consider applying an undercoating to the vehicle's underside. This thick, rubberized coating protects against road salt, moisture, and debris.
By following these steps, you can effectively prevent rust on your vehicle using coatings.
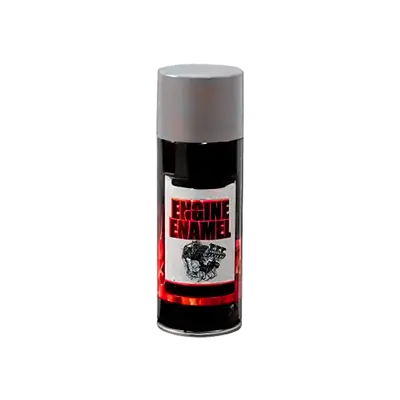
What are the benefits of using high-heat engine and exhaust primers?
High-heat engine and exhaust primers offer several benefits, particularly in automotive and industrial applications where components are exposed to extreme temperatures. These primers are specially formulated to withstand high temperatures, providing a durable base for subsequent coatings. Here are the key benefits:
1. **Heat Resistance**: High-heat primers can endure temperatures often exceeding 1000°F (538°C), making them ideal for engines and exhaust systems that experience intense heat.
2. **Corrosion Protection**: They provide a protective barrier against rust and corrosion, which is crucial for metal components exposed to harsh environmental conditions and thermal cycling.
3. **Improved Adhesion**: These primers enhance the adhesion of topcoats, ensuring that paint or other finishes adhere properly and last longer, even under high-temperature conditions.
4. **Durability**: By forming a tough, resilient layer, high-heat primers help extend the lifespan of engine and exhaust components, reducing the need for frequent maintenance or replacements.
5. **Thermal Stability**: They maintain their structural integrity and protective qualities even when subjected to rapid temperature changes, preventing cracking or peeling.
6. **Aesthetic Enhancement**: High-heat primers can improve the appearance of engine and exhaust parts by providing a smooth, uniform surface for topcoats, which can be important for custom or performance vehicles.
7. **Chemical Resistance**: These primers often offer resistance to chemicals such as oils, fuels, and solvents, which are commonly encountered in automotive environments.
8. **Cost-Effectiveness**: By protecting components from heat damage and corrosion, high-heat primers can reduce repair costs and downtime, offering long-term savings.
Overall, high-heat engine and exhaust primers are essential for maintaining the performance, appearance, and longevity of components exposed to extreme temperatures.
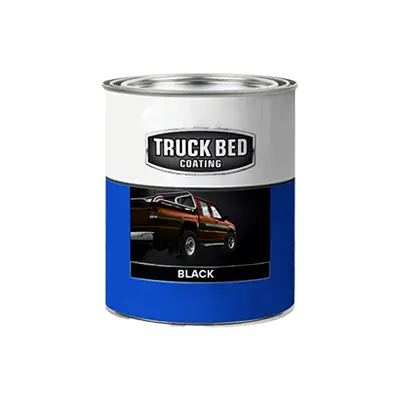
How do I apply truck bed coatings for maximum durability?
1. **Preparation**: Start by thoroughly cleaning the truck bed. Remove any debris, dirt, and grease using a degreaser or a specialized cleaner. Rinse and let it dry completely. Sand the surface with 80-120 grit sandpaper to remove any rust and create a rough texture for better adhesion. Wipe down with a tack cloth to remove dust.
2. **Masking**: Use painter’s tape and plastic sheeting to cover areas you don’t want coated, such as the truck’s exterior, tailgate edges, and any hardware.
3. **Priming**: Apply a primer if recommended by the coating manufacturer. This step enhances adhesion and provides an additional layer of protection. Allow the primer to dry as per the instructions.
4. **Mixing**: Thoroughly mix the truck bed coating. If using a two-part system, ensure the components are mixed in the correct ratio. Use a stir stick or a mechanical mixer for even consistency.
5. **Application**: Use a brush, roller, or spray gun to apply the coating. Start from the front of the bed and work towards the tailgate. Apply in even, overlapping strokes to avoid streaks and ensure full coverage. Pay special attention to corners and seams.
6. **Curing**: Allow the first coat to dry as per the manufacturer’s instructions, usually 1-2 hours. Apply a second coat for enhanced durability. Some products may require a third coat.
7. **Final Curing**: Let the coating cure completely, which can take 24-72 hours depending on the product and environmental conditions. Avoid heavy use until fully cured.
8. **Inspection**: Check for any missed spots or thin areas and touch up as necessary. Remove masking tape and plastic sheeting carefully.
9. **Maintenance**: Regularly clean the coated bed and inspect for damage. Touch up as needed to maintain protection.
What are the best practices for maintaining automotive paint and coatings?
To maintain automotive paint and coatings effectively, follow these best practices:
1. **Regular Washing**: Wash your vehicle every two weeks using a pH-balanced car shampoo and a microfiber mitt to prevent scratches. Rinse thoroughly to remove all soap residues.
2. **Drying**: Use a clean, soft microfiber towel to dry the car after washing to prevent water spots. Avoid air drying as it can leave mineral deposits.
3. **Waxing**: Apply a high-quality car wax every three months to protect the paint from UV rays, contaminants, and moisture. Waxing enhances the shine and provides a protective barrier.
4. **Polishing**: Polish the car once or twice a year to remove minor scratches and swirl marks. Use a dual-action polisher for best results, and follow up with a wax or sealant.
5. **Paint Sealants and Coatings**: Consider applying a paint sealant or ceramic coating for long-term protection. These provide a durable shield against environmental damage and make cleaning easier.
6. **Avoiding Harsh Chemicals**: Steer clear of household cleaning agents like dish soap, which can strip wax and damage the paint. Use products specifically designed for automotive finishes.
7. **Parking**: Whenever possible, park in a garage or shaded area to protect the paint from sun damage and bird droppings. Use a car cover if indoor parking is not available.
8. **Immediate Cleaning of Contaminants**: Quickly remove bird droppings, tree sap, and bug splatters, as they can etch into the paint. Use a detailing spray and a soft cloth for spot cleaning.
9. **Regular Inspection**: Periodically inspect the paint for chips and scratches. Touch up small areas promptly to prevent rust and further damage.
10. **Professional Detailing**: Consider professional detailing services annually for a thorough cleaning and protection application.
By adhering to these practices, you can maintain the aesthetic appeal and longevity of your vehicle's paint and coatings.