Call +(254) 703 030 000 / 751 483 999 / 721 704 777
.....Read More


Frequently Asked Questions
What is soldering and how does it work?
Soldering is a process used to join two or more metal components together by melting a filler metal, known as solder, into the joint. The solder has a lower melting point than the workpieces, allowing it to flow into the joint without melting the components themselves. This creates a strong, electrically conductive, and often airtight connection.
The process begins by cleaning the surfaces to be joined, ensuring they are free of oxides, dirt, and grease, which can prevent proper adhesion. A flux is often applied to the surfaces to further clean them and prevent oxidation during the heating process. Flux can be a separate substance or integrated into the solder itself.
A soldering iron or gun is used to heat the joint area. The tip of the soldering tool is applied to the metal surfaces, heating them to a temperature above the melting point of the solder but below the melting point of the workpieces. Once the surfaces are adequately heated, the solder is introduced to the joint. The heat causes the solder to melt and flow into the joint by capillary action, filling any gaps and creating a bond as it cools and solidifies.
Soldering is commonly used in electronics to connect components to circuit boards, in plumbing to join pipes, and in metalwork for creating intricate designs. The choice of solder depends on the application, with lead-based solders being traditional but lead-free solders becoming more common due to health and environmental concerns.
The result is a durable connection that can withstand mechanical stress and conduct electricity efficiently, making soldering an essential technique in various industries.
What are the different types of soldering techniques?
1. **Soft Soldering**: Utilizes a filler metal with a melting point below 400°C, typically tin-lead or lead-free alloys. It's commonly used in electronics for joining wires and components on circuit boards.
2. **Hard Soldering (Silver Soldering/Brazing)**: Involves higher temperatures and uses a filler metal with a melting point above 450°C. Silver soldering is used for stronger joints in plumbing, jewelry, and metalwork.
3. **Wave Soldering**: A bulk soldering process where electronic components are soldered to a PCB by passing them over a wave of molten solder. It's efficient for mass production of through-hole and surface-mount assemblies.
4. **Reflow Soldering**: Used primarily for surface-mount technology (SMT). Solder paste is applied to the PCB, components are placed, and the assembly is heated in a reflow oven to melt the solder and form joints.
5. **Selective Soldering**: Targets specific areas of a PCB for soldering, ideal for mixed-technology boards where only certain components require soldering.
6. **Torch Soldering**: Uses a gas torch to heat the workpieces and solder. It's suitable for plumbing and metalwork where precision is less critical.
7. **Induction Soldering**: Employs electromagnetic induction to heat the workpiece. It's fast and precise, used in applications requiring localized heating.
8. **Resistance Soldering**: Uses electrical resistance to generate heat at the joint. It's precise and used for delicate components and assemblies.
9. **Ultrasonic Soldering**: Uses ultrasonic vibrations to assist in the soldering process, often used for materials that are difficult to solder with traditional methods.
10. **Laser Soldering**: Employs a laser to heat the solder joint, offering precision and control, ideal for microelectronics and fine-pitch components.
How do you choose the right soldering iron?
To choose the right soldering iron, consider the following factors:
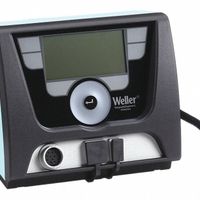
1. **Type of Soldering Iron**: Decide between a basic soldering iron, a soldering station, or a soldering gun. Basic irons are suitable for simple tasks, while stations offer temperature control for precision work. Guns are for heavy-duty tasks.
2. **Power and Wattage**: For electronics, a 20-50 watt iron is sufficient. Higher wattage irons heat up faster and maintain temperature better, which is crucial for larger components.
3. **Temperature Control**: Opt for a soldering iron with adjustable temperature settings. This feature allows you to work with different materials and components without damaging them.
4. **Tip Variety and Availability**: Ensure the iron supports interchangeable tips and that replacements are readily available. Different tips are needed for various tasks, such as fine work or larger joints.
5. **Ergonomics and Comfort**: Choose an iron with a comfortable grip, especially if you’ll be using it for extended periods. A lightweight design can reduce hand fatigue.
6. **Heat-up Time**: Consider how quickly the iron reaches the desired temperature. Faster heat-up times improve efficiency, especially in professional settings.
7. **Safety Features**: Look for features like auto shut-off and heat-resistant handles to prevent accidents and injuries.
8. **Brand and Reliability**: Opt for reputable brands known for quality and durability. Check reviews and ratings to gauge user satisfaction.
9. **Price and Budget**: Balance your needs with your budget. While higher-end models offer more features, a basic model may suffice for occasional use.
10. **Intended Use**: Match the iron to your specific needs, whether for hobbyist projects, professional electronics work, or heavy-duty applications.
What safety precautions should be taken during soldering?
1. **Ventilation**: Ensure the workspace is well-ventilated to avoid inhaling fumes. Use a fume extractor or work near an open window.
2. **Personal Protective Equipment (PPE)**: Wear safety goggles to protect your eyes from splashes and flying debris. Use heat-resistant gloves to prevent burns.
3. **Proper Attire**: Wear long sleeves and pants made of natural fibers to protect your skin from hot solder and splashes. Avoid loose clothing and jewelry.
4. **Soldering Iron Safety**: Use a soldering iron with a stand to prevent accidental burns. Always return the iron to its stand when not in use.
5. **Electrical Safety**: Ensure all electrical equipment is properly grounded. Inspect cords and plugs for damage before use.
6. **Fire Safety**: Keep a fire extinguisher nearby. Avoid soldering near flammable materials.
7. **Workspace Organization**: Keep the workspace tidy to prevent accidents. Ensure all tools and materials are within easy reach.
8. **Material Handling**: Use lead-free solder to minimize exposure to toxic substances. Wash hands thoroughly after handling solder and flux.
9. **Temperature Control**: Use a soldering iron with adjustable temperature settings to prevent overheating and damage to components.
10. **First Aid**: Be familiar with basic first aid for burns and have a first aid kit accessible.
11. **Training**: Ensure you are trained in proper soldering techniques and safety procedures.
12. **Disposal**: Dispose of solder waste and used materials according to local regulations to prevent environmental contamination.
How do you properly maintain and clean a soldering iron?
To properly maintain and clean a soldering iron, follow these steps:
1. **Preparation**: Ensure the soldering iron is unplugged and cooled down before cleaning. Safety is paramount to avoid burns or electric shock.
2. **Cleaning the Tip**:
- **Use a Damp Sponge**: When the iron is hot, wipe the tip on a damp, not wet, sponge to remove oxidation and old solder. This should be done regularly during use.
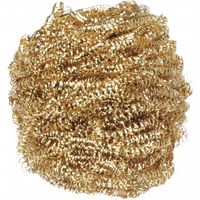
- **Brass Wool**: Alternatively, use brass wool or a wire cleaner to clean the tip without cooling it down as much as a sponge would.
- **Tip Tinner**: Occasionally, use a tip tinner or reactivator to remove stubborn oxidation and re-tin the tip. Simply dip the hot tip into the tinner and wipe off excess.
3. **Tinning the Tip**: After cleaning, apply a small amount of fresh solder to the tip. This process, known as tinning, prevents oxidation and ensures efficient heat transfer.
4. **Inspect the Tip**: Regularly check the tip for wear or damage. Replace it if it becomes pitted, deformed, or excessively worn, as this can affect performance.
5. **Cleaning the Iron Body**: Wipe the soldering iron body with a dry or slightly damp cloth to remove dust and debris. Avoid using water on electrical parts.
6. **Storage**: Store the soldering iron in a stand when not in use. Ensure the tip is tinned before storage to prevent oxidation.
7. **Regular Maintenance**: Periodically disassemble the soldering iron (if applicable) to clean internal components and check for loose connections. Follow the manufacturer's instructions for maintenance.
By following these steps, you can extend the life of your soldering iron and ensure it functions efficiently.
What are the common soldering mistakes and how to avoid them?
Common soldering mistakes include:
1. **Cold Joints**: Occur when the solder doesn't melt completely, leading to weak connections. Avoid by ensuring the soldering iron is hot enough and maintaining contact until the solder flows smoothly.
2. **Insufficient Wetting**: Happens when solder doesn't adhere properly to the components or pads. Prevent by cleaning surfaces thoroughly and using flux to promote adhesion.
3. **Excessive Solder**: Results in solder bridges or short circuits. Avoid by using the right amount of solder and practicing control over the soldering process.
4. **Solder Bridges**: Occur when solder connects two adjacent pads unintentionally. Prevent by using a fine-tipped iron and desoldering braid to remove excess solder.
5. **Overheating Components**: Can damage sensitive components. Avoid by using a temperature-controlled soldering iron and minimizing contact time.
6. **Poor Soldering Iron Maintenance**: Leads to inefficient heat transfer. Prevent by regularly cleaning the tip and tinning it with solder to prevent oxidation.
7. **Wrong Solder Type**: Using inappropriate solder can cause poor joints. Use lead-free or leaded solder as required, ensuring compatibility with the components.
8. **Improper Joint Preparation**: Dirty or oxidized surfaces hinder soldering. Clean all surfaces and use flux to remove oxidation.
9. **Incorrect Component Placement**: Leads to misalignment and poor connections. Double-check component orientation and placement before soldering.
10. **Inadequate Heat Transfer**: Results in weak joints. Ensure the soldering iron tip is clean and properly sized for the job.
To avoid these mistakes, practice good soldering techniques, maintain your tools, and ensure a clean working environment.
How do you desolder components from a PCB?
To desolder components from a PCB, follow these steps:
1. **Preparation**: Ensure you have the necessary tools: a soldering iron, desoldering pump (solder sucker), desoldering braid (wick), tweezers, and safety equipment like goggles. Work in a well-ventilated area.
2. **Heat the Soldering Iron**: Plug in the soldering iron and let it reach the appropriate temperature, typically around 350°C (662°F) for most soldering tasks.
3. **Apply Flux**: Apply a small amount of flux to the solder joints. This helps in heat transfer and makes the solder easier to remove.
4. **Desoldering with a Pump**:
- Place the soldering iron tip on the solder joint to melt the solder.
- Quickly place the desoldering pump over the molten solder and activate it to suck up the solder.
- Repeat if necessary until the joint is free of solder.
5. **Desoldering with Braid**:
- Place the desoldering braid over the solder joint.
- Press the heated soldering iron tip onto the braid. The heat will melt the solder, which is then absorbed by the braid.
- Remove the braid and cut off the used portion. Repeat if needed.
6. **Component Removal**: Once the solder is removed, gently lift the component using tweezers. If it doesn’t come off easily, check for remaining solder and repeat the desoldering process.
7. **Clean the Area**: Use isopropyl alcohol and a brush to clean any flux residue from the PCB.
8. **Inspect the PCB**: Check for any damage to the PCB pads or traces. Repair if necessary before installing new components.
9. **Safety**: Turn off and unplug the soldering iron. Dispose of any waste materials properly.
By following these steps, you can effectively desolder components from a PCB without damaging the board or the components.
What is the difference between soldering and welding?
Soldering and welding are both techniques used to join materials, primarily metals, but they differ significantly in their processes, applications, and outcomes.
Soldering involves joining two or more metal items by melting and flowing a filler metal, known as solder, into the joint. The solder has a lower melting point than the workpieces, so the base metals do not melt. Soldering is typically used for electrical connections, plumbing, and delicate metalwork. It operates at temperatures below 450°C (842°F), making it suitable for joining thin metals and electronic components without damaging them. The joints created are not as strong as those made by welding, but they are sufficient for applications where high strength is not critical.
Welding, on the other hand, involves melting the base materials themselves, often with the addition of a filler material, to form a strong joint upon cooling. This process requires much higher temperatures, often exceeding 1,500°C (2,732°F), depending on the metals involved. Welding is used in applications where strong, permanent joints are necessary, such as in construction, automotive, and aerospace industries. The resulting welds are typically as strong as or stronger than the base materials. Welding can be performed using various techniques, including arc welding, MIG, TIG, and gas welding, each suited for different materials and thicknesses.
In summary, soldering is a low-temperature process suitable for delicate and electrical applications, while welding is a high-temperature process used for creating strong, permanent joints in structural applications.
How do you select the right solder for a specific application?
To select the right solder for a specific application, consider the following factors:
1. **Type of Metal Being Joined**: Ensure compatibility with the metals involved. For example, lead-free solders are often used for copper and brass.
2. **Melting Temperature**: Choose a solder with a melting point suitable for the components and substrate to avoid damage. Low-melting solders are ideal for heat-sensitive components.
3. **Mechanical Strength**: For applications requiring strong joints, such as structural or load-bearing connections, select a solder with high tensile strength.
4. **Electrical Conductivity**: For electrical applications, use solders with high conductivity, like those containing silver.
5. **Corrosion Resistance**: In environments prone to corrosion, select solders with additives that enhance resistance, such as those containing tin or silver.
6. **Flux Type**: Choose the appropriate flux core (rosin, water-soluble, or no-clean) based on the cleaning process and the nature of the application.
7. **Regulatory Compliance**: Ensure the solder complies with regulations like RoHS for environmental and health safety, especially in consumer electronics.
8. **Thermal Cycling and Fatigue Resistance**: For applications exposed to temperature fluctuations, select solders that can withstand thermal cycling without cracking.
9. **Cost**: Balance performance with budget constraints. Lead-free solders are often more expensive but necessary for compliance.
10. **Availability and Manufacturer Recommendations**: Consider readily available options and follow manufacturer guidelines for specific applications.
By evaluating these factors, you can select a solder that meets the technical and regulatory requirements of your specific application.
What are the best practices for soldering electronic components?
1. **Preparation**: Ensure a clean workspace and gather all necessary tools, including a soldering iron, solder, flux, a damp sponge, and safety equipment like goggles.
2. **Component and Board Preparation**: Clean the components and PCB pads with isopropyl alcohol to remove any oils or contaminants. Ensure components fit properly and are correctly oriented.
3. **Soldering Iron Maintenance**: Use a soldering iron with an appropriate wattage (15-30W for small electronics) and a clean, well-tinned tip. Regularly clean the tip on a damp sponge to maintain heat transfer efficiency.
4. **Temperature Control**: Set the soldering iron to the correct temperature, typically between 350°C to 400°C, depending on the solder type. Avoid overheating to prevent damage to components and the PCB.
5. **Use of Flux**: Apply flux to the joint area to improve solder flow and prevent oxidation. Some solder wires come with a flux core, but additional flux can be beneficial.
6. **Soldering Technique**: Heat the joint, not the solder. Place the soldering iron tip on the component lead and pad simultaneously, then apply solder to the joint, not the iron. Allow the solder to flow and form a concave fillet.
7. **Avoid Cold Joints**: Ensure the solder joint is shiny and smooth. A dull or grainy appearance indicates a cold joint, which may lead to poor electrical connectivity.
8. **Component Protection**: Use heat sinks or clips to protect sensitive components from excessive heat during soldering.
9. **Inspection and Testing**: Inspect solder joints for quality and continuity. Use a multimeter to test connections and ensure functionality.
10. **Safety Precautions**: Work in a well-ventilated area to avoid inhaling fumes. Handle the soldering iron with care to prevent burns.