Call +(254) 703 030 000 / 751 483 999 / 721 704 777
.....Read More

Frequently Asked Questions
What is the best wire crimper for automotive use?
The best wire crimper for automotive use is the IWISS Ratcheting Crimper Tool. This tool is highly regarded for its precision, durability, and versatility, making it ideal for automotive applications. It features a ratcheting mechanism that ensures a secure and consistent crimp every time, reducing the risk of poor connections that can lead to electrical failures. The ergonomic handle design provides comfort during extended use, minimizing hand fatigue.
The IWISS crimper is compatible with a wide range of insulated and non-insulated terminals, making it suitable for various automotive wiring tasks. It is constructed from high-quality steel, ensuring long-lasting performance even in demanding environments. The adjustable crimping pressure allows for customization based on the specific wire gauge and terminal type, enhancing its versatility.
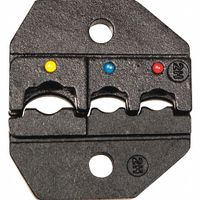
Additionally, the tool includes interchangeable die sets, which can be easily swapped to accommodate different terminal sizes and types, further increasing its utility in automotive projects. The precise crimping action of the IWISS tool ensures reliable electrical connections, which is crucial for the safety and functionality of automotive electrical systems.
Overall, the IWISS Ratcheting Crimper Tool is a top choice for automotive professionals and DIY enthusiasts alike, offering a combination of reliability, ease of use, and adaptability that is essential for effective automotive wiring work.
How do you choose the right crimping tool for a specific application?
To choose the right crimping tool for a specific application, consider the following factors:
1. **Connector Type**: Identify the type of connector you are working with, such as coaxial, RJ45, or insulated terminals. Each requires a specific crimping tool designed for that connector type.
2. **Wire Gauge**: Determine the wire gauge or size you will be crimping. Crimping tools are often rated for specific wire sizes, so ensure the tool accommodates the wire gauge you are using.
3. **Crimp Profile**: Different applications require different crimp profiles, such as hexagonal, indent, or oval. Choose a tool that provides the correct crimp profile for your application to ensure a secure connection.
4. **Material Compatibility**: Consider the materials of both the connector and the wire. Some tools are designed for specific materials like copper or aluminum, which can affect the crimp quality.
5. **Volume and Frequency**: For high-volume or frequent crimping, consider ergonomic tools or those with ratcheting mechanisms to reduce hand fatigue and ensure consistent crimps.
6. **Adjustability**: Some applications may require adjustable crimping tools to accommodate different sizes or types of connectors. Look for tools with adjustable dies or settings.
7. **Quality and Brand**: Opt for reputable brands known for durability and precision. High-quality tools often provide better performance and longevity.
8. **Budget**: Balance your budget with the need for quality. While cheaper tools may suffice for occasional use, investing in a high-quality tool is advisable for professional or frequent use.
9. **Certification and Standards**: Ensure the tool meets industry standards and certifications relevant to your application, such as UL or IEC standards.
10. **User Reviews and Recommendations**: Research user reviews and seek recommendations from professionals to gauge the tool's performance and reliability in real-world applications.
What are the differences between ratchet and non-ratchet crimpers?
Ratchet crimpers and non-ratchet crimpers are tools used for crimping connectors onto cables, but they differ in design and functionality.
Ratchet Crimpers:
1. **Mechanism**: They have a ratcheting mechanism that ensures the crimping process is completed fully before the tool can be released. This mechanism locks the handles in place until the crimp is properly executed.
2. **Consistency**: The ratchet mechanism provides consistent pressure, resulting in uniform crimps and reducing the risk of under-crimping or over-crimping.
3. **Ease of Use**: They require less manual force, as the ratchet mechanism assists in applying the necessary pressure.
4. **Safety**: The ratchet system prevents incomplete crimps, which can lead to poor electrical connections.
5. **Adjustability**: Many ratchet crimpers allow for pressure adjustment to accommodate different connector sizes and types.
Non-Ratchet Crimpers:
1. **Mechanism**: These crimpers rely solely on manual force, without any locking mechanism to ensure the crimp is completed.
2. **Consistency**: The quality of the crimp depends on the user's skill and strength, which can lead to variability in crimp quality.
3. **Ease of Use**: They require more manual effort and precision, as the user must judge when the crimp is complete.
4. **Safety**: There is a higher risk of incomplete crimps, which can compromise the connection's integrity.
5. **Cost**: Generally, non-ratchet crimpers are less expensive than ratchet crimpers, making them a budget-friendly option for occasional use.
In summary, ratchet crimpers offer more consistent and reliable results with less effort, while non-ratchet crimpers are more dependent on user skill and are typically more affordable.
How do you properly maintain and care for crimping tools?
To properly maintain and care for crimping tools, follow these steps:
1. **Regular Cleaning**: After each use, clean the crimping tool to remove any debris, dust, or residue. Use a soft brush or cloth to wipe down the tool, paying special attention to the jaws and moving parts.
2. **Lubrication**: Periodically lubricate the moving parts of the crimping tool to ensure smooth operation. Use a light machine oil or a lubricant recommended by the manufacturer. Apply a small amount to the pivot points and wipe off any excess to prevent attracting dirt.
3. **Inspection**: Regularly inspect the tool for signs of wear or damage. Check the jaws for any misalignment, cracks, or chips. Ensure that the handles are intact and that the tool operates smoothly without any unusual resistance or noise.
4. **Calibration**: Some crimping tools require calibration to maintain accuracy. Follow the manufacturer's guidelines for calibration frequency and procedures. Use a calibration gauge if necessary to ensure the tool is crimping to the correct specifications.
5. **Storage**: Store the crimping tool in a dry, clean environment to prevent rust and corrosion. Use a protective case or pouch if available. Avoid storing the tool in a way that puts pressure on the handles or jaws.
6. **Avoid Misuse**: Use the crimping tool only for its intended purpose. Avoid using it as a hammer, pliers, or for cutting, as this can damage the tool and affect its performance.
7. **Replacement**: Replace any worn or damaged parts immediately. If the tool is beyond repair, consider replacing it to ensure safety and efficiency in your work.
By following these maintenance steps, you can extend the life of your crimping tools and ensure they function effectively.
What are the common mistakes to avoid when using wire crimpers?
1. **Choosing the Wrong Crimper**: Ensure the crimper is suitable for the type and size of the wire and terminal you are using. Using the wrong tool can lead to poor connections.
2. **Incorrect Wire Stripping**: Strip the wire to the correct length. Too much or too little exposed wire can result in weak connections or short circuits.
3. **Improper Terminal Selection**: Use the correct terminal for the wire gauge. Mismatched sizes can cause loose connections or damage.
4. **Inadequate Crimping Pressure**: Apply the right amount of pressure. Too little pressure can lead to loose connections, while too much can damage the wire or terminal.
5. **Not Inspecting the Crimp**: Always inspect the crimp visually and physically to ensure it is secure and properly aligned.
6. **Ignoring Manufacturer Instructions**: Follow the manufacturer's guidelines for both the crimper and terminals to ensure optimal performance.
7. **Using Damaged Tools**: Regularly inspect and maintain crimpers. Damaged or worn tools can lead to poor-quality crimps.
8. **Skipping the Test**: Test the crimped connection for strength and conductivity to ensure reliability.
9. **Crimping Insulation Instead of Wire**: Ensure the crimp is on the wire, not the insulation, to maintain electrical conductivity.
10. **Overlooking Safety Precautions**: Wear appropriate safety gear and ensure the workspace is safe to prevent accidents.
11. **Rushing the Process**: Take your time to ensure each step is done correctly to avoid mistakes.
12. **Not Using a Ratcheting Crimper for Precision**: For consistent results, especially in professional settings, use a ratcheting crimper that ensures complete crimping.
How do you test the quality of a crimped connection?
1. **Visual Inspection**: Check for uniformity, proper alignment, and absence of visible damage or deformities. Ensure the wire is fully inserted and the insulation is not pinched.
2. **Pull Test**: Apply a tensile force to the crimped connection to ensure it can withstand the required mechanical stress without the wire slipping out.
3. **Microsectioning**: Cut and polish a cross-section of the crimp to examine the internal structure under a microscope. Look for proper compression and absence of voids.
4. **Electrical Testing**: Measure the electrical resistance of the crimped connection. It should be low and consistent with expected values to ensure good conductivity.
5. **Crimp Height Measurement**: Use a micrometer to measure the crimp height and compare it to the specifications provided by the terminal manufacturer.
6. **Insulation Resistance Test**: Ensure the insulation is intact and provides adequate resistance to prevent electrical leakage.
7. **Environmental Testing**: Subject the crimped connection to environmental conditions such as temperature cycling, humidity, and vibration to test its durability and reliability.
8. **Shear Test**: Apply a lateral force to test the mechanical strength of the crimped connection.
9. **X-Ray Inspection**: Use X-ray imaging to inspect the internal structure of the crimp without destroying it, checking for proper wire placement and compression.
10. **Crimp Force Monitoring**: During the crimping process, monitor the force applied to ensure it is within the specified range for optimal crimp quality.
Can you use a wire crimper for different types of connectors and terminals?
Yes, a wire crimper can be used for different types of connectors and terminals, but it depends on the design and features of the crimper. There are various types of crimpers available, each suited for specific tasks:
1. **Universal Crimpers**: These are versatile tools designed to handle a wide range of connectors and terminals. They often come with interchangeable dies or adjustable settings to accommodate different sizes and types of connectors, such as insulated, non-insulated, and coaxial connectors.
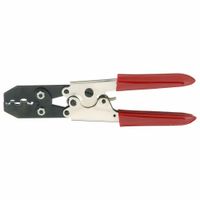
2. **Ratchet Crimpers**: These provide consistent pressure and are often used for insulated terminals. They ensure a secure crimp by only releasing when the crimp is complete, reducing the risk of a poor connection.
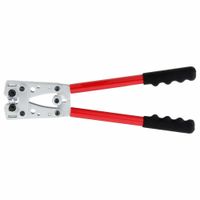
3. **Hydraulic Crimpers**: Used for heavy-duty applications, these crimpers can handle large gauge wires and connectors, often used in industrial settings.
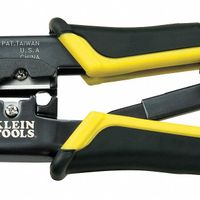
4. **Specialized Crimpers**: Designed for specific types of connectors, such as RJ45 for Ethernet cables or coaxial cable connectors. These crimpers are tailored to the specific requirements of the connector type.
When using a crimper, it is crucial to match the tool with the connector type and size to ensure a secure and reliable connection. Using the wrong crimper can result in poor connections, which may lead to electrical failures or safety hazards. Always refer to the manufacturer's guidelines for compatibility and proper usage.