Call +(254) 703 030 000 / 751 483 999 / 721 704 777
- Home
- Tools
- Hand Tools
- Drain Cleaning Plumbing Hand Tools
.....Read More
Frequently Asked Questions
What is the best tool for unclogging drains?
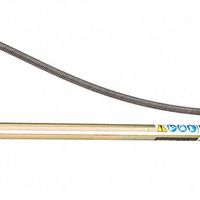
The best tool for unclogging drains is a plumber's snake, also known as a drain auger. This tool is highly effective for clearing blockages in pipes that are beyond the reach of a plunger. A plumber's snake consists of a long, flexible metal cable with a corkscrew-like tip that can navigate through the twists and turns of plumbing to reach and dislodge clogs.
For minor clogs, a hand-cranked snake is usually sufficient. It is easy to use and can be manually fed into the drain until it reaches the obstruction. Once the clog is encountered, the snake can be rotated to break up or hook onto the debris, allowing it to be pulled out or pushed through the pipe.
For more stubborn clogs, a motorized drain snake may be necessary. These are more powerful and can handle tougher blockages, such as those caused by tree roots or dense accumulations of hair and grease. Motorized snakes are often used by professional plumbers due to their efficiency and ability to clear severe clogs.
In addition to a plumber's snake, other tools like a plunger or a chemical drain cleaner can be used for less severe clogs. However, a plumber's snake is generally more versatile and effective for a wide range of blockages. It is also a more environmentally friendly option compared to chemical cleaners, which can be harsh and potentially damaging to pipes.
Overall, a plumber's snake is the best tool for unclogging drains due to its effectiveness, versatility, and ability to handle a variety of clogs without causing damage to the plumbing system.
How do you use a manual drain auger?
To use a manual drain auger, follow these steps:
1. **Preparation**: Wear gloves and safety goggles. Place a bucket or towels under the drain to catch any water or debris.
2. **Access the Drain**: Remove any drain covers or stoppers. For sinks, you may need to detach the P-trap using a wrench.
3. **Insert the Auger**: Feed the auger cable into the drain slowly. If using a sink, insert it directly into the pipe. For toilets, use a toilet auger designed for that purpose.
4. **Advance the Cable**: Turn the handle clockwise to extend the cable further into the pipe. Apply gentle pressure to help the cable navigate bends and curves.
5. **Reach the Clog**: When you feel resistance, you’ve likely reached the clog. Continue turning the handle to break up the blockage. If the cable gets stuck, reverse the direction slightly and try again.
6. **Break Up the Clog**: Push and pull the cable back and forth while rotating the handle to dislodge the clog. Be patient and persistent.
7. **Retrieve the Cable**: Once the clog is cleared, slowly retract the cable by turning the handle counterclockwise. Clean the cable as you pull it out to avoid spreading debris.
8. **Test the Drain**: Run water to ensure the drain is clear. If it’s still slow, repeat the process.
9. **Clean Up**: Clean the auger thoroughly with water and disinfectant. Reassemble any removed parts, such as the P-trap or drain cover.
10. **Dispose of Waste**: Properly dispose of any debris or waste material collected during the process.
By following these steps, you can effectively use a manual drain auger to clear clogs in household drains.
What are the different types of drain cleaning tools?
There are several types of drain cleaning tools, each designed for specific tasks and types of clogs:
1. **Plunger**: A basic tool used to create suction and pressure to dislodge clogs in sinks, toilets, and tubs.
2. **Drain Snake (Auger)**: A flexible, coiled tool that can be manually or mechanically fed into pipes to break up or retrieve clogs. Variants include hand augers for small drains and toilet augers specifically designed for toilets.
3. **Drain Claw**: A small, flexible tool with a claw or hook at the end, used to grab and remove hair and debris from drains.
4. **Hydro Jet**: A high-pressure water jetting tool that blasts water through pipes to clear blockages and clean the pipe walls.
5. **Chemical Drain Cleaners**: Liquid or gel solutions that use chemical reactions to dissolve clogs. They are effective but can be harsh on pipes and the environment.
6. **Drain Cleaning Bladder**: A rubber bladder that attaches to a garden hose and expands in the pipe, using water pressure to push clogs through.
7. **Pipe Inspection Camera**: A camera attached to a flexible cable, used to visually inspect the inside of pipes to identify clogs and damage.
8. **Plumber’s Snake with Camera**: Combines a drain snake with a camera to both clear and inspect pipes simultaneously.
9. **Electric Drain Auger**: A motorized version of the manual auger, used for tougher clogs in larger pipes.
10. **Enzymatic Drain Cleaners**: Use natural enzymes to break down organic material in pipes, offering a more environmentally friendly option.
11. **Wire Brush**: A tool with bristles used to scrub the inside of pipes to remove buildup and prevent clogs.
These tools vary in complexity and application, from simple manual devices to advanced mechanical and chemical solutions.
How do you install a new faucet?
1. **Gather Tools and Materials**: Wrench, basin wrench, plumber's tape, bucket, and the new faucet.
2. **Turn Off Water Supply**: Locate the shut-off valves under the sink and turn them off. Open the faucet to release any remaining water.
3. **Remove Old Faucet**:
- Place a bucket under the sink to catch any water.
- Disconnect the water supply lines using a wrench.
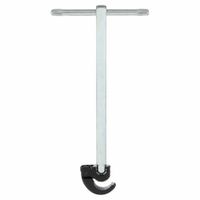
- Use a basin wrench to loosen and remove the nuts securing the old faucet.
- Lift the old faucet out.
4. **Clean the Area**: Remove any old sealant or debris from the sink surface.
5. **Install New Faucet**:
- Insert the faucet through the mounting holes.
- Secure it from underneath using the provided nuts and washers. Tighten with a basin wrench.
- Apply plumber's tape to the threads of the faucet’s tailpieces.
6. **Connect Water Supply Lines**:
- Attach the supply lines to the faucet’s tailpieces and the shut-off valves. Tighten with a wrench.
- Ensure connections are secure but not overtightened.
7. **Check for Leaks**:
- Turn on the water supply.
- Open the faucet and check for leaks at all connections.
- Tighten connections if necessary.
8. **Final Adjustments**:
- Ensure the faucet is aligned correctly.
- Clean the area and remove any installation debris.
9. **Test the Faucet**:
- Run both hot and cold water to ensure proper flow and temperature.
- Check for smooth operation of handles and spout.
10. **Seal the Base**: If required, apply a bead of silicone sealant around the base of the faucet to prevent water seepage.
What tools are needed to repair a garbage disposal?
To repair a garbage disposal, you will need the following tools:
1. **Allen Wrench (Hex Key):** Often included with the disposal unit, this is used to manually turn the motor shaft and clear jams.
2. **Screwdriver:** A flathead or Phillips screwdriver is necessary for removing the disposal unit or accessing internal components.
3. **Pliers:** Useful for gripping and removing small parts or debris.
4. **Plumber’s Putty:** Used to create a watertight seal when reinstalling the disposal unit.
5. **Bucket:** To catch any water or debris that may spill during the repair process.
6. **Flashlight:** Provides better visibility in the dark space under the sink.
7. **Tongue-and-Groove Pliers (Channel Locks):** Helpful for loosening or tightening plumbing connections.
8. **Wire Strippers:** If electrical connections need to be repaired or replaced.
9. **Multimeter:** To check electrical connections and ensure power is reaching the unit.
10. **Replacement Parts:** Such as gaskets, seals, or a new disposal unit if necessary.
11. **Pipe Wrench:** For loosening or tightening plumbing connections that are difficult to reach.
12. **Cleaning Brush:** To clean out any debris or buildup inside the disposal.
13. **Safety Gloves:** To protect your hands from sharp objects or debris.
14. **Safety Goggles:** To protect your eyes from splashes or debris.
These tools will help you address common issues such as jams, leaks, or electrical problems with your garbage disposal. Always ensure the power is turned off before beginning any repair work.
How do you remove a tub drain?
1. **Gather Tools**: You'll need a drain wrench or a tub drain removal tool, a screwdriver, pliers, and possibly a hairdryer.
2. **Remove Stopper**: If your tub has a stopper, remove it. For a lift-and-turn stopper, unscrew the knob and lift it out. For a push-pull stopper, unscrew the top cap and remove it.
3. **Clean the Area**: Clear any debris or hair around the drain to ensure a clean working area.
4. **Heat the Drain (Optional)**: If the drain is old or stuck, use a hairdryer to heat the area around the drain to loosen any sealant or plumber’s putty.
5. **Insert Drain Wrench**: Place the drain wrench or removal tool into the crossbars inside the drain. Ensure it fits snugly.
6. **Turn Counterclockwise**: Use pliers or an adjustable wrench to turn the drain wrench counterclockwise. Apply steady pressure to avoid damaging the tub.
7. **Remove the Drain**: Once loosened, continue turning until the drain is free. Lift it out carefully.
8. **Clean the Drain Area**: Remove any old plumber’s putty or sealant from the drain opening. Clean the area thoroughly to prepare for a new drain installation.
9. **Inspect and Replace**: Check the condition of the drain and surrounding pipes. Replace any damaged parts before installing a new drain.
10. **Install New Drain (Optional)**: If replacing, apply plumber’s putty around the new drain flange, insert it into the opening, and tighten using the drain wrench.
11. **Test for Leaks**: Run water to ensure there are no leaks around the new drain.
12. **Reattach Stopper**: If applicable, reattach the stopper by reversing the removal process.
What tools are required for shower valve replacement?
For a shower valve replacement, you will need the following tools:
1. **Screwdriver Set**: Both flathead and Phillips screwdrivers are necessary for removing the handle and trim plate.
2. **Adjustable Wrench**: Useful for loosening and tightening nuts and bolts.
3. **Pipe Wrench**: Essential for gripping and turning pipes, especially if they are stuck or corroded.
4. **Allen Wrench Set**: Often required for removing the handle, as many are secured with a hex screw.
5. **Pliers**: Needle-nose or slip-joint pliers can help in gripping small parts or pulling out the valve.
6. **Plumber’s Tape (Teflon Tape)**: Used to ensure a watertight seal on threaded connections.
7. **Plumber’s Grease**: Helps in lubricating O-rings and other moving parts to ensure smooth operation.
8. **Utility Knife**: Useful for cutting away any caulking or sealant around the trim plate.
9. **Bucket or Container**: To catch any water that may spill during the replacement process.
10. **Torch or Heat Gun**: Sometimes needed to loosen old soldered connections.
11. **Soldering Kit**: If the new valve requires soldering, you’ll need a torch, solder, and flux.
12. **Hacksaw or Pipe Cutter**: For cutting pipes if necessary, especially if the valve is being relocated or if the old pipes are damaged.
13. **Measuring Tape**: To ensure the new valve fits properly in the existing space.
14. **Level**: To ensure the valve is installed straight.
15. **Safety Gear**: Gloves and safety goggles to protect against sharp edges and debris.
These tools will help you efficiently and safely replace a shower valve, ensuring a proper fit and leak-free installation.


