Call +(254) 703 030 000 / 751 483 999 / 721 704 777
.....Read More

Frequently Asked Questions
What are the different types of temperature probe connectors and their uses?
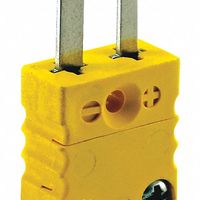
Thermocouple Connectors: These are used with thermocouple probes, which measure temperature through voltage differences across dissimilar metals. They are color-coded according to type (e.g., Type K, J, T) and are used in industrial applications due to their wide temperature range and durability.
RTD Connectors: Used with Resistance Temperature Detectors (RTDs), these connectors are designed for precision and stability. They are typically used in laboratory and industrial settings where accurate temperature readings are crucial.
Thermistor Connectors: These connectors are used with thermistor probes, which are temperature-sensitive resistors. They are ideal for applications requiring high sensitivity and are commonly used in HVAC systems and medical devices.
Miniature Connectors: These are smaller versions of standard connectors, used in applications where space is limited. They are often used in portable devices and compact equipment.
Standard Connectors: These are the most common type of connectors, used in a wide range of applications. They provide a reliable connection for general-purpose temperature measurement.
Bayonet Connectors: These connectors are used in applications requiring a secure and quick connection, such as in automotive and industrial environments. They are designed for easy installation and removal.
DIN Connectors: Used in European and industrial applications, these connectors comply with DIN standards and are known for their robustness and reliability.
USB Connectors: These connectors allow temperature probes to interface with computers and other digital devices, enabling data logging and analysis. They are used in research and development, as well as in educational settings.
Wireless Connectors: These connectors enable wireless communication between the temperature probe and the monitoring system, used in remote monitoring and IoT applications.
How do I choose the right thermocouple wire for my temperature probe?
1. **Temperature Range**: Determine the temperature range you need to measure. Different thermocouple types (e.g., J, K, T, E, N, R, S, B) have varying temperature limits.
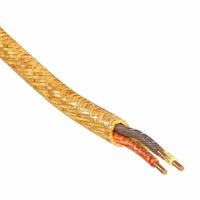
2. **Environment**: Consider the environment where the thermocouple will be used. Factors like moisture, chemical exposure, and mechanical stress can affect performance. Choose a wire with appropriate insulation (e.g., Teflon, fiberglass, ceramic) for durability.
3. **Accuracy and Sensitivity**: Different thermocouple types offer varying levels of accuracy and sensitivity. Type K is common for general use, while Type T is better for low temperatures. For high precision, consider Type R or S.
4. **Compatibility**: Ensure the thermocouple wire is compatible with your temperature measurement system, including connectors and instrumentation.
5. **Length and Gauge**: Determine the required length and gauge of the wire. Longer distances may require thicker wires to minimize signal loss.
6. **Cost**: Balance performance needs with budget constraints. Some thermocouple types and materials are more expensive than others.
7. **Regulatory Standards**: Check for compliance with industry standards and regulations relevant to your application.
8. **Response Time**: Consider the response time needed for your application. Thinner wires generally respond faster.
9. **Calibration**: Ensure the wire can be calibrated to maintain measurement accuracy over time.
10. **Supplier Reputation**: Choose a reputable supplier to ensure quality and reliability.
By evaluating these factors, you can select the right thermocouple wire for your specific application needs.
What are the best practices for extending the reach of a temperature probe?
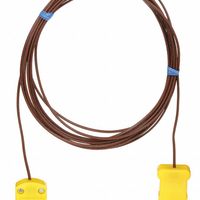
1. **Use of Extension Wires**: Utilize thermocouple extension wires made of the same materials as the thermocouple to maintain accuracy. Ensure the wires are properly insulated to prevent interference.
2. **Signal Conditioning**: Implement signal conditioning techniques such as amplification and filtering to enhance signal quality over long distances.
3. **Twisted Pair Cables**: Use twisted pair cables to minimize electromagnetic interference (EMI) and maintain signal integrity.
4. **Shielding**: Employ shielded cables to protect against EMI, especially in environments with high electrical noise.
5. **Cold Junction Compensation**: Ensure proper cold junction compensation at the connection point to maintain accuracy when extending thermocouple wires.
6. **Use of Transmitters**: Convert the temperature signal to a 4-20 mA current loop using transmitters, which is less susceptible to signal loss over long distances.
7. **Wireless Solutions**: Consider wireless transmitters for remote or hard-to-reach locations to eliminate the need for long cable runs.
8. **Proper Grounding**: Ensure proper grounding of the probe and extension wires to prevent ground loops and potential signal distortion.
9. **Calibration**: Regularly calibrate the extended system to ensure accuracy, especially after installation or maintenance.
10. **Environmental Protection**: Use appropriate protective conduits or enclosures to shield the probe and wires from environmental factors like moisture, temperature extremes, and physical damage.
11. **Connector Quality**: Use high-quality connectors to ensure reliable connections and minimize signal loss.
12. **Length Considerations**: Keep extension lengths as short as possible to reduce potential signal degradation and maintain accuracy.
How do I properly connect temperature probe cords and extension leads?
1. **Select Compatible Components**: Ensure the temperature probe, cords, and extension leads are compatible in terms of connector type and material. Use connectors that match the probe's specifications.
2. **Inspect for Damage**: Check all components for any signs of wear or damage. Replace any frayed or broken cords to prevent inaccurate readings or safety hazards.
3. **Use Proper Connectors**: Use connectors that are specifically designed for temperature probes. These often include thermocouple connectors or specific plug types that ensure a secure and accurate connection.
4. **Ensure Correct Polarity**: Connect the positive and negative leads correctly. Most temperature probes have color-coded wires (e.g., red for positive, black for negative) to help with this.
5. **Secure Connections**: Firmly attach the connectors to prevent them from coming loose. Use locking connectors if available, or secure with electrical tape if necessary.
6. **Avoid Interference**: Keep the cords and leads away from sources of electrical interference, such as motors or other high-voltage equipment, to ensure accurate readings.
7. **Use Proper Lengths**: Use the shortest possible extension leads to minimize resistance and potential signal loss. If long distances are necessary, consider using a signal amplifier.
8. **Protect from Environmental Factors**: Ensure that the cords and connections are protected from moisture, extreme temperatures, and physical damage. Use protective tubing or conduit if necessary.
9. **Test the Setup**: After connecting, test the setup to ensure that the temperature readings are accurate. Calibrate the system if necessary.
10. **Regular Maintenance**: Periodically check the connections and cords for wear and recalibrate the system as needed to maintain accuracy.
What are the common issues with temperature probe components and how can they be resolved?
Common issues with temperature probe components include:
1. **Calibration Drift**: Over time, probes can lose accuracy. Regular calibration against a standard reference can resolve this.
2. **Mechanical Damage**: Probes can be bent, broken, or otherwise physically damaged. Use protective sheaths and handle with care to prevent damage.
3. **Contamination**: Exposure to corrosive or reactive substances can degrade probe materials. Use appropriate materials for the environment and regularly clean the probes.
4. **Electrical Noise**: Interference from other electrical devices can affect readings. Use shielded cables and proper grounding to minimize noise.
5. **Thermal Shock**: Rapid temperature changes can damage probes. Use probes designed for high thermal shock resistance and avoid sudden temperature changes.
6. **Moisture Ingress**: Moisture can enter the probe and affect readings. Ensure proper sealing and use moisture-resistant designs.
7. **Connection Issues**: Loose or corroded connections can lead to inaccurate readings. Regularly inspect and maintain connections.
8. **Aging and Wear**: Probes can degrade over time. Implement a regular replacement schedule based on manufacturer recommendations.
9. **Improper Installation**: Incorrect installation can lead to inaccurate readings. Follow manufacturer guidelines for installation.
10. **Signal Loss**: Long cable runs can result in signal loss. Use signal amplifiers or shorter cable runs to mitigate this.
By addressing these issues through regular maintenance, proper handling, and using the right materials and designs for specific environments, the reliability and accuracy of temperature probes can be significantly improved.
How do I adapt a temperature probe to work with different measuring devices?
To adapt a temperature probe for use with different measuring devices, follow these steps:
1. **Identify Compatibility**: Determine the type of temperature probe (e.g., thermocouple, RTD, thermistor) and the input requirements of the measuring devices (e.g., voltage, current, resistance).
2. **Signal Conditioning**: Use signal conditioning circuits to convert the probe's output to a compatible signal for the measuring device. For thermocouples, use a cold junction compensation and amplification circuit. For RTDs, employ a Wheatstone bridge and an amplifier. For thermistors, use a voltage divider or linearization circuit.
3. **Connector Adaptation**: Ensure the physical connectors match. Use adapters or rewire connectors if necessary to fit the measuring device's input ports.
4. **Calibration**: Calibrate the probe with each device to ensure accurate readings. Use known temperature references to adjust the device's settings or apply correction factors.
5. **Interface Protocols**: If the measuring device uses digital communication (e.g., I2C, SPI), ensure the probe's output is digitized using an ADC (Analog-to-Digital Converter) and that the communication protocol is compatible.
6. **Power Supply**: Ensure the probe's power requirements are met by the measuring device. Use voltage regulators or power adapters if necessary.
7. **Software Configuration**: Update or configure the measuring device's software or firmware to recognize and correctly interpret the probe's output.
8. **Testing**: Conduct thorough testing to verify the probe's performance with each device, checking for accuracy, stability, and response time.
By following these steps, you can effectively adapt a temperature probe to work with various measuring devices, ensuring accurate and reliable temperature measurements.
What are the key considerations when replacing parts of a temperature probe system?
When replacing parts of a temperature probe system, key considerations include:
1. **Compatibility**: Ensure the replacement parts are compatible with the existing system in terms of size, type, and connection interfaces.
2. **Accuracy and Calibration**: Verify that the new parts maintain or improve the system's accuracy. Calibration may be necessary to ensure precise measurements.
3. **Material and Environment**: Select materials that can withstand the operating environment, including temperature range, chemical exposure, and humidity.
4. **Response Time**: Consider the response time of the replacement parts to ensure they meet the system's requirements for timely data acquisition.
5. **Durability and Longevity**: Choose parts with a proven track record for durability and a long lifespan to minimize future maintenance.
6. **Regulatory Compliance**: Ensure the parts comply with relevant industry standards and regulations, such as ISO or ASTM.
7. **Installation and Maintenance**: Evaluate the ease of installation and future maintenance needs. Consider if specialized tools or skills are required.
8. **Cost**: Balance the cost of replacement parts with their quality and performance. Consider the total cost of ownership, including maintenance and potential downtime.
9. **Supplier Reliability**: Choose reputable suppliers with a history of providing quality components and reliable customer support.
10. **Interference and Noise**: Assess the potential for electrical interference or noise that could affect the probe's performance and data integrity.
11. **Redundancy and Backup**: Consider implementing redundancy or backup systems to ensure continuous operation during maintenance or failure.
12. **Documentation and Support**: Ensure availability of comprehensive documentation and technical support for troubleshooting and future upgrades.
13. **Integration with Existing Systems**: Ensure seamless integration with existing data acquisition and control systems to maintain operational efficiency.