Call +(254) 703 030 000 / 751 483 999 / 721 704 777
.....Read More


Frequently Asked Questions
What is the purpose of a bench power supply?
A bench power supply is a versatile and essential tool used in electronics and electrical engineering for providing a stable and adjustable source of power to various devices and circuits. Its primary purpose is to supply a controlled voltage and current to test, develop, and troubleshoot electronic components and systems. Here are the key purposes of a bench power supply:
1. **Testing and Prototyping**: It allows engineers and technicians to test circuits and components under different voltage and current conditions, ensuring they function correctly before final implementation.
2. **Adjustability**: Bench power supplies offer adjustable voltage and current settings, enabling users to simulate different power conditions and observe how circuits respond, which is crucial for design and testing phases.
3. **Stability and Precision**: They provide a stable and precise output, which is critical for sensitive electronic components that require specific voltage and current levels to operate correctly.
4. **Safety**: Bench power supplies often include features like current limiting and short-circuit protection, which help prevent damage to components and ensure user safety during experiments and testing.
5. **Versatility**: They can power a wide range of devices, from simple circuits to complex systems, making them indispensable in laboratories, workshops, and educational settings.
6. **Troubleshooting**: By providing a known and reliable power source, bench power supplies help in diagnosing and fixing issues in malfunctioning circuits by isolating power-related problems.
7. **Educational Use**: In educational environments, they are used to teach students about electronics, allowing them to experiment with different circuit designs and understand the effects of varying power conditions.
Overall, a bench power supply is a fundamental tool for anyone working with electronics, providing the necessary power and control to facilitate development, testing, and learning.
How do you use a bench power supply?
To use a bench power supply, follow these steps:
1. **Understand the Controls**: Familiarize yourself with the power supply's controls, including voltage and current adjustment knobs, display panel, and output terminals.
2. **Set Voltage and Current Limits**: Determine the required voltage and current for your device. Use the voltage knob to set the desired voltage. Adjust the current limit to a safe level to prevent damage to your device.
3. **Connect the Device**: Turn off the power supply. Connect the positive (red) and negative (black) leads from the power supply to the corresponding terminals on your device. Ensure secure and correct polarity connections.
4. **Power On**: Turn on the power supply. Monitor the display to ensure the voltage and current are as expected. Adjust if necessary.
5. **Monitor Operation**: Observe the device's operation. The power supply should maintain the set voltage while the current adjusts according to the device's needs. If the current exceeds the set limit, the power supply will enter constant current mode to protect the device.
6. **Adjust as Needed**: If adjustments are needed, turn off the power supply before making changes to the connections or settings.
7. **Turn Off and Disconnect**: Once testing is complete, turn off the power supply. Disconnect the leads from the device.
8. **Safety Precautions**: Always ensure the power supply is off before making connections. Avoid short circuits and ensure proper ventilation to prevent overheating.
By following these steps, you can safely and effectively use a bench power supply for testing and powering electronic devices.
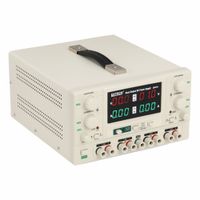
What are the differences between single, triple, and quadruple output bench power supplies?
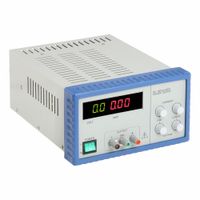
Single output bench power supplies provide one adjustable output channel, suitable for powering a single device or circuit. They are ideal for straightforward applications where only one voltage or current level is needed. These power supplies are typically more compact and cost-effective, making them a good choice for basic testing and development tasks.
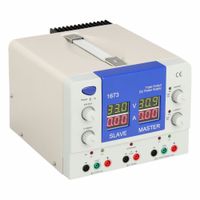
Triple output bench power supplies offer three output channels, usually consisting of two adjustable outputs and one fixed output. This configuration is beneficial for more complex applications requiring multiple voltage levels simultaneously, such as powering different sections of a circuit with varying voltage requirements. The fixed output is often set to a common voltage like 5V, useful for digital circuits. Triple output supplies provide greater flexibility and are commonly used in more advanced testing and development environments.
Quadruple output bench power supplies provide four output channels, which can be a combination of adjustable and fixed outputs. These are designed for even more complex applications where multiple devices or circuit sections need to be powered independently. Quadruple supplies offer the highest level of versatility, allowing for simultaneous testing of multiple components or systems. They are typically used in sophisticated research and development settings where multiple power sources are required.
In summary, the primary differences lie in the number of output channels and the flexibility they offer. Single output supplies are best for simple applications, triple output supplies cater to moderately complex needs, and quadruple output supplies are suited for highly complex and demanding applications. The choice depends on the specific requirements of the project, including the number of devices to be powered and the complexity of the testing environment.
How do you set the voltage and current on a bench power supply?
To set the voltage and current on a bench power supply, follow these steps:
1. **Power On**: Turn on the bench power supply and ensure it is in a standby or off-load state.
2. **Select Mode**: Choose between constant voltage (CV) or constant current (CC) mode, depending on your requirement. Most bench power supplies automatically switch between these modes based on the load.
3. **Set Voltage**:
- Use the voltage adjustment knob or buttons to set the desired output voltage.
- If the power supply has a digital display, monitor the voltage reading as you adjust.
- For precise settings, some power supplies offer coarse and fine adjustment knobs.
4. **Set Current Limit**:
- Disconnect the load or short the output terminals using a wire or a dedicated shorting bar.
- Adjust the current limit knob to set the maximum current the power supply will deliver.
- Observe the current display to ensure it reflects the desired limit.
- Remove the short or reconnect the load after setting the current limit.
5. **Connect Load**: Attach the load to the output terminals, ensuring correct polarity.
6. **Monitor Output**: Once the load is connected, observe the power supply’s display to ensure it operates in the desired mode (CV or CC) and that the output values are as expected.
7. **Adjust as Needed**: If necessary, fine-tune the voltage or current settings while monitoring the display to achieve precise control.
8. **Safety Check**: Ensure all connections are secure and that the power supply is not exceeding the load’s voltage or current ratings to prevent damage.
By following these steps, you can effectively set and control the voltage and current on a bench power supply for various applications.
What safety precautions should be taken when using a bench power supply?
1. **Read the Manual**: Familiarize yourself with the manufacturer's instructions and safety guidelines.
2. **Inspect Equipment**: Check for any visible damage to the power supply, cables, and connectors before use.
3. **Proper Ventilation**: Ensure the power supply is in a well-ventilated area to prevent overheating.
4. **Correct Settings**: Set the voltage and current limits appropriately for the device you are powering to avoid overloading.
5. **Use Insulated Tools**: Employ insulated tools to prevent accidental short circuits.
6. **Secure Connections**: Ensure all connections are secure and use appropriate connectors to prevent accidental disconnection.
7. **Avoid Overloading**: Do not exceed the power supply's maximum voltage and current ratings.
8. **Grounding**: Ensure the power supply is properly grounded to prevent electrical shock.
9. **Personal Protective Equipment (PPE)**: Wear safety goggles and gloves if necessary, especially when working with high voltages.
10. **Keep Dry**: Ensure the work area is dry and free from liquids to prevent electrical hazards.
11. **Emergency Procedures**: Be aware of emergency shut-off procedures and have a plan in case of an electrical fault.
12. **Avoid Contact**: Do not touch live circuits and keep hands dry and free from conductive materials.
13. **Use Fuses and Circuit Breakers**: Utilize appropriate fuses and circuit breakers to protect against overcurrent.
14. **Monitor Operation**: Continuously monitor the power supply during operation for any signs of malfunction.
15. **Turn Off When Not in Use**: Always turn off and unplug the power supply when not in use to prevent accidental activation.
How do you connect a bench power supply to a device?
To connect a bench power supply to a device, follow these steps:
1. **Identify Voltage and Current Requirements**: Determine the voltage and current specifications of the device you intend to power. This information is usually found in the device's manual or on a label.
2. **Set Voltage on Power Supply**: Adjust the voltage knob on the bench power supply to match the required voltage of the device. Ensure the power supply is turned off while making adjustments.
3. **Set Current Limit**: Adjust the current limit to a safe level slightly above the device's normal operating current. This prevents excessive current from damaging the device.
4. **Connect Leads**: Use appropriate gauge wires with banana plugs or alligator clips. Connect the positive lead (usually red) to the positive terminal of the power supply and the positive input of the device. Connect the negative lead (usually black) to the negative terminal of the power supply and the negative input of the device.
5. **Double-Check Connections**: Ensure all connections are secure and correct. Verify that the polarity is correct to avoid damage.
6. **Power On**: Turn on the bench power supply. Gradually increase the voltage to the set level while monitoring the current to ensure it stays within limits.
7. **Monitor Operation**: Observe the device to ensure it operates correctly. Check the power supply's display to confirm that voltage and current remain stable.
8. **Adjust if Necessary**: If the device does not function as expected, recheck connections and settings. Adjust the current limit if needed.
9. **Power Off**: Once testing or use is complete, turn off the power supply before disconnecting the leads to ensure safety.
Following these steps ensures a safe and effective connection between a bench power supply and a device.
What are common troubleshooting steps for bench power supplies?
1. **Check Connections**: Ensure all cables and connections are secure and correctly attached. Loose or incorrect connections can lead to power supply issues.
2. **Verify Output Settings**: Confirm that the voltage and current settings are correctly configured for the device being powered. Incorrect settings can cause the device to malfunction or not power on.
3. **Inspect for Physical Damage**: Examine the power supply for any visible signs of damage, such as burnt components, broken knobs, or damaged cables.
4. **Test with a Multimeter**: Use a multimeter to measure the output voltage and current to ensure they match the settings on the power supply. This helps verify the accuracy of the power supply.
5. **Check for Overload or Short Circuit**: Ensure the power supply is not overloaded or short-circuited. Disconnect the load and test the power supply independently to see if it functions correctly without the load.
6. **Review Fuse and Circuit Breaker**: Inspect and replace any blown fuses or tripped circuit breakers. These components protect the power supply from damage due to overloads or short circuits.
7. **Examine Cooling System**: Ensure that the cooling fans and vents are unobstructed and functioning properly to prevent overheating.
8. **Reset the Power Supply**: Turn off the power supply, disconnect it from the mains, wait a few minutes, and then reconnect and power it on to reset any internal faults.
9. **Consult the Manual**: Refer to the user manual for specific troubleshooting steps and error codes related to the model in use.
10. **Test with a Known Good Load**: Connect the power supply to a known good load to determine if the issue lies with the power supply or the original load.
11. **Contact Manufacturer Support**: If the issue persists, contact the manufacturer for technical support or consider professional repair services.