Call +(254) 703 030 000 / 751 483 999 / 721 704 777
.....Read More

Frequently Asked Questions
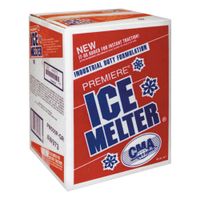
What is the best ice melt for concrete?
The best ice melt for concrete is typically calcium magnesium acetate (CMA). CMA is considered one of the safest options for concrete surfaces due to its minimal corrosive properties. It is less damaging than traditional salts like sodium chloride or calcium chloride, which can cause spalling and scaling on concrete surfaces over time. CMA works by preventing ice from bonding to the surface, making it easier to remove.
Another good option is magnesium chloride. It is less corrosive than sodium chloride and works effectively at lower temperatures, down to about -13°F (-25°C). Magnesium chloride is also less harmful to vegetation and pets, making it a more environmentally friendly choice.
Potassium chloride is another alternative, though it is less effective at very low temperatures compared to magnesium chloride and CMA. It is, however, less corrosive and safer for concrete.
When choosing an ice melt, consider the following factors:
1. **Temperature Range**: Ensure the product is effective at the temperatures you typically experience.
2. **Corrosiveness**: Opt for products with lower corrosive properties to protect your concrete.
3. **Environmental Impact**: Choose products that are less harmful to plants, pets, and the environment.
4. **Cost**: Balance effectiveness and safety with your budget.
Always follow the manufacturer's instructions for application to minimize potential damage to concrete surfaces. Additionally, sealing your concrete can provide an extra layer of protection against any potential damage from ice melt products.
How do I choose the right snow blower for my driveway?
To choose the right snow blower for your driveway, consider the following factors:
1. **Driveway Size and Type**:
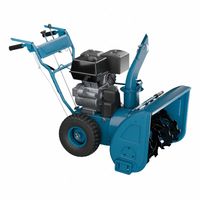
- For small, paved driveways, a single-stage snow blower is sufficient.
- For medium to large driveways, especially gravel or uneven surfaces, opt for a two-stage or three-stage snow blower.
2. **Snowfall Amount and Frequency**:
- Light, infrequent snowfalls can be managed with a single-stage blower.
- Heavy, frequent snowfalls require a two-stage or three-stage blower for efficiency.
3. **Terrain**:
- Flat driveways can use any type, but hilly or sloped driveways benefit from self-propelled models, typically found in two-stage or three-stage blowers.
4. **Storage Space**:
- Ensure you have adequate storage for the blower. Single-stage models are more compact, while two-stage and three-stage models require more space.
5. **Budget**:
- Single-stage blowers are generally more affordable. Two-stage and three-stage models are more expensive but offer greater power and features.
6. **Power Source**:
- Electric blowers are quieter and require less maintenance but are less powerful, suitable for small areas.
- Gas-powered blowers are more powerful and ideal for larger areas but require more maintenance.
7. **Ease of Use**:
- Consider features like electric start, power steering, and adjustable chute controls for ease of operation.
8. **Brand and Warranty**:
- Choose reputable brands known for reliability and good customer service. Check the warranty for coverage details.
By evaluating these factors, you can select a snow blower that meets your specific needs and ensures efficient snow removal for your driveway.
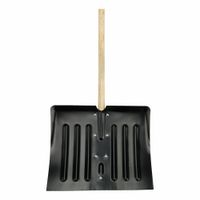
What are the differences between snow shovels and snow pushers?
Snow shovels and snow pushers are both tools designed for snow removal, but they serve different purposes and have distinct features.
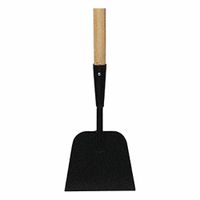
Snow Shovels:
1. **Design**: Snow shovels typically have a flat, rectangular blade with a slight curve, designed for lifting and throwing snow. The blade is often made of metal or hard plastic.
2. **Function**: They are ideal for clearing small areas, such as steps, walkways, and driveways, where precision is needed. The design allows users to scoop and lift snow, making it suitable for heavy, wet snow.
3. **Handle**: The handle is usually straight or slightly curved, providing leverage for lifting. It may have a D-grip for better control.
4. **Versatility**: Snow shovels can be used for breaking up ice and compacted snow due to their sturdy construction.
5. **Effort**: Requires more physical effort as it involves lifting and throwing snow.
Snow Pushers:
1. **Design**: Snow pushers have a wide, curved blade, often made of lightweight materials like plastic or aluminum, designed to push snow rather than lift it.
2. **Function**: Best suited for clearing large, open areas like driveways and sidewalks. They are effective for light to moderate snowfalls and work by pushing snow to the side.
3. **Handle**: The handle is usually longer and straight, allowing for a two-handed grip to maximize pushing power.
4. **Efficiency**: Snow pushers are efficient for quickly moving large volumes of snow without lifting, reducing strain on the back.
5. **Effort**: Requires less physical effort compared to shovels, as it involves pushing rather than lifting.
In summary, snow shovels are better for precision and heavy snow, while snow pushers are ideal for quickly clearing large areas with lighter snow.
How can I prevent ice from forming on my driveway?
To prevent ice from forming on your driveway, start by ensuring proper drainage to avoid water accumulation. Install or maintain gutters and downspouts to direct water away from the driveway. Before a snowstorm, apply a de-icing agent like calcium chloride or magnesium chloride, which lowers the freezing point of water. Consider using sand or kitty litter for traction if ice does form. Heated driveway systems, though costly, can be installed to melt snow and ice automatically. Regularly shovel snow to prevent compaction and ice formation. Use a snow blower for efficiency. Apply a thin layer of salt or a salt alternative after shoveling to prevent residual moisture from freezing. Keep the driveway clear of debris that can trap moisture. For long-term solutions, consider resurfacing the driveway with materials that have better traction or installing a permeable surface that allows water to drain through. Regular maintenance and timely action are key to preventing ice formation.
What is the safest ice melt for pets?
The safest ice melt for pets is typically one that is free from harmful chemicals such as sodium chloride (rock salt) and calcium chloride, which can irritate paws and be toxic if ingested. Pet-safe ice melts often use alternative ingredients like magnesium chloride, urea, or calcium magnesium acetate (CMA), which are less irritating and safer for pets.
Magnesium chloride is a popular choice because it is less harsh on paws and skin, and it works effectively at lower temperatures. Urea, a common fertilizer, is another option that is less toxic, though it is not as effective in extremely cold conditions. Calcium magnesium acetate is biodegradable and non-corrosive, making it a safe choice for pets and the environment, though it may be less effective in heavy ice conditions.
When selecting a pet-safe ice melt, look for products specifically labeled as "pet-friendly" or "pet-safe." These products are formulated to minimize harm to animals and often include added ingredients to reduce irritation. It's important to follow the manufacturer's instructions for application to ensure safety and effectiveness.
In addition to choosing a pet-safe ice melt, consider taking extra precautions such as wiping your pet's paws after walks to remove any residue, using booties to protect their feet, and ensuring they do not ingest any ice melt from the ground. Regularly check your pet's paws for any signs of irritation or injury during the winter months.
How do I use a roof rake safely?
To use a roof rake safely, follow these steps:
1. **Choose the Right Rake**: Select a roof rake with a long, extendable handle to reach the roof without needing a ladder. Ensure it has a non-slip grip and a lightweight design for easy handling.
2. **Check Weather Conditions**: Avoid using a roof rake during windy or icy conditions to prevent accidents. Wait for a calm day with stable footing.
3. **Wear Appropriate Gear**: Dress warmly in non-slip boots, gloves, and a hat. Use safety goggles to protect your eyes from falling debris.
4. **Clear the Area**: Ensure the area around your house is clear of obstacles, people, and pets. This prevents injuries from falling snow or ice.
5. **Position Yourself Safely**: Stand on the ground, not on a ladder, to maintain stability. Position yourself at a safe distance from the roof's edge.
6. **Use Proper Technique**: Start from the roof's edge and work your way up, pulling snow downwards. Avoid pulling large amounts of snow at once to prevent strain or damage to the roof.
7. **Avoid Electrical Hazards**: Be cautious of overhead power lines. Ensure the rake does not come into contact with them to prevent electrical hazards.
8. **Take Breaks**: Snow removal can be physically demanding. Take regular breaks to avoid fatigue and maintain focus.
9. **Inspect the Roof**: After clearing snow, inspect the roof for any damage or ice dams. Address any issues promptly to prevent further damage.
10. **Store the Rake Properly**: After use, clean and store the roof rake in a dry place to prevent rust and ensure it’s ready for future use.
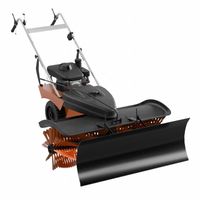
What are the benefits of using a snow sweeper?
A snow sweeper offers several benefits, making it an essential tool for managing snow in various environments:
1. **Efficiency**: Snow sweepers are designed to clear large areas quickly and effectively, reducing the time and effort required compared to manual shoveling. This is particularly beneficial for businesses and municipalities that need to maintain accessibility and safety.
2. **Safety**: By rapidly removing snow, sweepers help prevent the accumulation of ice, reducing the risk of slips and falls. This is crucial for pedestrian safety on sidewalks and in parking lots.
3. **Versatility**: Many snow sweepers are equipped with adjustable brushes and can handle different types of surfaces, from pavements to gravel paths. Some models can also be used year-round for tasks like sweeping leaves or debris.
4. **Cost-Effectiveness**: Although the initial investment may be significant, snow sweepers can save money in the long run by reducing labor costs and minimizing the need for de-icing chemicals, which can be expensive and environmentally harmful.
5. **Environmental Impact**: By reducing reliance on salt and chemical de-icers, snow sweepers help minimize environmental damage to plants, soil, and water sources. They also reduce the wear and tear on infrastructure caused by corrosive substances.
6. **Accessibility**: For individuals with physical limitations, snow sweepers provide an accessible option for snow removal, eliminating the physical strain associated with shoveling.
7. **Durability**: Built to withstand harsh winter conditions, snow sweepers are robust and durable, ensuring long-term use and reliability.
8. **Enhanced Property Value**: Regular and efficient snow removal maintains the aesthetic appeal and functionality of properties, potentially enhancing their value and attractiveness to tenants or buyers.
Overall, snow sweepers offer a practical, efficient, and environmentally friendly solution for snow management, benefiting both individual users and larger communities.
How do I maintain my snow blower?
1. **Read the Manual**: Familiarize yourself with the manufacturer's instructions for specific maintenance guidelines.
2. **Inspect and Tighten**: Regularly check for loose bolts, nuts, and fasteners. Tighten them to ensure the machine operates safely.
3. **Check the Oil**: Before each use, check the oil level and quality. Change the oil at least once a season or after 25 hours of use.
4. **Fuel System**: Use fresh fuel and add a fuel stabilizer to prevent clogs. At the end of the season, drain the fuel tank or run the engine until it’s empty.
5. **Spark Plug**: Inspect the spark plug for wear and replace it annually or if it appears damaged.
6. **Air Filter**: Clean or replace the air filter regularly to ensure efficient engine performance.
7. **Auger and Impeller**: Check for damage or wear. Replace any worn or damaged parts to maintain effective snow clearing.
8. **Belts**: Inspect drive and auger belts for wear and tension. Replace them if they show signs of fraying or cracking.
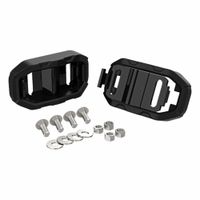
9. **Shear Pins**: Keep spare shear pins on hand and replace any that are broken to protect the auger from damage.
10. **Lubrication**: Lubricate moving parts such as the auger, chute, and wheels to prevent rust and ensure smooth operation.
11. **Tires**: Check tire pressure and inflate to the recommended level. For models with tracks, inspect for wear and proper tension.
12. **Chute and Deflector**: Ensure the chute and deflector move freely. Clear any obstructions and lubricate as needed.
13. **Storage**: Store in a dry, sheltered area. Cover the snow blower to protect it from dust and moisture.
14. **Pre-Season Check**: Before the first snowfall, perform a comprehensive check to ensure everything is in working order.
What is the most effective way to remove ice from sidewalks?
The most effective way to remove ice from sidewalks involves a combination of mechanical and chemical methods. Start by shoveling or using a snow blower to remove as much snow as possible before it turns to ice. This reduces the amount of ice that forms and makes subsequent removal easier.
For existing ice, apply a de-icing agent. Rock salt (sodium chloride) is commonly used, but it is less effective at temperatures below 15°F (-9°C) and can damage concrete and vegetation. Instead, consider using calcium chloride, which works at lower temperatures and is less harmful to surfaces and plants. Magnesium chloride is another option, effective at low temperatures and less corrosive.
For environmentally friendly alternatives, use sand or kitty litter to provide traction, though they do not melt ice. Beet juice mixed with salt brine is an eco-friendly de-icer that lowers the freezing point of water and reduces salt usage.
After applying a de-icer, use an ice scraper or a sturdy shovel to break up and remove the ice. For thick ice, a metal ice chopper can be effective. Always wear appropriate footwear to prevent slipping.
Preventive measures can also be effective. Before a storm, apply a liquid anti-icer like calcium chloride or magnesium chloride to prevent ice from bonding to the sidewalk. Regularly clear snow during a storm to prevent accumulation and subsequent icing.
In summary, the most effective approach combines timely snow removal, appropriate de-icing agents, and preventive measures to manage and remove ice from sidewalks efficiently.
How do I store snow removal equipment during the off-season?
To store snow removal equipment during the off-season, first clean all equipment thoroughly to remove salt, dirt, and debris, which can cause corrosion. For snow blowers, drain the fuel tank or add a fuel stabilizer to prevent the fuel from degrading and damaging the engine. Change the oil and replace the spark plug if necessary. Lubricate all moving parts to prevent rust and ensure smooth operation when needed again.
For shovels and smaller tools, inspect them for any damage and repair or replace as needed. Clean them thoroughly and apply a light coat of oil to metal parts to prevent rust. Store them in a dry place, ideally hung up or off the ground to avoid moisture contact.
For larger equipment like plows, clean them thoroughly and inspect for any damage. Touch up any chipped paint to prevent rust. Grease all fittings and moving parts. Store plows in a dry, covered area, ideally on a pallet or blocks to keep them off the ground.
Ensure all equipment is stored in a dry, cool place, away from direct sunlight and moisture. Use covers to protect from dust and dirt. If possible, store equipment in a garage or shed. For outdoor storage, use weatherproof covers and ensure they are securely fastened.
Finally, create a maintenance checklist for each piece of equipment, noting any repairs needed and maintenance performed. This will help ensure everything is in good working order when the snow season returns. Regularly check on stored equipment to ensure it remains in good condition throughout the off-season.