Call +(254) 703 030 000 / 751 483 999 / 721 704 777
.....Read More

Frequently Asked Questions
What are turning and grooving tools used for?
Turning and grooving tools are essential components in machining processes, primarily used in lathes and CNC machines to shape and finish materials, typically metals or plastics.
Turning tools are used to remove material from the outer diameter of a rotating workpiece. The primary purpose of turning is to produce cylindrical parts with precise dimensions and smooth finishes. Turning operations can include facing, taper turning, contour turning, and threading. These tools are designed to handle various cutting conditions and materials, ensuring efficient material removal and high-quality surface finishes. They come in different geometries and materials, such as high-speed steel, carbide, or ceramic, to suit specific applications and workpiece materials.
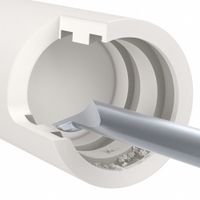
Grooving tools, on the other hand, are used to cut narrow, precise grooves into the workpiece. These grooves can serve various purposes, such as accommodating O-rings, creating slots for retaining rings, or preparing the workpiece for subsequent operations like threading. Grooving tools are designed to cut both external and internal grooves, and they come in various shapes and sizes to match the required groove dimensions. They can also be used for parting-off operations, where the tool cuts through the entire diameter of the workpiece to separate it into two parts.
Both turning and grooving tools are critical for achieving the desired shape, size, and surface finish of a workpiece. They are selected based on factors such as the material of the workpiece, the type of operation, and the required precision. Proper selection and use of these tools are crucial for optimizing machining efficiency, tool life, and the quality of the finished product.
How do you select the right grooving tool for a lathe?
Selecting the right grooving tool for a lathe involves several key considerations:
1. **Material Compatibility**: Choose a tool material compatible with the workpiece material. Carbide tools are suitable for hard materials, while high-speed steel (HSS) is better for softer materials.
2. **Groove Dimensions**: Determine the groove width, depth, and profile. Select a tool that matches these dimensions. For narrow grooves, use a thin tool; for deeper grooves, ensure the tool can handle the depth without deflection.
3. **Tool Geometry**: Consider the tool's geometry, including rake angle, clearance angle, and cutting edge design. Positive rake angles reduce cutting forces, while negative angles are more robust for heavy cuts.
4. **Insert Type**: Choose between solid tools and indexable inserts. Indexable inserts are cost-effective for high-volume production as they can be replaced without changing the entire tool.
5. **Machine Capability**: Ensure the lathe can accommodate the tool's size and that it has sufficient power and rigidity to handle the cutting forces.
6. **Coolant and Lubrication**: Some tools require specific coolants or lubricants to function optimally. Ensure compatibility with your machine's coolant system.
7. **Surface Finish Requirements**: If a high-quality surface finish is needed, select a tool with a fine cutting edge and appropriate coating to reduce friction and wear.
8. **Tool Holder Compatibility**: Ensure the tool fits the lathe's tool holder system. Compatibility with quick-change systems can improve efficiency.
9. **Cost and Availability**: Consider the cost of the tool and its availability. Balance initial cost with tool life and performance.
10. **Manufacturer Recommendations**: Follow manufacturer guidelines for tool selection based on specific applications and materials.
By considering these factors, you can select a grooving tool that meets your specific machining requirements effectively.
What materials can be machined with turning and grooving tools?
Turning and grooving tools can machine a wide variety of materials, including:
1. **Metals:**
- **Steel:** Both carbon and alloy steels are commonly machined using turning and grooving tools. High-speed steel (HSS) and carbide tools are often used.
- **Stainless Steel:** Requires tools with high wear resistance due to its toughness and work-hardening properties.
- **Aluminum:** Easily machined with high-speed tools, often requiring specific geometries to prevent built-up edge.
- **Copper and Brass:** These materials are relatively easy to machine, with brass being more favorable due to its free-machining properties.
- **Titanium:** Requires sharp, wear-resistant tools due to its strength and tendency to work harden.
- **Cast Iron:** Machined with carbide tools, though it can be abrasive and cause tool wear.
2. **Non-Metals:**
- **Plastics:** Includes materials like nylon, PVC, and acrylic. These require sharp tools to prevent melting and ensure a smooth finish.
- **Composites:** Such as fiberglass and carbon fiber, which require specialized tools to handle their abrasive nature.
3. **Superalloys:**
- **Inconel and Hastelloy:** These high-temperature alloys are challenging to machine and require tools with high heat resistance and toughness.
4. **Ceramics:**
- Machining ceramics is difficult due to their hardness and brittleness, often requiring diamond or CBN tools.
5. **Wood:**
- While not as common in industrial settings, wood can be machined with turning tools, typically using high-speed steel.
Each material presents unique challenges, such as tool wear, heat generation, and surface finish requirements, necessitating the selection of appropriate tool materials and geometries.
How do you maintain and sharpen turning and grooving tools?
To maintain and sharpen turning and grooving tools, follow these steps:
1. **Inspection**: Regularly inspect tools for wear, damage, or dullness. Look for signs like chipping, rounding of edges, or surface finish deterioration.
2. **Cleaning**: Clean tools after each use to remove debris, coolant, and chips. Use a soft brush or cloth and appropriate cleaning agents to prevent corrosion.
3. **Sharpening**: Use a bench grinder or specialized tool grinder. Ensure the grinding wheel is appropriate for the tool material (e.g., diamond wheels for carbide tools).
4. **Angle Maintenance**: Maintain the original tool geometry. Use a protractor or angle gauge to ensure the correct rake and clearance angles are preserved during sharpening.
5. **Coolant Use**: Apply coolant during grinding to prevent overheating, which can alter tool hardness and lead to premature wear.
6. **Honing**: After grinding, hone the cutting edge with a fine stone or diamond file to remove burrs and achieve a sharp edge.
7. **Balancing**: Ensure the tool is balanced after sharpening to prevent vibration during operation, which can affect precision and tool life.
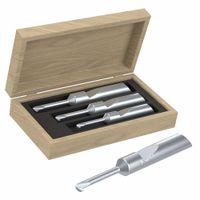
8. **Storage**: Store tools in a dry, organized manner. Use protective covers or cases to prevent accidental damage.
9. **Documentation**: Keep records of tool maintenance, including sharpening dates and any issues encountered, to track tool life and performance.
10. **Training**: Ensure personnel are trained in proper tool handling and maintenance techniques to extend tool life and ensure safety.
By following these steps, you can maintain the efficiency and longevity of turning and grooving tools, ensuring optimal performance and precision in machining operations.
What are the differences between face grooving and internal grooving?
Face grooving and internal grooving are both machining processes used to create grooves, but they differ in their applications and techniques.
Face Grooving:
1. **Location**: Face grooving is performed on the end face of a workpiece, typically on a flat surface perpendicular to the axis of rotation.
2. **Purpose**: It is used to create grooves for retaining rings, O-rings, or to provide clearance for mating parts.
3. **Tool Orientation**: The cutting tool is oriented to cut on the face of the workpiece.
4. **Tool Design**: Tools for face grooving are designed to handle radial forces and are often wider to accommodate the face width.
5. **Applications**: Common in applications requiring sealing surfaces or retaining features on the face of components like flanges or covers.
Internal Grooving:
1. **Location**: Internal grooving is performed inside a bore or hole within the workpiece.
2. **Purpose**: It is used to create grooves for internal retaining rings, seals, or to facilitate assembly of internal components.
3. **Tool Orientation**: The cutting tool is oriented to cut inside the bore, often requiring longer and more slender tools.
4. **Tool Design**: Tools for internal grooving are designed to fit within the bore and handle axial forces, often with a smaller profile to access tight spaces.
5. **Applications**: Common in applications involving internal components like cylinders, bushings, or housings.
In summary, the primary differences lie in the location of the groove (face vs. internal), the orientation and design of the cutting tools, and the specific applications for which each process is used.
How do you set up a lathe for turning and grooving operations?
1. **Safety First**: Wear appropriate personal protective equipment (PPE) such as safety glasses and gloves. Ensure the lathe is clean and free of obstructions.
2. **Select and Install the Tool**: Choose the appropriate turning or grooving tool based on the material and desired finish. Secure the tool in the tool post, ensuring it is at the correct height, typically at the centerline of the workpiece.
3. **Prepare the Workpiece**: Measure and mark the workpiece for the desired dimensions. Secure it in the chuck or between centers, ensuring it is tightly clamped and properly aligned.
4. **Set the Lathe Speed**: Determine the correct spindle speed based on the material and diameter of the workpiece. Adjust the lathe speed using the speed control or gear settings.
5. **Adjust the Tool Position**: For turning, position the tool to make contact with the workpiece at the desired starting point. For grooving, align the tool with the marked groove location.
6. **Set the Depth of Cut**: Use the cross-slide or compound rest to set the depth of cut. For grooving, ensure the tool is perpendicular to the workpiece and set to the correct depth.
7. **Check Alignment**: Ensure the tool is perpendicular to the workpiece for grooving and properly aligned for turning. Use a dial indicator if necessary to verify alignment.
8. **Perform a Test Cut**: Make a light test cut to verify settings and adjust as necessary. Check the surface finish and dimensions.
9. **Begin Machining**: Engage the feed mechanism for turning or manually feed the tool for grooving. Monitor the operation closely, adjusting feed rate and depth as needed.
10. **Finish and Inspect**: Once the operation is complete, stop the lathe, remove the workpiece, and inspect it for accuracy and finish. Make any necessary adjustments for subsequent operations.
What safety precautions should be taken when using turning and grooving tools?
When using turning and grooving tools, several safety precautions are essential to ensure a safe working environment:
1. **Personal Protective Equipment (PPE):** Always wear safety goggles to protect your eyes from flying debris. Use gloves to protect your hands, but ensure they are tight-fitting to avoid entanglement. Wear hearing protection if the noise level is high.
2. **Machine Inspection:** Before starting, inspect the machine for any damage or wear. Ensure all guards and covers are in place and functioning properly.
3. **Tool Condition:** Check the turning and grooving tools for sharpness and integrity. Replace any dull or damaged tools to prevent accidents and ensure quality work.
4. **Secure Workpiece:** Ensure the workpiece is securely clamped or held in place to prevent movement during operation, which could lead to accidents.
5. **Proper Setup:** Set the correct speed, feed, and depth of cut according to the material and tool specifications. Incorrect settings can lead to tool breakage or workpiece damage.
6. **Clear Work Area:** Keep the work area clean and free of obstructions. Remove any unnecessary tools or materials that could cause tripping or interference.
7. **Avoid Distractions:** Stay focused on the task at hand. Avoid using the machine if you are tired or distracted, as this increases the risk of accidents.
8. **Emergency Procedures:** Be familiar with the machine's emergency stop procedures and ensure they are easily accessible.
9. **Training:** Only trained and authorized personnel should operate turning and grooving machines. Regular training updates are recommended to stay informed about safety practices.
10. **Maintenance:** Regularly maintain and service the machine to ensure it operates safely and efficiently.
By adhering to these safety precautions, the risk of accidents and injuries can be significantly reduced when using turning and grooving tools.