Call +(254) 703 030 000 / 751 483 999 / 721 704 777
.....Read More
Frequently Asked Questions
What is a knurling tool used for?
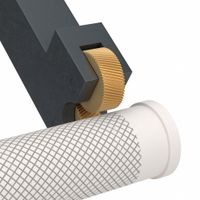
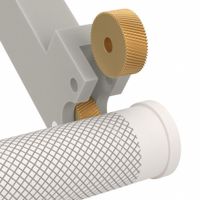
A knurling tool is used to create a textured pattern on the surface of a workpiece, typically cylindrical, to enhance grip or aesthetic appeal. This tool is commonly employed in metalworking and machining processes. The knurling process involves pressing a set of hardened steel wheels, known as knurls, against the rotating workpiece. These wheels have a series of sharp, patterned teeth that impress a corresponding pattern onto the material's surface.
Knurling is often applied to parts that require a secure grip, such as tool handles, knobs, and fasteners. The patterns can vary, with common types including straight, diamond, and cross-hatched designs. The choice of pattern depends on the functional and aesthetic requirements of the component.
In addition to providing grip, knurling can also be used for decorative purposes, adding a visually appealing texture to metal parts. It can also serve as a reference mark or alignment aid on mechanical components.
Knurling tools are typically used on lathes, where the workpiece is rotated while the knurling tool is pressed against it. The process requires careful control of pressure and speed to ensure a consistent pattern without damaging the workpiece. Knurling can be performed on various materials, including metals like steel, aluminum, and brass, as well as some plastics.
Overall, a knurling tool is an essential instrument in manufacturing and machining, providing both functional and decorative benefits to a wide range of products.
How do you use a knurling tool on a lathe?
To use a knurling tool on a lathe, first ensure the lathe is set up correctly and the workpiece is securely mounted in the chuck. Select the appropriate knurling tool, which typically consists of two or three hardened steel wheels with patterns. Position the tool in the tool post, ensuring it is perpendicular to the workpiece and aligned with the centerline.
Adjust the lathe speed to a low RPM, typically between 50 to 200 RPM, to prevent excessive heat and tool wear. Engage the lathe's power feed to ensure a consistent feed rate, which is crucial for uniform knurling.
Begin by bringing the knurling tool into contact with the rotating workpiece. Apply steady pressure to the tool, allowing the knurling wheels to imprint the pattern onto the surface. The pressure should be sufficient to form the pattern but not so high as to damage the tool or workpiece.
Monitor the knurling process closely, ensuring the pattern is forming evenly. Adjust the feed rate or pressure if necessary to maintain consistency. Once the desired length of knurling is achieved, retract the tool and stop the lathe.
Inspect the knurled surface for uniformity and depth. If the pattern is not satisfactory, adjustments may be needed, and the process can be repeated. Clean the workpiece to remove any debris or burrs resulting from the knurling process.
Finally, ensure all tools and equipment are properly stored and the lathe is cleaned for future use.
What are the different types of knurling patterns?
Knurling patterns are primarily categorized into three main types: straight, diamond, and annular.
1. **Straight Knurling**: This pattern consists of parallel lines that run along the length of the workpiece. It is often used for decorative purposes or to provide a grip on cylindrical surfaces. Straight knurling is typically applied when rotational grip is not a primary concern, as it does not provide as much resistance to turning as other patterns.
2. **Diamond Knurling**: This is the most common knurling pattern, characterized by a crisscross design that forms a series of diamond shapes. Diamond knurling is highly effective for providing a strong grip, making it ideal for hand tools, knobs, and handles. The pattern is created by two sets of diagonal lines intersecting each other, which enhances friction and prevents slipping.
3. **Annular Knurling**: Also known as circular or ring knurling, this pattern consists of concentric circles or rings around the workpiece. Annular knurling is less common and is typically used for aesthetic purposes or when a specific type of grip is required. It is often found on parts that need to be rotated by hand, such as adjustment knobs.
Each knurling pattern can vary in pitch and depth, allowing for customization based on the specific application and material of the workpiece. The choice of pattern depends on the functional requirements, aesthetic preferences, and the manufacturing process involved.
How do you choose the right knurling tool?
Choosing the right knurling tool involves several key considerations to ensure optimal performance and desired results. First, determine the type of knurling required: straight, diamond, or diagonal. This depends on the application and aesthetic preference. Next, consider the material of the workpiece. Harder materials may require more robust tools, while softer materials might need less aggressive knurling patterns to avoid deformation.
The size and diameter of the workpiece are crucial in selecting the appropriate tool size and knurling wheel. Ensure the tool can accommodate the workpiece dimensions without causing excessive pressure or slippage. The pitch of the knurling pattern is another important factor; finer pitches are suitable for smaller diameters, while coarser pitches work better for larger surfaces.
Tool material and quality are also vital. High-speed steel (HSS) or carbide tools are preferred for their durability and ability to withstand high temperatures and pressures. Consider the tool holder compatibility with your lathe or machine to ensure secure and stable operation.
Additionally, assess the knurling tool's design, such as single-wheel, double-wheel, or rotary, based on the specific application and machine setup. Single-wheel tools are simpler and suitable for straightforward tasks, while double-wheel or rotary tools offer more complex patterns and are ideal for high-volume production.
Finally, consider the manufacturer's reputation and customer reviews to ensure reliability and performance. Opt for tools from reputable brands known for precision engineering and durability. By evaluating these factors, you can select a knurling tool that meets your specific needs and delivers high-quality results.
What materials can be knurled?
Knurling is a machining process used to create a patterned texture on the surface of a material, typically for grip or aesthetic purposes. Various materials can be knurled, depending on their properties and the intended application.
1. **Metals**: Metals are the most common materials for knurling due to their strength and durability. Common metals include:
- **Steel**: Both carbon and stainless steel are frequently knurled for tools, handles, and fasteners.
- **Aluminum**: Lightweight and corrosion-resistant, aluminum is often knurled for automotive and aerospace components.
- **Brass**: Known for its machinability and aesthetic appeal, brass is used in decorative and functional applications.
- **Copper**: Used for its conductivity and appearance, copper is knurled in electrical components and decorative items.
- **Titanium**: Valued for its strength-to-weight ratio, titanium is knurled in high-performance applications.
2. **Plastics**: Certain plastics can be knurled, especially when a textured grip is needed. These include:
- **Nylon**: Durable and resistant to wear, nylon is used in mechanical components.
- **Polycarbonate**: Known for its impact resistance, polycarbonate is used in safety equipment and consumer products.
- **ABS (Acrylonitrile Butadiene Styrene)**: Common in consumer electronics and automotive parts.
3. **Wood**: While less common, wood can be knurled for decorative purposes or to enhance grip on tool handles and furniture.
4. **Rubber**: Soft materials like rubber can be knurled to improve grip, often seen in grips for sports equipment and tools.
5. **Composites**: Some composite materials, combining properties of different substances, can be knurled for specialized applications.
The choice of material for knurling depends on factors such as the desired texture, the material's machinability, and the application's functional requirements.
How do you maintain and replace knurling wheels?
To maintain and replace knurling wheels, follow these steps:
1. **Inspection**: Regularly inspect the knurling wheels for wear and tear. Look for signs of dullness, chipping, or uneven wear, which can affect the quality of the knurled surface.
2. **Cleaning**: Keep the wheels clean by removing debris and metal shavings after each use. Use a brush or compressed air to clean the teeth of the wheels, ensuring no material is lodged between them.
3. **Lubrication**: Apply a suitable lubricant to the knurling wheels to reduce friction and prevent overheating during operation. This helps in prolonging the life of the wheels.
4. **Alignment**: Ensure the knurling wheels are properly aligned with the workpiece. Misalignment can cause uneven patterns and excessive wear on the wheels.
5. **Pressure Adjustment**: Adjust the pressure applied by the knurling tool to avoid excessive force, which can damage the wheels and the workpiece. Use the minimum pressure necessary to achieve the desired pattern.
6. **Replacement**: When the knurling wheels become too worn or damaged, replace them. To do this, first, remove the knurling tool from the machine. Then, unscrew or unbolt the wheels from the tool, depending on the design. Install the new wheels, ensuring they are securely fastened and properly aligned.
7. **Testing**: After replacement, test the new wheels on a scrap piece to ensure they produce the desired pattern and are functioning correctly.
8. **Documentation**: Keep a maintenance log to track the condition of the knurling wheels and schedule regular inspections and replacements as needed.
By following these steps, you can maintain the efficiency and longevity of your knurling wheels, ensuring consistent quality in your knurling operations.
What are the common problems and solutions in knurling?
Common problems in knurling include:
1. **Poor Knurl Pattern**: This occurs when the knurl pattern is not well-defined or consistent. It can be caused by incorrect tool alignment, insufficient pressure, or worn-out knurling tools.
**Solution**: Ensure the knurling tool is properly aligned with the workpiece. Apply adequate pressure and replace worn tools. Use a lathe with a rigid setup to minimize vibrations.
2. **Tool Slippage**: The knurling tool may slip on the workpiece, leading to uneven patterns.
**Solution**: Increase the contact pressure and ensure the workpiece is securely clamped. Use a knurling tool with a sharper profile to enhance grip.
3. **Material Deformation**: Excessive force can deform the workpiece, especially if it is made of softer materials.
**Solution**: Adjust the feed rate and pressure to suit the material's hardness. Use a knurling tool with a finer pitch for softer materials.
4. **Chatter Marks**: Vibrations during the knurling process can cause chatter marks, affecting the surface finish.
**Solution**: Ensure the machine setup is rigid and reduce the speed to minimize vibrations. Use a dampening tool holder if necessary.
5. **Tool Wear**: Knurling tools can wear out quickly, especially when used on hard materials.
**Solution**: Regularly inspect and replace knurling tools. Use high-quality, wear-resistant materials for the knurling tool.
6. **Inconsistent Depth**: Variations in knurl depth can occur due to uneven pressure or tool misalignment.
**Solution**: Maintain consistent pressure and ensure the tool is properly aligned. Use a lathe with a digital readout for precise control.
By addressing these issues with proper setup, tool maintenance, and process adjustments, the quality of knurling can be significantly improved.