Call +(254) 703 030 000 / 751 483 999 / 721 704 777
.....Read More
Frequently Asked Questions
What is a boring bar used for?
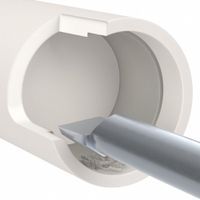
A boring bar is a tool used in machining operations to enlarge or finish the inside diameter of a hole. It is commonly employed in lathes, milling machines, or boring mills. The primary function of a boring bar is to achieve precise internal diameters and improve the surface finish of pre-drilled or cast holes.
Boring bars consist of a long, cylindrical shank with a cutting tool attached at one end. The cutting tool can be made from various materials, such as high-speed steel, carbide, or ceramic, depending on the material being machined and the desired finish. The bar is mounted in the machine's tool holder, and as the workpiece rotates, the cutting tool removes material from the inside of the hole.
Boring bars are essential for achieving tight tolerances and smooth finishes in applications where precision is critical, such as in the automotive, aerospace, and manufacturing industries. They are used to create accurate cylindrical shapes, correct misaligned holes, and produce tapered or stepped bores. Additionally, boring bars can be used for internal threading and grooving operations.
The design of a boring bar can vary based on the specific application. Some bars are adjustable, allowing for changes in the cutting diameter, while others are fixed. The length and diameter of the bar are chosen based on the depth and size of the hole being machined. Proper selection and setup of a boring bar are crucial to minimize deflection and vibration, which can affect the accuracy and surface finish of the machined hole.
How do you choose the right boring bar size?
To choose the right boring bar size, consider the following factors:
1. **Bore Diameter**: The boring bar should be small enough to fit into the bore but large enough to provide stability. Typically, the bar diameter should be about 70-80% of the bore diameter to minimize deflection.
2. **Length-to-Diameter Ratio**: A lower ratio is preferred to reduce deflection and vibration. Ideally, keep the ratio below 4:1. If a longer reach is necessary, consider using a dampened or carbide bar to enhance rigidity.
3. **Material**: Choose a boring bar material based on the workpiece material and machining conditions. Steel bars are cost-effective for short reaches, while carbide bars offer better rigidity and vibration resistance for longer reaches.
4. **Insert Type and Size**: Ensure the boring bar can accommodate the required insert size and type for the specific machining operation. The insert should be suitable for the material and provide the desired surface finish and tolerance.
5. **Machine Capability**: Consider the machine's power and rigidity. A larger, more rigid machine can handle larger bars, while smaller machines may require smaller, lighter bars.
6. **Coolant and Chip Evacuation**: Ensure the boring bar design allows for effective coolant delivery and chip evacuation, especially in deep bores, to maintain tool life and surface finish.
7. **Application Requirements**: Consider the specific requirements of the operation, such as surface finish, tolerance, and production volume, to select a bar that meets these needs efficiently.
By evaluating these factors, you can select a boring bar that provides the necessary balance between size, rigidity, and performance for your specific machining application.
What materials are boring bars made from?
Boring bars are typically made from materials that provide a balance of strength, rigidity, and wear resistance. Common materials include:
1. **High-Speed Steel (HSS):** Known for its toughness and ability to withstand high temperatures, HSS is often used for general-purpose boring bars. It is cost-effective and suitable for a variety of materials.
2. **Carbide:** Tungsten carbide is a popular choice for boring bars due to its hardness and wear resistance. It can maintain a sharp cutting edge at high temperatures, making it ideal for high-speed applications and harder materials.
3. **Cermet:** A composite material made from ceramic and metallic materials, cermet offers excellent wear resistance and can provide a superior surface finish. It is used in applications requiring high precision.
4. **Ceramic:** Ceramic boring bars are used for high-speed machining of hard materials. They offer excellent heat resistance and can maintain hardness at elevated temperatures, but they are more brittle compared to other materials.
5. **Cobalt Steel:** This is a variation of high-speed steel with added cobalt, which enhances its heat resistance and hardness. It is used for more demanding applications where standard HSS might fail.
6. **Polycrystalline Diamond (PCD):** PCD-tipped boring bars are used for non-ferrous and abrasive materials. They offer exceptional wear resistance and can produce high-quality finishes.
7. **Cubic Boron Nitride (CBN):** CBN is second only to diamond in hardness and is used for machining hard ferrous materials. It provides excellent wear resistance and thermal stability.
8. **Steel with Carbide Inserts:** Many boring bars are made from steel for the body with replaceable carbide inserts. This combination provides a cost-effective solution with the benefits of carbide cutting edges.
These materials are selected based on the specific requirements of the machining operation, including the material being machined, the desired surface finish, and the operational speed.
How do you set up a boring bar on a lathe?
To set up a boring bar on a lathe, follow these steps:
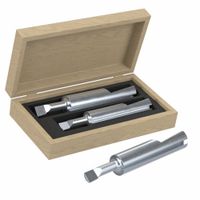
1. **Select the Boring Bar**: Choose a boring bar that fits the size and depth of the hole you need to bore. Ensure it is compatible with your lathe's tool post.
2. **Install the Tool Holder**: Secure the appropriate tool holder in the lathe's tool post. Ensure it is tightly clamped to prevent movement during operation.
3. **Insert the Boring Bar**: Place the boring bar into the tool holder. Adjust its position so that the cutting edge is at the correct height, typically at the centerline of the workpiece.
4. **Align the Boring Bar**: Use a dial indicator or a test bar to ensure the boring bar is parallel to the lathe bed. This prevents tapering in the bore.
5. **Set the Cutting Edge**: Adjust the boring bar so that the cutting edge is slightly above the centerline to avoid rubbing and ensure efficient cutting.
6. **Secure the Boring Bar**: Tighten the tool holder screws to secure the boring bar firmly. Double-check the alignment and height after tightening.
7. **Adjust the Lathe Settings**: Set the appropriate spindle speed and feed rate based on the material and diameter of the bore.
8. **Test Run**: Perform a test cut on a scrap piece to verify the setup. Check for any vibrations or misalignment.
9. **Final Adjustments**: Make any necessary adjustments to the boring bar position or lathe settings based on the test run results.
10. **Begin Boring**: Once satisfied with the setup, proceed with boring the actual workpiece, ensuring consistent feed and speed for a smooth finish.
What is the difference between boring and drilling?
Boring and drilling are both machining processes used to create holes in materials, but they differ in purpose and technique.
Drilling is the process of creating a new hole in a material using a drill bit. It is typically the initial step in hole-making and involves the use of a rotating tool to cut through the material. Drilling is used to create holes of various sizes and depths, and it can be performed on a wide range of materials, including metal, wood, and plastic. The primary goal of drilling is to produce a hole with a specific diameter and depth.
Boring, on the other hand, is a machining process used to enlarge an existing hole or to achieve greater accuracy in the size and finish of a hole. It is often performed after drilling to refine the hole's dimensions and improve its surface finish. Boring can be done using a single-point cutting tool or a boring head, which is mounted on a machine such as a lathe or a milling machine. The process is used to achieve precise tolerances and is often employed in applications where high accuracy is required.
In summary, the key difference between boring and drilling lies in their purpose and application: drilling is used to create new holes, while boring is used to enlarge and refine existing holes.
How do you maintain and sharpen a boring bar?
To maintain and sharpen a boring bar, follow these steps:
1. **Inspection**: Regularly inspect the boring bar for wear, damage, or buildup of material. Check the cutting edge for dullness or chipping.
2. **Cleaning**: Clean the boring bar thoroughly to remove any debris, coolant, or chips. Use a brush and a suitable cleaning solution to ensure all residues are removed.
3. **Sharpening**:
- **Tool Grinding**: Use a tool grinder to sharpen the cutting edge. Ensure the grinder is set to the correct angle for the specific boring bar. Typically, a relief angle of 5-7 degrees and a rake angle of 10-15 degrees are used, but this can vary based on the material and application.
- **Honing**: After grinding, hone the cutting edge with a fine honing stone to remove burrs and achieve a smooth, sharp edge.
4. **Balancing**: Ensure the boring bar is balanced to prevent vibrations during operation. This can be done using a balancing machine or by manually adjusting the weight distribution.
5. **Coating**: If applicable, reapply any protective coatings that may have worn off during sharpening. This helps reduce friction and increase tool life.
6. **Storage**: Store the boring bar in a dry, clean environment to prevent rust and corrosion. Use protective covers or cases to avoid accidental damage.
7. **Regular Maintenance**: Implement a regular maintenance schedule to check and sharpen the boring bar as needed. This ensures consistent performance and prolongs the tool's lifespan.
By following these steps, you can maintain and sharpen a boring bar effectively, ensuring optimal performance and longevity.
What are the common problems encountered with boring bars and how to solve them?
Common problems with boring bars include:
1. **Vibration and Chatter**: This occurs due to the long overhang of the boring bar. To solve this, use a larger diameter bar, reduce the overhang, or use a dampened boring bar. Adjusting cutting parameters like speed and feed can also help.
2. **Poor Surface Finish**: This can result from tool wear, incorrect cutting parameters, or vibration. Ensure the tool is sharp, optimize cutting speed and feed, and minimize vibration by using a rigid setup.
3. **Tool Deflection**: Excessive tool deflection can lead to inaccurate dimensions. Use a stiffer boring bar, reduce the overhang, and decrease the depth of cut to minimize deflection.
4. **Chip Control**: Poor chip evacuation can cause surface damage and tool wear. Use appropriate chip breakers, increase coolant flow, or adjust cutting parameters to improve chip control.
5. **Tool Wear**: Rapid tool wear can be due to incorrect cutting speeds, feeds, or material hardness. Use the correct tool material and geometry, and adjust cutting parameters to extend tool life.
6. **Inaccurate Boring**: This can be caused by tool deflection, machine misalignment, or thermal expansion. Ensure proper machine alignment, use a stable setup, and allow the machine to reach operating temperature before precision boring.
7. **Excessive Heat**: Excessive heat can lead to tool wear and poor surface finish. Use adequate coolant, reduce cutting speed, or use a tool with better heat resistance.
By addressing these issues with appropriate solutions, the performance and accuracy of boring operations can be significantly improved.