Call +(254) 703 030 000 / 751 483 999 / 721 704 777
.....Read More
Frequently Asked Questions
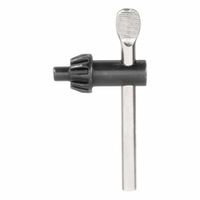
What is the difference between keyed and keyless drill chucks?
Keyed drill chucks use a key to tighten or loosen the grip on the drill bit. This key fits into a gear mechanism on the chuck, allowing for a secure and precise tightening. Keyed chucks are known for their strong grip, making them ideal for heavy-duty applications where the drill bit must remain firmly in place. They are often found on larger, more powerful drills and are preferred in situations where maximum torque is required.
Keyless drill chucks, on the other hand, do not require a key for operation. They are designed to be tightened and loosened by hand, which makes them more convenient and quicker to use. Keyless chucks are typically found on cordless drills and are favored for their ease of use and speed, especially in applications where bits need to be changed frequently. However, they may not provide as strong a grip as keyed chucks, which can be a disadvantage in high-torque situations.
In summary, the main difference lies in the method of securing the drill bit: keyed chucks use a key for a strong grip, while keyless chucks rely on hand tightening for convenience and speed.
How do I choose the right drill chuck for my drill press or lathe?
To choose the right drill chuck for your drill press or lathe, consider the following factors:
1. **Type of Chuck**: Determine whether you need a keyed, keyless, or hybrid chuck. Keyed chucks offer a secure grip and are ideal for heavy-duty applications, while keyless chucks allow for quick bit changes and are suitable for lighter tasks.
2. **Chuck Size**: Match the chuck size to the drill bit shank size you plan to use. Common sizes include 1/4", 3/8", and 1/2". Ensure the chuck can accommodate the range of bit sizes you intend to use.
3. **Mounting Type**: Identify the spindle taper or thread type on your drill press or lathe. Common tapers include Jacobs Taper (JT) and Morse Taper (MT). Ensure compatibility between the chuck and the spindle.
4. **Material and Build Quality**: Opt for chucks made from durable materials like hardened steel for longevity and precision. High-quality chucks provide better grip and reduce the risk of slippage.
5. **Runout Tolerance**: Check the runout specification, which indicates the chuck's precision. Lower runout values mean higher accuracy, which is crucial for precision work.
6. **Brand and Compatibility**: Consider reputable brands known for quality and reliability. Ensure the chuck is compatible with your specific drill press or lathe model.
7. **Intended Use**: Consider the type of work you will be doing. Heavy-duty tasks may require a more robust chuck, while lighter tasks can use a simpler model.
8. **Budget**: Balance your needs with your budget. While higher-end chucks offer better performance, there are cost-effective options that provide adequate functionality for less demanding tasks.
By evaluating these factors, you can select a drill chuck that meets your specific needs and ensures optimal performance for your projects.
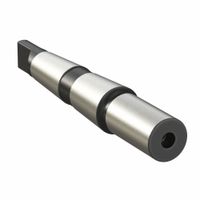
What are Morse taper sleeves and how are they used?
Morse taper sleeves are cylindrical tools used to adapt or extend the taper size of machine tool spindles and accessories. They are integral in machining operations, particularly in lathes, drill presses, and milling machines, where they facilitate the fitting of various tool shanks into machine spindles. The Morse taper system, developed by Stephen A. Morse in the mid-19th century, is characterized by a self-holding taper that ensures a secure fit between the tool and the machine spindle.
Morse taper sleeves come in various sizes, typically numbered from MT0 to MT7, with each number representing a specific taper angle and diameter. These sleeves are used to adapt a smaller Morse taper tool to a larger spindle or vice versa. For instance, if a machine spindle has a Morse taper size of MT3 and the tool shank is MT2, an MT3 to MT2 reducing sleeve would be used to fit the tool into the spindle.
The primary function of Morse taper sleeves is to provide versatility and flexibility in machining operations. They allow machinists to use a wide range of tools without needing to change the machine spindle or tool holder. This adaptability is crucial in operations requiring frequent tool changes or when using machines with fixed spindle sizes.
Morse taper sleeves are designed with precision to ensure a tight fit, minimizing tool runout and ensuring accurate machining. They are typically made from hardened steel to withstand the stresses of machining operations. The self-locking nature of the Morse taper means that the tool is held securely in place during operation, reducing the risk of slippage and ensuring consistent performance.
In summary, Morse taper sleeves are essential components in machining, providing adaptability and precision by allowing different tool sizes to be used with various machine spindles.
How do I maintain and clean my drill chuck?
To maintain and clean your drill chuck, follow these steps:
1. **Safety First**: Unplug the drill or remove the battery to ensure it is not powered.
2. **Remove the Bit**: Open the chuck by turning it counterclockwise and remove any drill bit.
3. **Initial Cleaning**: Use a dry cloth or compressed air to remove loose dust and debris from the chuck's exterior and interior.
4. **Deep Cleaning**:
- For keyed chucks, use the chuck key to open the jaws fully. For keyless chucks, twist the sleeve to open the jaws.
- Use a small brush, like a toothbrush, to scrub away dirt and grime from the jaws and inside the chuck.
- If necessary, use a mild solvent or rubbing alcohol on a cloth to wipe down the chuck, removing any stubborn grease or residue.
5. **Lubrication**:
- Apply a few drops of light machine oil or a specialized chuck lubricant to the moving parts of the chuck.
- Open and close the chuck several times to distribute the lubricant evenly.
6. **Reassemble and Test**:
- Reinsert the drill bit and tighten the chuck to ensure it grips properly.
- Plug in or reattach the battery to the drill and test the chuck by running the drill at a low speed to ensure smooth operation.
7. **Regular Maintenance**:
- Clean the chuck after every few uses to prevent buildup.
- Store the drill in a dry place to avoid rust and corrosion.
By following these steps, you can ensure your drill chuck remains in good working condition, providing reliable performance and extending its lifespan.
What are the common sizes of drill chuck arbors?
Common sizes of drill chuck arbors are typically defined by the taper and the thread size they accommodate. The most prevalent types are:
1. **Jacobs Taper (JT):**
- JT1: Smallest, used for light-duty applications.
- JT2, JT3, JT4, JT5, JT6: Increasingly larger sizes for medium to heavy-duty applications.
2. **Morse Taper (MT):**
- MT1, MT2, MT3, MT4, MT5, MT6: Used for larger drill presses and lathes, with MT2 and MT3 being the most common in general-purpose drilling.
3. **Brown & Sharpe Taper (B&S):**
- Less common, used in specific industrial applications.
4. **Threaded Arbors:**
- 1/2"-20: Common for smaller chucks.
- 5/8"-16, 3/4"-16: Used for larger chucks.
5. **Straight Shank Arbors:**
- Available in various diameters, typically ranging from 1/4" to 1".
These sizes are chosen based on the specific requirements of the drill press or machine tool, the size of the drill chuck, and the nature of the work being performed.
How do I replace a drill chuck on a milling machine?
To replace a drill chuck on a milling machine, follow these steps:
1. **Safety First**: Ensure the milling machine is turned off and unplugged. Wear safety goggles and gloves.
2. **Remove the Old Chuck**:
- **Lower the Quill**: Use the quill handle to lower the quill to a comfortable working height.
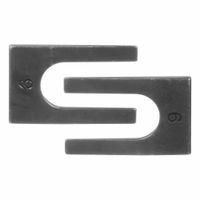
- **Loosen the Chuck**: If the chuck is attached with a drawbar, use a wrench to loosen it. If it’s a taper-mounted chuck, insert a drift key into the spindle slot and tap it gently with a hammer to release the chuck.
- **Remove the Chuck**: Once loosened, carefully remove the chuck from the spindle.
3. **Prepare the New Chuck**:
- **Inspect the New Chuck**: Ensure the new chuck is clean and free from debris. Check for compatibility with your milling machine.
- **Lubricate**: Apply a light coat of machine oil to the spindle and the inside of the new chuck to facilitate smooth installation.
4. **Install the New Chuck**:
- **Align the Chuck**: Align the new chuck with the spindle. If it’s a taper fit, ensure the tapers are clean and free of oil.
- **Mount the Chuck**: Slide the chuck onto the spindle. If using a drawbar, thread it through the spindle and into the chuck, then tighten with a wrench.
- **Secure the Chuck**: For a taper-mounted chuck, use a rubber mallet to gently tap the chuck into place, ensuring a snug fit.
5. **Test the Installation**:
- **Run the Machine**: Plug in the machine and run it at a low speed to ensure the chuck is properly seated and runs true.
- **Check for Wobble**: Observe for any wobble or misalignment. If present, reseat the chuck.
6. **Final Check**: Tighten all components and ensure the chuck is securely attached before use.
What are the signs that a drill chuck needs replacement or repair?
Signs that a drill chuck needs replacement or repair include:
1. **Slipping**: If the drill bit slips during operation, it indicates that the chuck is not gripping the bit securely. This can be due to worn jaws or a damaged chuck.
2. **Difficulty in Tightening or Loosening**: If you find it hard to tighten or loosen the chuck, it may be due to rust, debris, or internal damage. A chuck key that doesn’t fit properly can also be a sign of wear.
3. **Wobbling**: A drill bit that wobbles or is misaligned when the drill is in use suggests that the chuck is not holding the bit straight. This can affect drilling accuracy and may indicate a misaligned or damaged chuck.
4. **Visible Damage**: Cracks, dents, or other visible damage to the chuck can compromise its ability to function properly. Inspect the chuck for any physical damage that might affect its performance.
5. **Inconsistent Performance**: If the drill performs inconsistently, with bits frequently coming loose or the chuck not holding them securely, it may be time for a repair or replacement.
6. **Unusual Noises**: Grinding, clicking, or other unusual noises during operation can indicate internal damage or wear in the chuck mechanism.
7. **Corrosion**: Rust or corrosion on the chuck can impede its function and may require cleaning or replacement.
8. **Excessive Wear**: Over time, the jaws of the chuck can wear down, reducing their ability to grip the drill bit securely.
9. **Inability to Hold Different Sizes**: If the chuck cannot accommodate the range of bit sizes it was designed for, it may be due to wear or internal damage.
10. **Frequent Bit Changes**: If you frequently need to change bits due to slippage or poor performance, the chuck may be the issue.