.....Read More

Frequently Asked Questions

What are the different types of toolholders used in CNC machines?

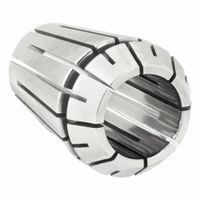
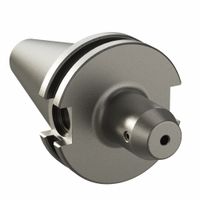
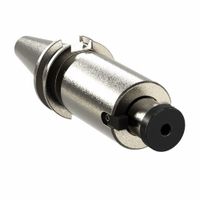
Toolholders are critical components in CNC machining, serving as the interface between the machine spindle and the cutting tool. They ensure precise tool positioning, rigidity, and efficient power transmission. Various types of toolholders are designed to accommodate different cutting operations and machine requirements: * **ER Collet Chucks:** These are highly versatile and widely used for holding various tools, including end mills, drills, and reamers. They use a collet that collapses around the tool shank when tightened, providing strong clamping force and good concentricity. * **Side Lock Holders:** Also known as set screw holders, these are commonly used for tools with cylindrical shanks, such as end mills. A set screw on the side of the holder clamps onto a flat on the tool shank, preventing rotation and pull-out. They offer good rigidity but might not provide as much concentricity as collet chucks. * **Hydraulic Holders:** These toolholders use hydraulic pressure to clamp the tool shank. A sealed chamber filled with hydraulic fluid expands when a screw is tightened, providing uniform clamping force around the tool. They offer excellent runout accuracy, vibration dampening, and ease of use, making them ideal for high-precision and high-speed machining. * **Shrink Fit Holders:** These holders rely on the principle of thermal expansion and contraction. The holder is heated, causing its bore to expand. The tool is then inserted, and as the holder cools, it shrinks around the tool shank, creating an extremely rigid and balanced connection. Shrink fit holders provide superior runout accuracy and clamping force, making them suitable for high-performance machining and demanding applications. * **Milling Chucks:** Designed for heavy-duty milling applications, these holders provide exceptional gripping force and rigidity. They typically use a series of bearings and rollers to create a strong, uniform clamp around the tool shank, minimizing vibration and improving surface finish. * **Tapered Shank Holders (e.g., CAT, BT, HSK):** These refer to the connection interface between the toolholder and the machine spindle. CAT and BT tapers are common in North America and Asia, respectively, offering good rigidity. HSK (Hollow Shank Taper) is a newer standard that provides a stiffer and more accurate connection due to simultaneous taper and face contact, making it popular for high-speed and high-precision machining.The choice of toolholder depends on factors such as the machining operation, desired precision, cutting forces, spindle interface, and budget.

How do I choose the right toolholder for my application?

Choosing the right toolholder for your application is crucial for achieving optimal machining performance, accuracy, and tool life. Several factors need to be considered. First, evaluate the type of machining operation. Is it heavy roughing, precise finishing, or something in between? This dictates the required rigidity and damping properties of the toolholder. For instance, heavy roughing benefits from more robust and vibration-dampening holders. Second, consider the spindle interface of your machine. Common interfaces include CAT, BT, HSK, and Capto. The toolholder must be compatible with your machine's spindle to ensure proper seating and concentricity. Third, the tooling system itself is important. Are you using solid carbide end mills, modular inserts, or drills? Different tool types often require specific holder designs, such as collet chucks, shrink-fit holders, or hydraulic chucks. Fourth, assess the required accuracy and surface finish. High-precision applications often demand toolholders with excellent runout accuracy to minimize vibration and achieve tighter tolerances. Shrink-fit and hydraulic chucks typically offer superior runout compared to standard collet chucks. Fifth, consider the cutting parameters like spindle speed and feed rate. High-speed machining often necessitates balanced toolholders to prevent vibration and ensure safe operation. Finally, factor in cost, ease of use, and maintenance. While advanced toolholders might offer better performance, they can also be more expensive and require specialized equipment for setup. Balancing these considerations will help you select the most effective toolholder for your specific application.

What is the difference between a collet and a collet chuck?

A collet is a type of chuck that forms a collar around an object to be held and exerts a strong clamping force on it when tightened. It is typically a single component with flexible slits that allow it to compress and grip a workpiece. Collets are known for their high precision, excellent gripping force, and ability to hold workpieces concentrically, making them ideal for applications requiring high accuracy, such as in CNC machining, woodworking, and tool holding. They are commonly used for holding round, square, or hexagonal workpieces. A collet chuck, on the other hand, is a tool holder designed to house and actuate a collet. It is a larger assembly that holds the collet and provides the mechanism to tighten and loosen it around the workpiece. Collet chucks are typically mounted on machine spindles, lathes, or milling machines. They come in various types, such as ER, TG, or R8, each designed for specific collet series. The collet chuck provides the necessary mechanical advantage and rigidity to ensure the collet properly grips the workpiece and transmits power from the machine to the cutting tool or workpiece. In essence, the collet is the gripping component, while the collet chuck is the system that holds and operates the collet.

How do I maintain and care for toolholders?

Maintaining and caring for toolholders is crucial for ensuring their longevity, accuracy, and optimal performance in machining operations. Proper care prevents premature wear, reduces vibration, improves surface finish, and extends the life of cutting tools. Here's a comprehensive guide to toolholder maintenance and care:1. Cleaning: Regularly clean toolholders to remove chips, coolant residue, and debris. Use a soft cloth or brush and a suitable cleaning solution. Avoid abrasive materials that could damage the precision surfaces. Ensure the taper, collet pocket, and retention knob area are spotless, as any contamination can affect clamping force and runout. 2. Inspection: Before each use, visually inspect toolholders for signs of wear, damage, or corrosion. Check for nicks, dents, or burrs on the taper that could compromise tool seating. Examine the retention knob for any cracks or deformation. For collet chucks, inspect the collet and collet nut for wear or damage. 3. Lubrication: Apply a light coat of rust preventative or spindle oil to the taper and other precision surfaces of the toolholder when storing or if it will not be used for an extended period. This prevents corrosion and helps maintain surface integrity. 4. Proper Storage: Store toolholders in a clean, dry environment, preferably in a dedicated tool storage cabinet or rack. This protects them from dust, moisture, and accidental damage. Avoid stacking them directly on top of each other, which can lead to nicks and scratches. 5. Torque Specifications: When assembling tools into toolholders, always adhere to the manufacturer's recommended torque specifications for the collet nut or clamping screws. Over-tightening can deform the toolholder or collet, leading to poor runout and reduced tool life, while under-tightening can cause tool slippage. Use a torque wrench for consistent and accurate tightening. 6. Balance: For high-speed machining applications, ensure that toolholders are properly balanced. Unbalanced toolholders can cause excessive vibration, leading to poor surface finish, reduced tool life, and premature spindle wear. 7. Handling: Handle toolholders with care. Avoid dropping them or subjecting them to impact, which can cause irreparable damage to the precision ground surfaces.By following these maintenance and care practices, you can significantly extend the life of your toolholders, ensure consistent machining performance, and ultimately reduce production costs.

What are the advantages of using a tapping head?

A tapping head offers several advantages in machining operations, primarily in creating internal threads. One significant benefit is increased efficiency. Tapping heads often incorporate quick-change collets, allowing for rapid tool changes and reducing downtime between operations. They also typically feature adjustable torque clutches, which prevent tap breakage by disengaging once the desired torque is reached. This protects both the workpiece and the tap, extending tool life and minimizing scrap. Furthermore, many tapping heads are designed for both right-hand and left-hand tapping, offering versatility for different thread requirements. Their robust construction and precision engineering contribute to consistent thread quality and accuracy, which is crucial for reliable assemblies. Finally, tapping heads can be used on a variety of machines, including drill presses and milling machines, making them a flexible solution for various manufacturing environments.

How do I properly install and remove drill chucks?

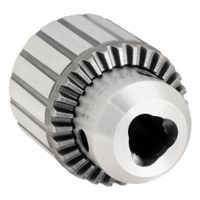
To properly install a drill chuck, first ensure the spindle and chuck taper are clean and free of burrs. Align the keyway on the chuck with the key on the spindle, then firmly push the chuck onto the spindle by hand. For a secure connection, tap the end of the chuck with a rubber mallet. To remove a drill chuck, you'll typically need a chuck key and a soft-faced hammer or a chuck wedge. If using a key, insert it into the chuck and turn counter-clockwise to loosen the jaws. For some chucks, a chuck wedge is inserted between the chuck and the drill press head, and then gently tapped with a hammer until the chuck separates from the spindle. Always wear safety glasses when performing these operations.

What is the purpose of a retention knob in a toolholder?

Please specify the topic you would like me to elaborate on.

How do I ensure the accuracy and precision of my tooling system?

Ensuring the accuracy and precision of your tooling system involves a multi-faceted approach. Regularly calibrate your tools according to manufacturer specifications and industry standards. This often includes using certified reference materials and performing calibration checks at specified intervals. Implement a robust maintenance schedule to keep tools in optimal working condition, addressing wear and tear promptly. This includes cleaning, lubrication, and replacing worn components. Utilize quality control measures throughout the tooling process. This can involve in-process checks, post-machining inspections, and statistical process control (SPC) to monitor variations and identify potential issues early. Invest in high-quality tools and materials from reputable suppliers, as inherent quality plays a significant role in long-term accuracy and precision. Provide comprehensive training for operators on proper tool usage, maintenance, and troubleshooting. Human error can significantly impact tooling performance. Finally, leverage advanced technologies such as vision systems, laser measurement, and automated inspection systems to enhance measurement capabilities and reduce manual intervention, thereby improving consistency and reliability.

What are the best practices for toolholder storage and organization?

Proper toolholder storage and organization are crucial for maintaining tool integrity, extending lifespan, and ensuring efficient machining operations. Best practices include:1. **Cleanliness:** Always clean toolholders before storage to prevent corrosion and contamination from chips, coolant, or oil. 2. **Protection:** Store toolholders in protective sleeves, trays, or cabinets to prevent damage from impacts, scratches, or moisture. This also protects the taper and critical surfaces. 3. **Humidity Control:** For long-term storage, consider climate-controlled environments or desiccant packs to prevent rust, especially in humid conditions. 4. **Categorization:** Organize toolholders by type (e.g., CAT, HSK, BT), taper size, and application. This allows for quick identification and retrieval. 5. **Labeling:** Clearly label storage locations or individual toolholder sleeves with essential information such as taper size, length, and specific features. 6. **Accessibility:** Arrange storage to ensure easy access to frequently used toolholders, minimizing search time and improving workflow. 7. **Inventory Management:** Implement a system (manual or digital) to track toolholder inventory, including quantities, locations, and maintenance history. 8. **Vertical Storage:** For smaller toolholders, vertical storage racks or cabinets can save space and offer clear visibility. 9. **Dedicated Locations:** Assign a specific, permanent location for each toolholder to prevent misplacement. 10. **Regular Inspection:** Periodically inspect stored toolholders for signs of wear, damage, or corrosion, addressing issues proactively.Adhering to these practices optimizes tool performance, reduces downtime, and contributes to a safer, more productive workshop environment.

How do I troubleshoot common issues with toolholders and tooling systems?

Troubleshooting common issues with toolholders and tooling systems involves a systematic approach to identify and resolve problems that can impact machining performance and tool life. One frequent issue is runout, which can cause poor surface finish, premature tool wear, and inconsistent part dimensions. To troubleshoot runout, first inspect the toolholder and cutting tool for any signs of damage, such as nicks or bent shanks. Ensure that the toolholder taper is clean and free of debris, as even small particles can affect concentricity. Check the clamping mechanism—whether it's a collet, hydraulic, or shrink-fit system—for proper function and secure clamping pressure. Using a dial indicator to measure runout both at the toolholder bore and at the tool's cutting edge can help pinpoint the source of the issue. Another common problem is vibration, which manifests as chatter marks on the workpiece, excessive noise, and accelerated tool wear. Vibration can stem from several factors, including insufficient rigidity in the machine, workpiece, or tooling setup. Begin by verifying the stability of the machine spindle and ensuring all clamps and fixtures are tight. Evaluate the tool stick-out; reducing it can significantly improve rigidity. Adjusting cutting parameters, such as speed, feed rate, and depth of cut, can also help dampen vibrations. Sometimes, selecting a tool with a different geometry or material, or using a vibration-damping toolholder, can be an effective solution. Tool breakage or chipping often indicates incorrect cutting conditions, improper tool selection, or a flaw in the tooling system. Examine the broken tool to understand the failure mode—is it fracture, chipping, or wear? This can provide clues. Verify that the correct cutting tool material and geometry are being used for the workpiece material and application. Check if the feed rate and speed are appropriate, as excessively high or low values can lead to failure. Ensure proper coolant delivery to prevent thermal shock or overheating. Finally, inspect the toolholder for any issues that might be contributing to excessive stress on the tool, such as worn pockets or inadequate clamping force. Regular maintenance and adherence to manufacturer guidelines for both toolholders and cutting tools are crucial for preventing these common problems.