Call +(254) 703 030 000 / 751 483 999 / 721 704 777
.....Read More

Frequently Asked Questions
What are the essential parts and accessories for micrometers?
The essential parts and accessories for micrometers include:
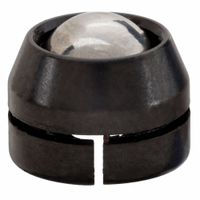
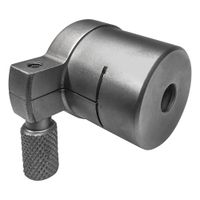
1. **Frame**: The rigid structure that holds the anvil and spindle in alignment. It is typically C-shaped to allow for the object being measured.
2. **Anvil**: The stationary measuring face against which the object is placed. It is usually made of hardened steel or carbide for durability.
3. **Spindle**: The movable measuring face that advances towards the anvil. It is precision-ground and threaded to ensure accurate measurements.
4. **Sleeve/Barrel**: The stationary part of the micrometer that houses the scale. It is marked with a linear scale for reading measurements.
5. **Thimble**: The rotating part that moves the spindle. It is marked with a vernier or digital scale for precise measurement readings.
6. **Ratchet Stop**: A mechanism that ensures consistent pressure is applied when taking measurements, preventing over-tightening and ensuring accuracy.
7. **Lock Nut**: A feature that locks the spindle in place to maintain a measurement reading.
8. **Spindle Screw**: The internal screw mechanism that allows the spindle to move in and out.
9. **Vernier Scale**: An additional scale on some micrometers that allows for more precise readings, typically to 0.001 mm or 0.0001 inch.
10. **Digital Display**: Found on digital micrometers, providing an electronic readout of the measurement.
11. **Calibration Standards**: Reference gauges or blocks used to calibrate the micrometer for accuracy.
12. **Protective Case**: A storage case to protect the micrometer from damage and environmental factors.
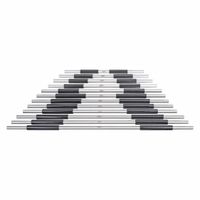
13. **Extension Rods**: Used with depth micrometers to extend their range.
14. **Wrench**: A small tool used for adjusting and calibrating the micrometer.
These components and accessories ensure the micrometer functions accurately and efficiently for precise measurement tasks.
How do I customize a micrometer for specific applications?
To customize a micrometer for specific applications, follow these steps:
1. **Select the Right Type**: Choose a micrometer type that suits your application, such as outside, inside, depth, or specialized micrometers like thread or blade micrometers.
2. **Range and Resolution**: Ensure the micrometer's measurement range and resolution match your requirements. For high precision, select a micrometer with finer resolution.
3. **Anvil and Spindle Tips**: Customize the anvil and spindle tips for specific shapes or materials. Options include flat, spherical, pointed, or interchangeable tips to accommodate different surfaces or features.
4. **Material and Coating**: Choose materials and coatings for durability and specific environmental conditions. Carbide-tipped anvils and spindles offer wear resistance, while coatings like titanium nitride provide additional protection.
5. **Digital vs. Analog**: Decide between digital and analog micrometers. Digital micrometers offer ease of reading and data output capabilities, while analog micrometers are preferred for simplicity and reliability in harsh environments.
6. **Data Output**: For applications requiring data logging, select a micrometer with digital output capabilities, such as USB or wireless connectivity, to integrate with data collection systems.
7. **Environmental Considerations**: If used in extreme conditions, choose micrometers with IP ratings for dust and water resistance. Temperature compensation features can also be beneficial.
8. **Calibration and Certification**: Ensure the micrometer is calibrated and certified to meet industry standards. Regular calibration is essential for maintaining accuracy.
9. **Ergonomics and Handling**: Consider ergonomic features like ratchet stops or friction thimbles for consistent pressure application, reducing user fatigue and measurement errors.
10. **Custom Features**: Some manufacturers offer custom micrometers tailored to specific needs, such as unique measurement ranges or specialized attachments.
By carefully selecting and customizing these features, you can optimize a micrometer for your specific application, ensuring accurate and reliable measurements.
What are micrometer calibrating standards and how are they used?
Micrometer calibrating standards are precision tools or reference materials used to ensure the accuracy and reliability of micrometers, which are devices for measuring small distances or thicknesses with high precision. These standards typically include gauge blocks, calibration rods, or reference standards with known dimensions.
Gauge blocks, often made of steel or ceramic, are the most common calibrating standards. They are manufactured to precise dimensions and are used to verify the accuracy of a micrometer by comparing the micrometer's readings against the known dimensions of the blocks. Calibration rods, usually made of steel or carbide, serve a similar purpose, especially for larger micrometers.
The calibration process involves several steps:
1. **Cleaning**: Both the micrometer and the calibrating standard must be clean and free of debris to ensure accurate measurements.
2. **Zeroing**: The micrometer is first zeroed by closing the spindle on the anvil without any object in between, ensuring the reading is zero.
3. **Measurement**: The micrometer is then used to measure the calibrating standard. The spindle is carefully adjusted to make contact with the standard without applying excessive force, which could lead to measurement errors.
4. **Comparison**: The reading on the micrometer is compared to the known dimension of the calibrating standard. Any discrepancy indicates a need for adjustment or recalibration of the micrometer.
5. **Adjustment**: If necessary, the micrometer is adjusted according to the manufacturer's instructions to correct any errors.
Regular calibration using these standards is crucial for maintaining the accuracy of micrometers, especially in precision engineering and manufacturing environments where even minor measurement errors can lead to significant issues.
How do I ensure my micrometer is accurately calibrated?
1. **Clean the Micrometer**: Ensure the micrometer is free from dust, oil, and debris. Use a clean, lint-free cloth to wipe the surfaces.
2. **Check Zero Setting**: Close the micrometer gently and ensure the reading is zero. If not, adjust the thimble or sleeve to align with the zero mark.
3. **Use Calibration Standards**: Utilize gauge blocks or calibration rods of known dimensions. These should be traceable to a national standard.
4. **Perform Calibration**: Measure the calibration standard with the micrometer. Ensure the micrometer reads the exact dimension of the standard.
5. **Adjust if Necessary**: If the reading is off, adjust the micrometer. This may involve using the adjustment wrench provided with the micrometer to align the thimble or sleeve.
6. **Check at Multiple Points**: Measure at several points across the micrometer’s range (e.g., 25%, 50%, 75%, and 100% of its capacity) to ensure accuracy throughout.
7. **Temperature Consideration**: Perform calibration in a controlled environment, ideally at 20°C (68°F), as temperature variations can affect measurements.
8. **Repeatability Test**: Measure the same standard multiple times to ensure consistent readings.
9. **Document Results**: Record the calibration results, including any adjustments made, for future reference and compliance.
10. **Regular Calibration Schedule**: Establish a routine calibration schedule based on usage frequency and manufacturer recommendations.
11. **Professional Calibration**: Periodically, have the micrometer calibrated by a professional service to ensure traceability and accuracy.
12. **Storage**: Store the micrometer in a protective case to prevent damage and maintain calibration.
By following these steps, you can ensure your micrometer remains accurately calibrated, providing reliable measurements.
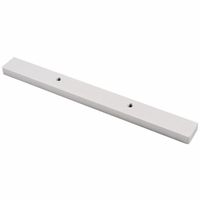
What are depth gauge base extensions and when should they be used?
Depth gauge base extensions are attachments used in conjunction with depth gauges to enhance their functionality and accuracy. These extensions are typically used in machining, woodworking, and metalworking to measure the depth of holes, slots, or recesses with greater precision. They extend the base of the depth gauge, allowing it to span larger openings or irregular surfaces, providing a stable reference point for accurate measurements.
Depth gauge base extensions should be used in the following scenarios:
1. **Large Openings**: When measuring the depth of large holes or slots where the standard base of the depth gauge cannot span the opening, extensions provide the necessary reach and stability.
2. **Irregular Surfaces**: In cases where the surface around the hole is uneven or has obstructions, extensions help in bridging these irregularities, ensuring the gauge sits flat and provides an accurate reading.
3. **Increased Stability**: For applications requiring high precision, extensions increase the contact area with the surface, reducing the risk of tilting or misalignment, which can lead to measurement errors.
4. **Versatility**: Extensions allow a single depth gauge to be used for a wider range of applications, enhancing its versatility and cost-effectiveness.
5. **Specialized Measurements**: In specialized industrial or engineering tasks where specific depth measurements are critical, extensions can be customized to meet unique requirements.
Using depth gauge base extensions ensures that measurements are accurate and reliable, which is crucial in maintaining the quality and integrity of the workpiece. They are essential tools for professionals who require precise depth measurements in their work.
How do I replace a micrometer battery cover or other replacement parts?
1. **Identify the Model**: Determine the specific model of your micrometer to ensure compatibility with replacement parts.
2. **Gather Tools**: You may need a small screwdriver, typically a Phillips or flathead, depending on the micrometer design.
3. **Power Off**: If the micrometer is digital, ensure it is turned off to prevent any damage or data loss.
4. **Locate the Battery Compartment**: Usually found on the back or side of the micrometer. Look for a small cover or panel.
5. **Remove the Battery Cover**: Use the appropriate screwdriver to unscrew the cover. Some models may have a snap-on cover that can be gently pried open.
6. **Replace the Battery**: Remove the old battery and insert a new one, ensuring the correct polarity. Use the battery type specified by the manufacturer, often a button cell like LR44 or SR44.
7. **Reattach the Battery Cover**: Align the cover and screw it back in place or snap it shut securely.
8. **Test the Micrometer**: Turn it on to ensure it functions correctly with the new battery.
9. **Replacing Other Parts**: For other parts like anvils or spindles, consult the user manual for specific instructions. Typically, these parts can be unscrewed or detached with the appropriate tools.
10. **Consult Manufacturer**: If unsure, contact the manufacturer or refer to the manual for guidance on replacing specific parts.
11. **Professional Assistance**: For complex repairs or if the micrometer is under warranty, consider professional servicing to avoid damage.
12. **Regular Maintenance**: Regularly check and maintain your micrometer to ensure longevity and accuracy.
What are the best ways to store and protect a micrometer when not in use?
1. **Clean Before Storage**: Wipe the micrometer with a clean, dry cloth to remove any dust, dirt, or moisture. Use a small amount of machine oil on a cloth to lightly coat the metal surfaces to prevent rust.
2. **Use a Protective Case**: Store the micrometer in its original protective case or a dedicated micrometer storage box. This prevents physical damage and exposure to environmental elements.
3. **Avoid Humidity**: Store the micrometer in a dry environment. Use silica gel packets in the storage case to absorb moisture and prevent rust.
4. **Temperature Control**: Keep the micrometer in a stable temperature environment. Avoid extreme temperatures which can affect the calibration and accuracy.
5. **Positioning**: Store the micrometer in a position that does not apply pressure on the spindle or anvil. Ideally, it should be stored with the spindle slightly open to relieve tension on the measuring surfaces.
6. **Regular Calibration**: Even when not in use, periodically check and calibrate the micrometer to ensure it remains accurate.
7. **Avoid Magnetic Fields**: Keep the micrometer away from strong magnetic fields which can affect its accuracy and functionality.
8. **Label and Organize**: Clearly label the storage area or case to ensure the micrometer is easily identifiable and not misplaced.
9. **Limit Handling**: Minimize handling to reduce the risk of dropping or damaging the micrometer. Always handle with clean, dry hands or wear gloves.
10. **Security**: If the micrometer is valuable or used in a professional setting, consider storing it in a locked cabinet or drawer to prevent unauthorized access or theft.