Call +(254) 703 030 000 / 751 483 999 / 721 704 777
.....Read More


Frequently Asked Questions
What is an inside micrometer used for?
An inside micrometer is a precision measuring instrument used to measure the internal dimensions of an object, such as the diameter of a hole, bore, or cylinder. It is essential in fields like mechanical engineering, machining, and manufacturing, where precise internal measurements are crucial for ensuring the proper fit and function of components.
The inside micrometer consists of a calibrated screw mechanism that allows for fine adjustments and accurate readings. It typically includes a set of interchangeable rods or extensions that can be combined to measure a range of sizes. The micrometer head, which contains the measurement scale, is attached to these rods. As the thimble is rotated, the spindle moves, allowing the user to measure the internal dimension with high precision.
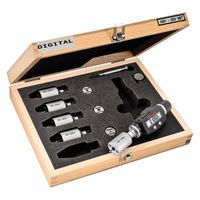
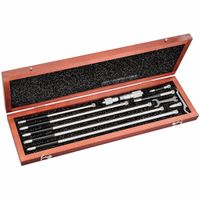
Inside micrometers are available in different types, including tubular, caliper-type, and digital versions. Tubular inside micrometers are often used for larger diameters, while caliper-type micrometers are suitable for smaller measurements. Digital inside micrometers provide electronic readouts, enhancing accuracy and ease of use.
The primary advantage of using an inside micrometer is its ability to provide highly accurate measurements, often to within a thousandth of an inch or a hundredth of a millimeter. This precision is vital for quality control and ensuring that parts meet specified tolerances. Proper use of an inside micrometer involves careful calibration, handling, and maintenance to maintain its accuracy and reliability over time.
How do you read an inside micrometer?
To read an inside micrometer, follow these steps:
1. **Preparation**: Ensure the micrometer is clean and calibrated. Select the appropriate extension rod for the range you need to measure.
2. **Assembly**: Attach the extension rod to the micrometer head. The rod length should match the approximate size of the object being measured.
3. **Zero Setting**: Before measuring, check the zero setting by closing the micrometer on a known standard or gauge block. Adjust if necessary.
4. **Positioning**: Insert the micrometer into the object or space to be measured. Ensure it is perpendicular to the surface for accurate measurement.
5. **Measuring**: Rotate the thimble until the measuring faces make contact with the inside surfaces. Use the ratchet stop or friction thimble to apply consistent pressure.
6. **Reading the Scale**:
- **Sleeve Scale**: Note the number on the sleeve scale. Each increment typically represents 0.025 inches or 0.5 mm.
- **Thimble Scale**: Read the number on the thimble scale that aligns with the sleeve’s reference line. Each increment usually represents 0.001 inches or 0.01 mm.
- **Vernier Scale (if present)**: For more precision, read the vernier scale. Identify the line on the vernier that aligns with a line on the thimble. This provides an additional decimal place.
7. **Calculate Total Measurement**: Add the sleeve, thimble, and vernier readings (if applicable) to get the total measurement.
8. **Record the Measurement**: Note the measurement, ensuring to include the unit of measurement (inches or millimeters).
9. **Verification**: Double-check the measurement by repeating the process to ensure accuracy.
10. **Maintenance**: After use, clean the micrometer and store it properly to maintain its accuracy.
What is the difference between a 2-point and 3-point inside micrometer?
A 2-point inside micrometer measures internal diameters using two contact points. It is ideal for measuring roundness and detecting ovality in bores. The two anvils expand outward to touch the internal surface, and the reading is taken from the micrometer scale. This type is best for smaller diameters and provides a straightforward measurement of the bore's diameter.
A 3-point inside micrometer, on the other hand, uses three contact points to measure internal diameters. It offers greater stability and accuracy, especially for larger diameters. The three anvils ensure that the micrometer is self-centering, which reduces the chance of measurement errors due to misalignment. This type is particularly useful for measuring the true diameter of a bore, as it compensates for any irregularities or out-of-round conditions.
In summary, the main differences lie in the number of contact points, the ability to self-center, and the suitability for different diameter ranges and measurement precision.
How do you calibrate an inside micrometer?
To calibrate an inside micrometer, follow these steps:
1. **Preparation**: Ensure the micrometer and the environment are at a stable temperature to avoid thermal expansion. Clean the micrometer and the calibration standards to remove any dust or debris.
2. **Select Calibration Standards**: Use gauge blocks or a ring gauge with known dimensions as the calibration standard. Ensure these standards are traceable to a national or international standard.
3. **Zero Setting**: If the micrometer has a zero setting feature, set it to zero using the smallest calibration standard.
4. **Measurement**: Insert the micrometer into the calibration standard. For a gauge block, place the micrometer between two blocks. For a ring gauge, insert the micrometer into the ring. Ensure the micrometer is perpendicular to the measuring surface to avoid cosine error.
5. **Reading**: Take the reading from the micrometer. Ensure the thimble is turned gently to avoid excessive force, which can lead to inaccurate readings.
6. **Comparison**: Compare the micrometer reading with the known dimension of the calibration standard. Note any deviation.
7. **Adjustment**: If the micrometer reading deviates from the standard, adjust the micrometer according to the manufacturer's instructions. This may involve adjusting the thimble or the spindle.
8. **Repeat**: Repeat the measurement and adjustment process with different calibration standards across the micrometer's range to ensure accuracy throughout.
9. **Documentation**: Record the calibration results, including the date, environmental conditions, and any adjustments made. This documentation is essential for traceability and future reference.
10. **Verification**: Periodically verify the calibration by repeating the process to ensure continued accuracy.
By following these steps, you ensure the inside micrometer provides precise and reliable measurements.
What are the advantages of using a 3-point inside micrometer?
A 3-point inside micrometer offers several advantages for precise internal diameter measurements:
1. **Accuracy and Precision**: The 3-point contact system ensures that the micrometer provides highly accurate and precise measurements by evenly distributing pressure across the internal surface, reducing the risk of measurement errors due to tilting or misalignment.
2. **Self-Centering**: The three-point design automatically centers itself within the bore, eliminating the need for manual centering and reducing the potential for human error. This feature is particularly beneficial for measuring roundness and ensuring consistent results.
3. **Versatility**: These micrometers can measure a wide range of bore sizes with interchangeable anvils or extensions, making them versatile tools for various applications in manufacturing and quality control.
4. **Ease of Use**: The ergonomic design and straightforward operation make 3-point inside micrometers user-friendly, even for operators with limited experience. The self-centering feature further simplifies the measurement process.
5. **Repeatability**: The consistent contact pressure and self-centering mechanism contribute to high repeatability, ensuring that repeated measurements yield the same results, which is crucial for quality assurance processes.
6. **Durability**: Typically constructed from robust materials, 3-point inside micrometers are designed to withstand regular use in industrial environments, offering long-lasting performance and reliability.
7. **Reduced Operator Influence**: The design minimizes the influence of the operator's technique on the measurement outcome, leading to more consistent and reliable data.
8. **Digital Options**: Many 3-point inside micrometers are available in digital versions, providing easy-to-read displays, data output capabilities, and enhanced measurement accuracy.
Overall, the 3-point inside micrometer is a valuable tool for achieving precise, reliable, and efficient internal diameter measurements in various industrial applications.
How do you use a tubular-rod inside micrometer?
To use a tubular-rod inside micrometer:
1. **Preparation**: Ensure the micrometer is clean and calibrated. Select the appropriate extension rod based on the approximate size of the bore or internal dimension you are measuring.
2. **Assembly**: Attach the selected extension rod to the micrometer head. If necessary, add additional rods to reach the desired length. Secure them tightly to avoid measurement errors.
3. **Zero Setting**: Before measuring, set the micrometer to zero. Use a micrometer standard or gauge block to verify the zero setting. Adjust the thimble or sleeve if needed to ensure accuracy.
4. **Positioning**: Insert the micrometer into the bore or space to be measured. Ensure the measuring faces are perpendicular to the axis of the bore for an accurate reading.
5. **Measurement**: Gently rotate the thimble to expand the measuring faces until they make contact with the internal surfaces. Use the ratchet stop or friction thimble to apply consistent measuring pressure.
6. **Reading**: Once the micrometer is properly positioned and the correct pressure is applied, read the measurement from the scale on the sleeve and thimble. Add the length of the extension rod(s) to the reading for the final measurement.
7. **Verification**: Double-check the measurement by repeating the process to ensure consistency and accuracy.
8. **Recording**: Note down the measurement and any relevant details for future reference.
9. **Disassembly and Storage**: Carefully disassemble the micrometer and clean all parts. Store the micrometer and rods in a protective case to prevent damage.
By following these steps, you can accurately measure internal dimensions using a tubular-rod inside micrometer.
What is the accuracy of an inside micrometer?
The accuracy of an inside micrometer typically ranges from ±0.0001 inches (±0.00254 mm) to ±0.0002 inches (±0.00508 mm), depending on the quality and design of the instrument. High-precision models may offer even greater accuracy. Inside micrometers are used to measure the internal dimensions of objects, such as the diameter of holes or the width of slots, and are crucial in applications requiring precise measurements.
The accuracy is influenced by several factors, including the quality of the micrometer's construction, the skill of the operator, and the environmental conditions during measurement. High-quality inside micrometers are made from materials that minimize thermal expansion and are designed to maintain their calibration over time. The operator's technique, such as ensuring the micrometer is properly aligned and applying consistent measuring force, also plays a critical role in achieving accurate results.
Calibration is essential for maintaining the accuracy of an inside micrometer. Regular calibration against a known standard ensures that the micrometer provides reliable measurements. Additionally, using the micrometer in a controlled environment, free from temperature fluctuations and vibrations, can help maintain its accuracy.
In summary, while the typical accuracy of an inside micrometer is around ±0.0001 to ±0.0002 inches, achieving this level of precision depends on the instrument's quality, proper calibration, and correct usage.