Call +(254) 703 030 000 / 751 483 999 / 721 704 777
- Home
- Machining
- Precision Measuring Tools
- Inspection Calibration Tools Equipment
.....Read More
Frequently Asked Questions
What are the key differences between inspection and calibration tools?
Inspection tools and calibration tools serve distinct purposes in quality control and measurement processes.
Inspection tools are used to examine, measure, and verify the characteristics of a product or component to ensure it meets specified standards and requirements. These tools assess attributes such as dimensions, surface finish, and functionality. Common inspection tools include calipers, micrometers, gauges, and coordinate measuring machines (CMMs). The primary goal of inspection is to detect defects or deviations from specifications, ensuring product quality and compliance.
Calibration tools, on the other hand, are used to adjust and verify the accuracy of measurement instruments. Calibration ensures that instruments provide precise and reliable measurements by comparing them against a standard or reference. Calibration tools include standard weights, voltage calibrators, and temperature baths. The process involves adjusting the instrument to align with the standard, documenting the results, and determining the measurement uncertainty. Calibration is crucial for maintaining the integrity of measurement systems and ensuring consistent product quality over time.
Key differences include:
1. **Purpose**: Inspection tools assess product conformity, while calibration tools ensure measurement accuracy.
2. **Function**: Inspection identifies defects; calibration adjusts and verifies instrument precision.
3. **Outcome**: Inspection results in pass/fail decisions; calibration results in instrument adjustments and documentation.
4. **Frequency**: Inspection is performed regularly during production; calibration is scheduled periodically based on usage and criticality.
5. **Standards**: Inspection uses product specifications; calibration uses traceable standards.
In summary, inspection tools focus on product quality, while calibration tools focus on measurement accuracy, both essential for maintaining high standards in manufacturing and quality assurance.
How often should inspection and calibration tools be calibrated?
Inspection and calibration tools should be calibrated at intervals that ensure their accuracy and reliability, which can vary based on several factors. Generally, calibration is recommended annually, but this can change depending on the tool's usage, environment, and manufacturer guidelines.
1. **Manufacturer's Recommendations**: Always follow the calibration schedule suggested by the tool's manufacturer, as they provide guidelines based on the tool's design and intended use.
2. **Frequency of Use**: Tools used frequently or in critical applications may require more frequent calibration. High-usage tools are more prone to wear and drift, necessitating shorter calibration intervals.
3. **Environmental Conditions**: Tools used in harsh environments, such as those with extreme temperatures, humidity, or vibration, may need more frequent calibration to maintain accuracy.
4. **Regulatory Requirements**: Some industries have specific regulatory standards that dictate calibration frequency. Compliance with these standards is crucial to ensure quality and safety.
5. **Historical Data**: Analyze past calibration records to identify trends in tool performance. If a tool consistently remains within acceptable limits, the interval might be extended. Conversely, if a tool frequently requires adjustment, more frequent calibration may be necessary.
6. **Criticality of Measurements**: Tools used for critical measurements that impact safety, quality, or compliance should be calibrated more often to minimize risks associated with inaccurate readings.
7. **Post-Event Calibration**: If a tool is dropped, damaged, or exposed to conditions outside its specified range, it should be recalibrated immediately to ensure continued accuracy.
Ultimately, the calibration frequency should be determined by a combination of these factors, ensuring that tools remain reliable and accurate for their intended applications.
What are the best practices for maintaining surface plates?
1. **Regular Cleaning**: Use a lint-free cloth and a mild cleaning solution to remove dust, dirt, and debris. Avoid harsh chemicals that can damage the surface.
2. **Proper Storage**: Store the surface plate in a stable environment, away from extreme temperatures and humidity. Use a protective cover when not in use to prevent contamination.
3. **Routine Inspection**: Regularly inspect the surface for scratches, dents, or other damage. Address any issues immediately to prevent further deterioration.
4. **Calibration**: Schedule regular calibration checks with a certified technician to ensure accuracy. Frequency depends on usage, but generally, an annual check is recommended.
5. **Avoid Overloading**: Do not exceed the weight capacity of the surface plate. Overloading can cause permanent warping or damage.
6. **Use Proper Tools**: Only use tools and accessories designed for surface plates. Avoid using sharp or heavy objects that can scratch or damage the surface.
7. **Temperature Control**: Maintain a consistent temperature in the room where the surface plate is used. Temperature fluctuations can cause expansion or contraction, affecting accuracy.
8. **Avoid Direct Contact**: Minimize direct contact with hands or other body parts to prevent oil and moisture transfer, which can lead to corrosion.
9. **Leveling**: Ensure the surface plate is properly leveled using adjustable supports. An uneven surface can lead to inaccurate measurements.
10. **Documentation**: Keep detailed records of maintenance, calibration, and any repairs. This helps in tracking the condition and performance over time.
11. **Training**: Ensure all users are trained in proper handling and maintenance procedures to prevent accidental damage.
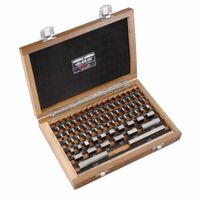
How do gauge blocks ensure measurement accuracy?
Gauge blocks ensure measurement accuracy through their precise manufacturing, material stability, and usage methodology. These blocks, also known as Johansson gauges, are made from high-grade materials like steel, ceramic, or tungsten carbide, which offer minimal thermal expansion and wear resistance. This ensures that their dimensions remain consistent over time and under varying environmental conditions.
The manufacturing process involves lapping the blocks to achieve extremely flat and parallel surfaces, with tolerances often within millionths of an inch or micrometers. This precision allows gauge blocks to serve as a standard for calibrating other measurement tools, ensuring their accuracy.
Gauge blocks are used in a process called "wringing," where two blocks are slid together with a slight twist, creating a molecular bond that holds them firmly without any adhesive. This wringing process eliminates air gaps, ensuring that the combined length of stacked blocks is accurate.
In practice, gauge blocks are used to calibrate micrometers, calipers, and other precision instruments. By providing a known reference length, they allow for the adjustment and verification of these tools, ensuring that measurements taken with them are accurate.
Furthermore, gauge blocks are often used in temperature-controlled environments to minimize thermal expansion effects. They are also periodically recalibrated against national or international standards to maintain their accuracy over time.
In summary, gauge blocks ensure measurement accuracy through their precise manufacturing, stable materials, and careful usage, serving as a reliable standard for calibrating and verifying the accuracy of other measurement instruments.
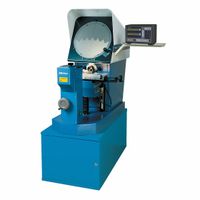
What industries commonly use optical comparators?
Optical comparators are widely used in various industries for precision measurement and quality control. Key industries include:
1. **Manufacturing**: Optical comparators are essential in the manufacturing sector for inspecting parts and components. They ensure that products meet specified dimensions and tolerances, which is crucial for maintaining quality and consistency.
2. **Automotive**: In the automotive industry, optical comparators are used to inspect engine components, gears, and other critical parts. They help in verifying that these components meet the stringent specifications required for safety and performance.
3. **Aerospace**: The aerospace industry relies on optical comparators to measure complex parts with high precision. This is vital for ensuring the safety and reliability of aircraft components, which must adhere to strict regulatory standards.
4. **Medical Devices**: Optical comparators are used in the medical device industry to inspect small, intricate parts such as surgical instruments and implants. Precision is crucial in this field to ensure the safety and effectiveness of medical devices.
5. **Electronics**: In electronics, optical comparators help in the inspection of circuit boards and micro-components. They ensure that these components are manufactured to exact specifications, which is essential for the functionality of electronic devices.
6. **Tool and Die Making**: This industry uses optical comparators to inspect and verify the dimensions of tools and dies. Accurate measurements are critical to ensure that the tools produce parts that meet design specifications.
7. **Plastics and Injection Molding**: Optical comparators are used to inspect molded parts for defects and dimensional accuracy. This helps in maintaining the quality of plastic products.
These industries benefit from the non-contact, precise measurement capabilities of optical comparators, which help in maintaining high standards of quality and efficiency.
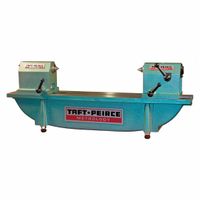
How do bench centers assist in quality assurance processes?
Bench centers assist in quality assurance processes by providing a stable and precise platform for measuring and inspecting components. They are essential in ensuring that parts meet specified tolerances and quality standards. Bench centers are used to check the concentricity, roundness, and alignment of cylindrical objects, which are critical parameters in many manufacturing processes.
By using bench centers, quality assurance teams can perform accurate dimensional inspections. The centers hold the workpiece securely, allowing for precise measurement with dial indicators, micrometers, or other gauging tools. This helps in detecting any deviations from the required specifications early in the production process, reducing the risk of defects in the final product.
Bench centers also facilitate repeatability and consistency in measurements, which are crucial for maintaining quality standards. They provide a reference point that ensures measurements are taken from the same position each time, minimizing human error and variability. This consistency is vital for statistical process control and for maintaining the integrity of quality assurance data.
Furthermore, bench centers can be integrated into automated inspection systems, enhancing efficiency and throughput in quality assurance processes. Automation reduces the time required for inspections and allows for real-time data collection and analysis, enabling quicker decision-making and corrective actions.
In summary, bench centers play a critical role in quality assurance by providing accurate, consistent, and efficient measurement capabilities, ensuring that products meet design specifications and quality standards.
What factors should be considered when selecting inspection and calibration equipment?
When selecting inspection and calibration equipment, several critical factors must be considered to ensure accuracy, reliability, and efficiency:
1. **Accuracy and Precision**: Choose equipment that meets the required accuracy and precision levels for your specific application. This ensures that measurements are reliable and consistent.
2. **Range and Capacity**: Ensure the equipment can handle the range of measurements needed. It should accommodate the smallest and largest measurements you expect to encounter.
3. **Resolution**: The equipment should have the appropriate resolution to detect the smallest changes in measurement that are significant for your application.
4. **Calibration Standards**: Select equipment that can be calibrated against recognized standards to maintain traceability and compliance with industry regulations.
5. **Environmental Conditions**: Consider the environmental conditions where the equipment will be used, such as temperature, humidity, and exposure to chemicals, which can affect performance.
6. **Durability and Build Quality**: The equipment should be robust enough to withstand the operational environment and usage frequency.
7. **Ease of Use**: User-friendly equipment reduces the likelihood of errors and increases efficiency. Consider the interface, display, and ease of operation.
8. **Maintenance and Support**: Evaluate the availability of maintenance services, spare parts, and technical support. Reliable after-sales service is crucial for long-term operation.
9. **Cost**: Balance the initial cost with the long-term benefits, including maintenance, calibration, and potential downtime costs.
10. **Compliance and Certification**: Ensure the equipment complies with relevant industry standards and certifications, which may be required for regulatory compliance.
11. **Reputation and Reviews**: Consider the manufacturer's reputation and user reviews to gauge reliability and performance.
12. **Integration and Compatibility**: Ensure the equipment can integrate with existing systems and software for seamless operation and data management.
