Call +(254) 703 030 000 / 751 483 999 / 721 704 777
.....Read More
Frequently Asked Questions
What are the different types of indicator accessories available?
Indicator accessories enhance the functionality and usability of measurement indicators. Here are the different types:
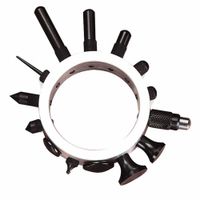
1. **Contact Points**: These are interchangeable tips that come in various shapes and materials, such as steel, carbide, or ruby, to suit different surfaces and measurement needs.
2. **Holders and Stands**: These provide stability and precision during measurement. Magnetic bases, articulated arms, and clamps are common types, allowing for flexible positioning.
3. **Extension Rods**: Used to extend the reach of the indicator, these rods help measure deeper or hard-to-reach areas.
4. **Backs and Mounting Brackets**: These accessories allow indicators to be mounted in different orientations or attached to specific equipment.
5. **Data Output Cables and Interfaces**: For digital indicators, these accessories facilitate data transfer to computers or other devices for analysis and record-keeping.
6. **Protective Covers and Cases**: These protect indicators from dust, moisture, and impact, extending their lifespan.
7. **Calibration Tools**: These include reference standards and gauges used to ensure the accuracy and precision of indicators.
8. **Adapters and Connectors**: These allow indicators to be used with various machines or in different setups, enhancing versatility.
9. **Lifting Levers**: These are used to raise the contact point without disturbing the setup, ensuring consistent measurements.
10. **Zeroing Tools**: These help in setting the indicator to zero before taking measurements, ensuring accuracy.
11. **Software**: For digital indicators, software solutions can provide advanced data analysis, reporting, and storage capabilities.
12. **Battery Packs and Chargers**: For portable digital indicators, these ensure continuous operation without downtime.
These accessories are essential for maximizing the performance and adaptability of measurement indicators in various industrial and laboratory settings.
How do I choose the right stem extension for my indicator?
To choose the right stem extension for your indicator, consider the following factors:
1. **Indicator Type**: Determine the type of indicator you are using (e.g., pressure gauge, thermometer) as different indicators may have specific requirements for stem extensions.
2. **Application Environment**: Assess the environment where the indicator will be used. Consider temperature, pressure, humidity, and exposure to chemicals or corrosive substances, as these factors will influence the material and design of the stem extension.
3. **Material Compatibility**: Select a stem extension material that is compatible with the process media and environmental conditions. Common materials include stainless steel, brass, and plastic, each offering different levels of corrosion resistance and durability.
4. **Length and Size**: Determine the appropriate length and diameter of the stem extension based on the installation requirements and the distance between the indicator and the process connection. Ensure the extension is long enough to provide accurate readings without causing stress or bending.
5. **Connection Type**: Choose the correct connection type for both the indicator and the process. Common connection types include threaded, flanged, and welded connections. Ensure compatibility with existing equipment.
6. **Thermal Expansion**: Consider the thermal expansion properties of the stem extension material, especially in high-temperature applications, to prevent measurement errors or mechanical failure.
7. **Installation and Maintenance**: Evaluate the ease of installation and maintenance. A well-designed stem extension should allow for easy access and removal for calibration or replacement.
8. **Cost and Availability**: Balance the cost of the stem extension with its performance and availability. Opt for a solution that meets your budget while ensuring reliability and longevity.
By considering these factors, you can select a stem extension that ensures accurate readings, durability, and compatibility with your specific application.
What are the benefits of using replacement stems and adapters?
Replacement stems and adapters offer several benefits:
1. **Customization**: They allow users to customize their equipment to better suit their needs, preferences, or specific applications. This can enhance performance and user satisfaction.
2. **Cost-Effectiveness**: Instead of replacing an entire device or system, users can replace only the worn-out or damaged parts, saving money and reducing waste.
3. **Extended Lifespan**: By replacing parts that are prone to wear and tear, the overall lifespan of the equipment can be extended, ensuring continued functionality and reliability.
4. **Improved Performance**: Newer or better-designed stems and adapters can improve the performance of the equipment, offering better efficiency, precision, or ease of use.
5. **Versatility**: Adapters can enable compatibility between different systems or components, allowing for greater flexibility in how equipment is used or combined.
6. **Ease of Maintenance**: Replacement parts simplify maintenance, as they can be easily swapped out without the need for specialized tools or skills, minimizing downtime.
7. **Safety**: Using the correct replacement parts ensures that equipment operates safely, reducing the risk of accidents or malfunctions.
8. **Environmental Impact**: By replacing only specific parts rather than entire systems, the environmental impact is reduced through less waste and resource consumption.
9. **Availability**: Replacement stems and adapters are often readily available, ensuring that repairs or upgrades can be done quickly without long wait times for parts.
10. **Innovation**: Manufacturers often release improved versions of stems and adapters, allowing users to benefit from the latest technological advancements without needing to purchase entirely new equipment.
How do I properly install contact points on an indicator?
1. **Preparation**: Ensure the indicator and contact points are clean and free from debris. Gather necessary tools such as a small screwdriver, tweezers, and a magnifying glass if needed.
2. **Remove Old Contact Points**: If replacing old contact points, carefully remove them using tweezers or a small screwdriver. Avoid damaging the indicator's surface.
3. **Inspect the Indicator**: Check the indicator for any signs of wear or damage. Ensure the surface where the contact points will be installed is smooth and intact.
4. **Select Appropriate Contact Points**: Choose contact points that match the specifications of your indicator. They should be compatible in size and material.
5. **Align Contact Points**: Position the new contact points on the indicator. Use tweezers for precise placement. Ensure they are aligned correctly with the indicator's mechanism.
6. **Secure Contact Points**: Gently press the contact points into place. If screws are involved, use a small screwdriver to tighten them securely. Avoid over-tightening, which can damage the contact points or the indicator.
7. **Test the Indicator**: Once installed, test the indicator to ensure the contact points are functioning correctly. The indicator should move smoothly without any obstruction.
8. **Adjust if Necessary**: If the indicator does not function properly, adjust the contact points. Ensure they are not too tight or too loose.
9. **Final Inspection**: Conduct a final inspection to confirm the contact points are securely installed and the indicator operates as expected.
10. **Maintenance**: Regularly check the contact points for wear and tear. Replace them as needed to maintain the indicator's accuracy and performance.
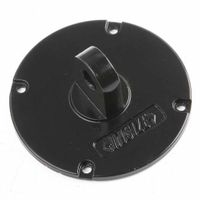
What is the best way to mount an indicator using backs and snugs?
To mount an indicator using backs and snugs, follow these steps:
1. **Select the Indicator**: Choose the appropriate dial indicator or test indicator based on the precision required for your measurement task.
2. **Choose the Mounting Location**: Identify a stable and accessible location on the machine or workpiece where the indicator can be mounted securely.
3. **Attach the Back**: The back of the indicator is typically a flat or lug back that allows for attachment. Secure the back to the indicator if it is not already attached. Ensure it is tightly fastened to prevent any movement during measurement.
4. **Select the Snug**: A snug is a clamping device that holds the indicator in place. Choose a snug that fits the diameter of the indicator stem or the dovetail mount, depending on the type of indicator.
5. **Mount the Snug**: Attach the snug to a magnetic base, stand, or other stable support structure. Ensure the snug is positioned to allow the indicator to reach the measurement point without obstruction.
6. **Position the Indicator**: Insert the indicator stem or dovetail into the snug. Adjust the snug to hold the indicator firmly in place. The indicator should be perpendicular to the surface being measured to ensure accurate readings.
7. **Align the Indicator**: Adjust the position of the indicator so that the contact point is in the correct position relative to the surface being measured. The indicator should be able to move freely without any binding.
8. **Secure the Setup**: Tighten all connections, including the snug and any other adjustable parts of the mounting system, to ensure stability.
9. **Test the Setup**: Gently move the workpiece or machine part to ensure the indicator reads correctly and returns to zero when the part is in its original position.
10. **Calibration Check**: Perform a quick calibration check to ensure the indicator is reading accurately before proceeding with measurements.
How can I maintain my indicator with bezels, crystals, and knobs?
To maintain your indicator with bezels, crystals, and knobs, follow these steps:
1. **Cleaning**: Use a soft, lint-free cloth to gently wipe the bezels and crystals. For stubborn dirt, dampen the cloth slightly with water or a mild soap solution. Avoid harsh chemicals that can damage surfaces.
2. **Inspection**: Regularly inspect bezels for scratches or dents. Check crystals for cracks or chips. Examine knobs for wear or looseness. Address any issues promptly to prevent further damage.
3. **Lubrication**: If the indicator has moving parts, apply a small amount of appropriate lubricant to ensure smooth operation. Avoid over-lubrication, which can attract dust and dirt.
4. **Tightening**: Periodically check that all screws and fasteners are secure. Tighten any loose components to maintain structural integrity.
5. **Storage**: Store the indicator in a dry, dust-free environment. Use a protective case or cover to shield it from environmental factors when not in use.
6. **Calibration**: Regularly calibrate the indicator to ensure accuracy. Follow the manufacturer's guidelines or consult a professional if necessary.
7. **Handling**: Handle the indicator with care. Avoid dropping or subjecting it to excessive force, which can damage bezels, crystals, and knobs.
8. **Replacement**: Replace damaged bezels, crystals, or knobs with manufacturer-approved parts to maintain functionality and appearance.
9. **Professional Service**: For complex maintenance or repairs, consult a professional technician. They can provide specialized care and ensure the longevity of your indicator.
By following these steps, you can effectively maintain your indicator, ensuring its accuracy and extending its lifespan.
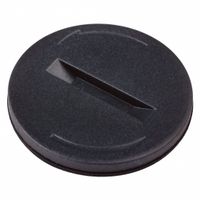
Where can I find replacement parts like battery covers and screws for my indicator?
You can find replacement parts for your indicator, such as battery covers and screws, through several avenues:
1. **Manufacturer's Website**: Check the official website of the indicator's manufacturer. They often have a support or parts section where you can order replacement parts directly.
2. **Authorized Dealers**: Contact authorized dealers or distributors of the brand. They usually have access to genuine parts and can order them for you if they are not in stock.
3. **Online Marketplaces**: Websites like Amazon, eBay, or Alibaba often have listings for replacement parts. Ensure you are purchasing from a reputable seller and that the parts are compatible with your specific model.
4. **Specialty Electronics Stores**: Some stores specialize in electronic components and may carry parts for various devices, including indicators. Check local listings or online directories for such stores.
5. **Repair Shops**: Electronics repair shops might have spare parts or can guide you on where to find them. They might also offer repair services if you prefer not to replace the parts yourself.
6. **Forums and Online Communities**: Join forums or online communities related to your indicator's brand or type. Members often share resources and may know where to find specific parts.
7. **Surplus and Salvage Stores**: These stores sell used or surplus electronic parts and might have what you need at a lower cost.
8. **3D Printing Services**: For parts like battery covers, consider using a 3D printing service if you can't find the original part. You can find or create a design and have it printed.
9. **Local Classifieds**: Check platforms like Craigslist or Facebook Marketplace for people selling parts or broken units you can salvage for parts.
Always verify the compatibility of parts with your specific model to ensure proper fit and function.