Call +(254) 703 030 000 / 751 483 999 / 721 704 777
.....Read More
Frequently Asked Questions
What are the advantages of using glass lab containers over plastic?
Glass lab containers offer several advantages over plastic ones:
1. **Chemical Resistance**: Glass is highly resistant to a wide range of chemicals, including acids, bases, and organic solvents, which can degrade or react with plastic over time.
2. **Thermal Stability**: Glass can withstand high temperatures and sudden temperature changes without deforming or melting, making it suitable for autoclaving and other high-temperature applications.
3. **Non-porous Surface**: Glass has a smooth, non-porous surface that prevents absorption of liquids and gases, reducing the risk of contamination and ensuring more accurate experimental results.
4. **Transparency**: Glass is clear and allows for easy observation of contents without opening the container, which is crucial for monitoring reactions and processes.
5. **Reusability**: Glass containers can be cleaned and sterilized repeatedly without degrading, making them more sustainable and cost-effective in the long run compared to disposable plastic containers.
6. **Inertness**: Glass is inert and does not leach chemicals into the contents, ensuring the purity and integrity of samples, which is particularly important in sensitive experiments.
7. **Environmental Impact**: Glass is recyclable and has a lower environmental impact compared to plastic, which contributes to pollution and is often not biodegradable.
8. **Durability**: While glass can break, it is generally more durable in terms of maintaining its shape and integrity under stress compared to plastic, which can warp or crack.
9. **Regulatory Compliance**: In some cases, glass is required by regulatory standards for certain types of testing and storage due to its inert and stable nature.
These advantages make glass lab containers a preferred choice in many scientific and industrial applications where precision, safety, and reliability are paramount.
How do you sterilize glass lab containers?
To sterilize glass lab containers, follow these steps:
1. **Cleaning**: Begin by thoroughly washing the glass containers with detergent and water to remove any residues or contaminants. Use a brush to scrub the interior and exterior surfaces. Rinse with distilled water to eliminate any soap residues.
2. **Inspection**: Check the containers for any cracks or chips, as damaged glassware can compromise the sterilization process and safety.
3. **Drying**: Allow the containers to air dry or use a drying oven to ensure they are completely dry before sterilization.
4. **Autoclaving**: Place the glass containers in an autoclave, ensuring they are not tightly sealed to allow steam penetration. Use autoclave tape to indicate successful sterilization. Set the autoclave to 121°C (250°F) at 15 psi for 15-30 minutes, depending on the size and thickness of the glassware.
5. **Alternative Methods**:
- **Dry Heat Sterilization**: For items that cannot be autoclaved, use a hot air oven. Preheat the oven to 160-180°C (320-356°F) and place the glassware inside for 2 hours.
- **Chemical Sterilization**: Submerge the glass containers in a chemical sterilant like ethylene oxide or hydrogen peroxide for the recommended time. Rinse thoroughly with sterile water afterward.
6. **Cooling and Storage**: After sterilization, allow the glassware to cool in a sterile environment to prevent contamination. Store in a clean, dust-free area or wrap in sterilized paper or foil until use.
7. **Handling**: Use sterile gloves or tools to handle sterilized glassware to maintain sterility.
By following these steps, you ensure that glass lab containers are properly sterilized and ready for use in experiments or procedures requiring aseptic conditions.
What types of glass lab containers are available for different laboratory applications?
Glass lab containers are essential in various laboratory applications due to their chemical resistance, transparency, and ability to withstand high temperatures. Here are some common types:
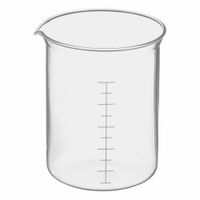
1. **Beakers**: Cylindrical with a flat bottom, used for mixing, stirring, and heating chemicals. They come in various sizes and often have a spout for pouring.
2. **Flasks**:
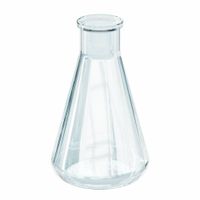
- **Erlenmeyer Flasks**: Conical shape with a flat bottom, ideal for mixing by swirling without risk of spillage.
- **Volumetric Flasks**: Used for precise dilutions and preparation of standard solutions, with a narrow neck and a single calibration mark.
- **Round-bottom Flasks**: Used for heating and boiling liquids, often in distillation processes.
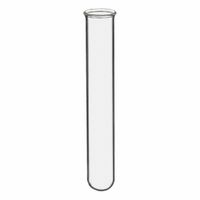
3. **Test Tubes**: Cylindrical tubes used for holding, mixing, or heating small quantities of substances. They are essential for qualitative experiments and assays.
4. **Pipettes**: Used for transferring precise volumes of liquid. They come in various types, including volumetric, graduated, and Pasteur pipettes.
5. **Burettes**: Long, graduated tubes with a stopcock at the bottom, used for titration to deliver precise volumes of liquid reagents.
6. **Petri Dishes**: Shallow, flat-lidded dishes used for culturing cells and microorganisms.
7. **Desiccators**: Airtight containers used to store moisture-sensitive substances, often with a desiccant to maintain a dry environment.
8. **Watch Glasses**: Concave glass used as a surface to evaporate a liquid, hold solids while being weighed, or cover a beaker.
9. **Funnels**: Used to channel liquids or fine-grained substances into containers with a small opening, minimizing spillage.
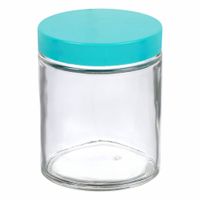
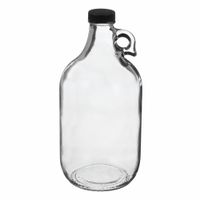
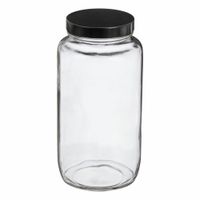
10. **Reagent Bottles**: Used for storing chemicals, available in amber or clear glass to protect light-sensitive substances.
These containers are chosen based on the specific requirements of the experiment, such as the need for precision, chemical compatibility, and thermal resistance.
How do you properly clean and maintain glass lab containers?
To properly clean and maintain glass lab containers, follow these steps:
1. **Pre-Rinse**: Immediately after use, rinse the glassware with warm water to remove any residues. This prevents substances from drying and becoming difficult to remove.
2. **Detergent Wash**: Use a mild, non-abrasive laboratory detergent. Fill the container with warm water and add detergent. Use a brush appropriate for the container's size and shape to scrub the interior and exterior surfaces.
3. **Rinse Thoroughly**: Rinse the glassware multiple times with tap water to remove all traces of detergent. Follow with a final rinse using distilled or deionized water to prevent mineral deposits.
4. **Inspect**: Check for any remaining residues or stains. If present, repeat the washing process or use specialized cleaning agents like acid or base baths, ensuring proper safety protocols.
5. **Drying**: Air-dry the glassware by placing it on a drying rack. Avoid using towels to prevent lint contamination. For faster drying, use a drying oven set to a low temperature.
6. **Storage**: Store glassware in a clean, dry area. Ensure it is organized to prevent breakage and contamination. Use dust covers if necessary.
7. **Regular Maintenance**: Periodically inspect glassware for cracks or chips. Damaged glassware should be discarded to prevent accidents.
8. **Special Cleaning**: For stubborn stains, use specific cleaning solutions like chromic acid or nitric acid baths, following all safety guidelines, including wearing appropriate personal protective equipment (PPE).
9. **Record Keeping**: Maintain a log of cleaning procedures, especially for glassware used in critical experiments, to ensure consistency and traceability.
By following these steps, you ensure the longevity and reliability of glass lab containers, maintaining a safe and efficient laboratory environment.
What are the temperature limits for glass lab containers?
Glass lab containers, such as beakers, flasks, and test tubes, are typically made from borosilicate glass due to its excellent thermal resistance. The temperature limits for these containers generally range from -70°C to about 500°C.
Borosilicate glass can withstand rapid temperature changes, making it suitable for heating and cooling applications in the lab. However, it is important to avoid sudden temperature shocks, such as moving a container directly from a hot plate to an ice bath, as this can cause thermal stress and lead to breakage.
For temperatures above 500°C, specialized glassware made from quartz glass may be used, as it can withstand temperatures up to approximately 1,000°C. However, quartz glass is more expensive and less commonly used than borosilicate glass.
When using glass lab containers, it is crucial to adhere to the manufacturer's guidelines and consider the specific type of glass used, as different formulations may have varying temperature limits. Additionally, ensure that the glassware is free from scratches or defects, as these can weaken the structure and reduce its thermal resistance.
How do you choose the right glass container for specific laboratory needs?
Choosing the right glass container for specific laboratory needs involves considering several factors:
1. **Chemical Compatibility**: Ensure the glass type is compatible with the chemicals used. Borosilicate glass is resistant to thermal shock and chemical corrosion, making it suitable for most applications. Soda-lime glass is less resistant to heat and chemicals but is cheaper.
2. **Thermal Resistance**: For experiments involving high temperatures or rapid temperature changes, borosilicate glass is preferred due to its low thermal expansion.
3. **Size and Volume**: Select containers that accommodate the volume of substances being used, with extra space to prevent overflow or spillage.
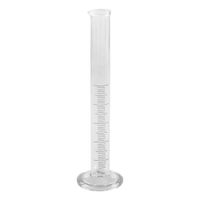
4. **Shape and Design**: The shape should suit the experiment's requirements. Beakers are ideal for mixing, while flasks are better for reactions. Graduated cylinders are used for precise measurements.
5. **Closure Type**: Consider whether the container needs a stopper or lid to prevent contamination or evaporation. Screw caps, glass stoppers, or rubber stoppers are common options.
6. **Durability and Strength**: For high-pressure reactions, choose thick-walled glassware. Ensure the glass can withstand the physical demands of the experiment.
7. **Transparency**: Clear glass is necessary for visual monitoring of reactions, while amber glass is used to protect light-sensitive substances.
8. **Cost and Availability**: Balance the need for specialized glassware with budget constraints. Borosilicate is more expensive but often necessary for demanding applications.
9. **Regulatory Compliance**: Ensure the glassware meets any relevant industry standards or regulations for safety and quality.
10. **Reusability and Cleaning**: Consider ease of cleaning and whether the glassware can be reused without risk of contamination.
By evaluating these factors, you can select the most appropriate glass container for your laboratory needs, ensuring safety, efficiency, and accuracy in your experiments.
Are there any safety precautions to consider when using glass lab containers?
When using glass lab containers, several safety precautions should be considered to prevent accidents and ensure a safe working environment:
1. **Inspection**: Before use, inspect glassware for cracks, chips, or defects. Damaged glassware can break under stress or temperature changes.
2. **Handling**: Handle glassware with care. Use both hands when carrying large or heavy items. Avoid using excessive force when assembling or disassembling glass apparatus.
3. **Temperature Changes**: Avoid sudden temperature changes. Gradually heat or cool glassware to prevent thermal shock, which can cause breakage.
4. **Pressure**: Do not use glassware under pressure or vacuum unless it is specifically designed for such conditions. Use appropriate safety shields and protective equipment.
5. **Chemical Compatibility**: Ensure that the glassware is compatible with the chemicals being used. Some chemicals can etch or weaken glass.
6. **Cleaning**: Clean glassware thoroughly after use. Use appropriate cleaning agents and avoid abrasive materials that can scratch the surface.
7. **Storage**: Store glassware properly. Use racks or shelves with barriers to prevent items from falling. Avoid stacking glassware too high.
8. **Personal Protective Equipment (PPE)**: Wear appropriate PPE, such as lab coats, gloves, and safety goggles, to protect against chemical splashes and glass breakage.
9. **Disposal**: Dispose of broken glassware in designated containers. Do not throw broken glass into regular trash bins.
10. **Training**: Ensure that all personnel are trained in the proper use and handling of glassware. Familiarize them with emergency procedures in case of accidents.
By adhering to these precautions, the risk of accidents and injuries can be minimized, ensuring a safer laboratory environment.