.....Read More

Frequently Asked Questions

1. What are the advantages of using plastic containers over glass for storing chemicals?

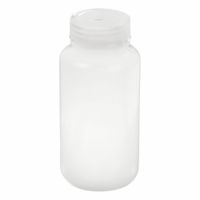
Plastic containers offer several advantages over glass for storing chemicals. They are significantly lighter, reducing shipping costs and making them easier to handle. Their durability makes them less prone to breaking upon impact, minimizing the risk of spills and exposure to hazardous chemicals. This inherent strength also makes them safer to transport and store, as there's less concern about shattering. Additionally, plastic is often more cost-effective to produce than glass, making plastic containers a more economical choice for large-scale storage. Plastic containers are also less reactive to certain chemicals, making them a safer option for a wider range of substances.

2. How do you sterilize glass containers between uses?

To sterilize glass containers between uses, you can follow these methods:1. Boiling Water Method: * Wash the glass containers and lids thoroughly with hot soapy water, rinsing them well. * Place a clean kitchen towel at the bottom of a large pot. * Carefully place the jars and lids (metal lids should be boiled for no more than 10 minutes to prevent damage to the seal) in the pot, ensuring they are fully submerged in water. * Bring the water to a rolling boil and boil for at least 10 minutes. For altitudes above 1,000 feet (305 meters), add an additional minute of boiling time for every 1,000 feet (305 meters) of elevation. * Carefully remove the hot jars and lids using tongs, placing them upside down on a clean towel to air dry. Do not wipe them, as this can reintroduce bacteria. 2. Oven Sterilization: * Preheat your oven to 250°F (120°C). * Wash and rinse the glass containers thoroughly. * Place the clean, wet jars on a baking sheet in the preheated oven for at least 20 minutes. Do not put lids in the oven, as they may melt or deform. * Remove the jars carefully with oven mitts and let them cool on a clean surface. 3. Dishwasher Sterilization: * Ensure your dishwasher has a "sterilize" or "sanitizing" cycle. * Wash the containers and lids in the dishwasher on this cycle. The high heat will sterilize them.Always use sterilized jars and lids immediately after they have been sterilized to prevent recontamination. This is crucial for food preservation and to ensure the safety and longevity of stored items.

3. What are the best practices for preventing cross-contamination in lab containers?

Preventing cross-contamination in lab containers is crucial for accurate and reliable experimental results. Key best practices include: * **Dedicated Equipment:** Use separate sets of glassware, pipettes, and other equipment for different reagents, samples, or experiments, especially when working with highly sensitive or infectious materials. * **Sterilization:** Thoroughly sterilize all lab containers and equipment before and after each use. Methods include autoclaving, dry heat sterilization, or chemical disinfection, depending on the material and application. * **Aseptic Technique:** Practice strict aseptic techniques when handling samples and reagents. This involves working in a sterile environment (e.g., a laminar flow hood), minimizing exposure to air, and avoiding direct contact with sterile surfaces. * **Proper Labeling:** Clearly and accurately label all containers with their contents, concentration, date of preparation, and any relevant safety information. This prevents accidental mixing or misuse. * **Segregation:** Store different types of samples and reagents separately to prevent accidental spills or aerosol transfer. Use secondary containment for hazardous materials. * **Regular Cleaning:** Maintain a clean and organized workspace. Regularly clean benches, floors, and equipment to reduce the presence of contaminants. * **Personal Protective Equipment (PPE):** Always wear appropriate PPE, such as gloves, lab coats, and safety glasses, to prevent contamination from personnel to samples and vice versa. * **Disposal:** Dispose of waste properly according to established protocols to avoid environmental contamination and cross-contamination within the lab.

4. How do you choose the right closure for a chemical container?

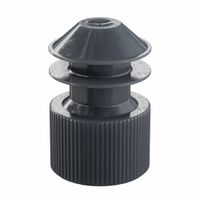
Choosing the right closure for a chemical container is critical for safety, preventing contamination, and maintaining the integrity of the contained substance. Several factors must be considered. First, the chemical compatibility between the closure material and the contained chemical is paramount. Incompatible materials can degrade, leach into the chemical, or react dangerously. Common closure materials include various plastics (HDPE, PP, PTFE), rubber, and metals, each with specific chemical resistance properties. Second, the type of closure mechanism is important. Screw caps provide a tight seal and are common for many liquids and solids. Tamper-evident closures offer an extra layer of security, indicating if the container has been opened. Dispensing closures, such as flip-top or pump dispensers, are designed for ease of use while controlling dispensing. Third, consider the container's contents and intended use. Volatile or hazardous chemicals require highly secure and chemical-resistant seals to prevent spills or vapors from escaping. If the container will be stored for a long period or subjected to extreme temperatures, the closure must maintain its integrity under those conditions. Finally, regulatory requirements and industry standards often dictate specific closure types for certain chemicals, particularly in pharmaceuticals, food, and dangerous goods transport. Always refer to safety data sheets (SDS) for specific chemical recommendations and relevant regulations.

5. What are the temperature limits for plastic vs. glass containers?

Plastic and glass containers have different temperature limits due to their material properties. Glass is generally more resistant to high temperatures than most plastics. Glass can typically withstand temperatures up to 250-300°C (482-572°F) for most borosilicate glass, and even higher for specialized types, making it suitable for baking and microwaving. However, sudden temperature changes can cause thermal shock and crack the glass. Plastic containers have a wider range of temperature limits depending on the type of plastic. For example: * **PET (Polyethylene Terephthalate):** Often used for water bottles and soft drinks, typically has a maximum temperature of around 60-70°C (140-158°F). It can deform or leach chemicals at higher temperatures. * **HDPE (High-Density Polyethylene):** Commonly used for milk jugs and detergent bottles, can withstand temperatures up to approximately 100-120°C (212-248°F) but can soften at boiling temperatures. * **PP (Polypropylene):** Frequently used for microwave-safe containers, can generally handle temperatures up to 120-160°C (248-320°F). * **PC (Polycarbonate):** Once popular for baby bottles, has a higher heat resistance, but concerns about BPA leaching have led to its decline in food-contact applications.It's crucial to check the specific recycling symbol or manufacturer's guidelines on plastic containers, as they often indicate whether they are microwave, freezer, or dishwasher safe, which correlates to their temperature tolerances. Using plastic containers beyond their recommended temperature limits can lead to warping, melting, and potential leaching of chemicals into food.

6. How do bottle dispensers work and what are their benefits?

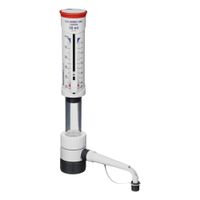
Bottle dispensers work by using a pump or a gravity-fed system to dispense liquids from a bottle. Pump dispensers typically have a tube that extends into the liquid, and when the pump is pressed, a vacuum is created, drawing the liquid up the tube and out of the nozzle. Gravity-fed dispensers, often used for thicker liquids like soap or lotion, rely on the force of gravity to push the liquid out when a valve is opened. The benefits of bottle dispensers include: * Convenience: They provide easy and controlled access to liquids, reducing spills and waste. * Hygiene: They minimize direct contact with the product, especially beneficial for shared items like hand soap or sanitizer. * Portion control: Many dispensers allow for precise dispensing, which can be useful for reducing overuse and saving money. * Organization: They can help declutter countertops and showers by providing a neat and uniform look. * Sustainability: Reusable dispensers can reduce the need for single-use plastic bottles, contributing to environmental conservation. * Versatility: They come in various designs and sizes, suitable for a wide range of liquids from beverages to cleaning products.

7. What is the process for securing aluminum caps to vials using crimpers?

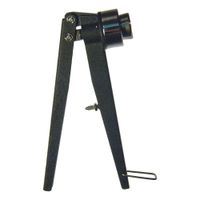
Securing aluminum caps to vials using crimpers involves a precise multi-step process to ensure a hermetic seal. First, the vial is filled with the desired contents and a stopper is placed on top. Next, an aluminum cap, which has an inner skirt and an outer skirt, is positioned over the stopper and the vial neck. The crimper then comes into play. Manual crimpers are hand-held tools, while automatic crimpers are part of a larger machine. The crimping action itself involves two main phases:1. **Gripping and Compression:** The jaws of the crimper descend and grip the outer skirt of the aluminum cap, pressing it firmly against the stopper and the glass rim of the vial. This initial compression helps to create a tight seal between the stopper and the vial. 2. **Crimping and Sealing:** As the crimper continues its motion, it rolls or folds the aluminum skirt under the flared rim of the vial neck. This creates a secure, permanent crimp that holds the cap firmly in place and prevents the stopper from being dislodged. The crimp ensures that the contents of the vial are protected from contamination and evaporation.The effectiveness of the seal depends on several factors, including the quality of the vial, stopper, and cap, as well as the calibration and proper operation of the crimper. Over-crimping can damage the cap or the vial, while under-crimping can result in a loose seal. Regular inspection and maintenance of crimping equipment are essential to maintain consistent and reliable sealing.

8. How do flask stabilizers and pour rings prevent spills?

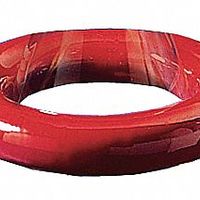
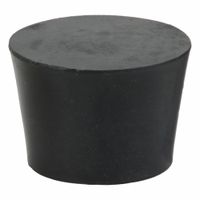
Flask stabilizers, often made of cork, rubber, or plastic, provide a wide, stable base for round-bottom flasks, preventing them from tipping over. Pour rings, usually made of plastic or silicone, fit around the neck of a flask or beaker and create a controlled pouring spout, which helps to direct the liquid flow and prevent drips and splashes, especially when transferring liquids from one container to another.

9. What are the differences in chemical resistance between plastic and glass containers?

Glass containers generally offer superior chemical resistance compared to plastic containers. Glass, particularly borosilicate glass, is highly inert and resistant to most acids, bases, and organic solvents, making it ideal for storing aggressive chemicals or samples that require high purity. It does not leach chemicals into its contents or absorb substances from them, preserving the integrity of the stored material. Plastic containers, on the other hand, vary significantly in their chemical resistance depending on the specific type of plastic. For example, polyethylene (PE) and polypropylene (PP) are resistant to many common chemicals, but they can be susceptible to degradation by strong oxidizing agents or certain organic solvents. PVC can leach plasticizers, and polycarbonate can degrade with exposure to some chemicals. Plastics can also absorb substances from their contents, potentially affecting the purity of the material stored. Factors like temperature, concentration, and exposure time also influence the chemical resistance of both materials, but glass typically maintains its integrity over a broader range of conditions.

10. How do lab adapters and joints enhance the functionality of flasks?
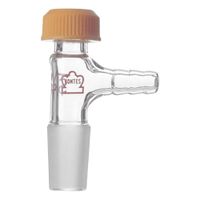
Lab adapters and joints are crucial components that significantly enhance the functionality of flasks in various laboratory settings. Their primary role is to create a sealed and interconnected system, allowing for controlled reactions, precise measurements, and safe handling of chemicals. Adapters, such as thermowell adapters, allow for the insertion of temperature probes directly into the reaction mixture within a flask, enabling accurate temperature monitoring and control, which is vital for many chemical reactions. Distillation adapters facilitate the connection of a flask to a condenser and receiving flask, enabling the separation of liquids based on their boiling points. Additionally, various types of inlet adapters allow for the controlled addition of liquids or gases to a flask, which is essential for reactions requiring slow addition or inert atmospheres. Joints, typically ground glass joints, provide a standardized, leak-proof connection between different pieces of glassware, including flasks, condensers, funnels, and stoppers. This secure connection prevents the escape of volatile chemicals or the entry of contaminants, ensuring the integrity of experiments. They also allow for easy assembly and disassembly of complex setups, improving efficiency and safety. Different sizes and types of joints (e.g., standard taper, ball-and-socket) offer flexibility in designing experimental setups to suit specific needs, from simple mixing to complex multi-step syntheses. Together, adapters and joints transform a basic flask into a versatile tool capable of performing a wide range of sophisticated chemical processes.