Call +(254) 703 030 000 / 751 483 999 / 721 704 777
.....Read More
Frequently Asked Questions
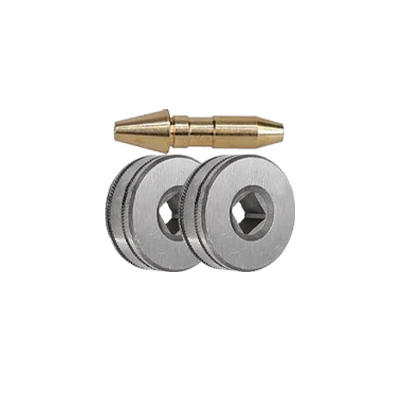
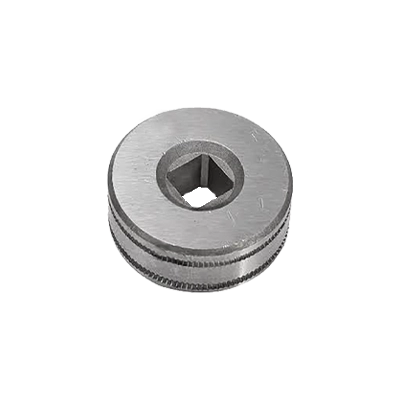
What are the different types of drive rolls for MIG wire feeders?
The different types of drive rolls for MIG wire feeders include:
1. **V-Groove Rolls**: These are used for solid wires. The V-shaped groove provides a firm grip on the wire, ensuring consistent feeding without slippage. They are ideal for hard wires like steel and stainless steel.
2. **U-Groove Rolls**: Designed for soft wires such as aluminum, U-groove rolls have a rounded groove that minimizes deformation and prevents the wire from being crushed. This design is crucial for maintaining the integrity of softer wires.
3. **Knurled Rolls**: These rolls have a textured surface that grips the wire more aggressively. They are typically used for flux-cored wires, which require a stronger grip due to their larger diameter and softer nature. The knurled surface helps in feeding the wire smoothly without slippage.
4. **Flat Rolls**: These are less common and are used for very specific applications where minimal deformation of the wire is critical. They provide a gentle grip and are sometimes used for delicate or specialty wires.
5. **V-Knurled Rolls**: A combination of V-groove and knurled designs, these rolls are used for flux-cored wires that need both a firm grip and the ability to handle the wire's softer nature. They provide the benefits of both V-groove and knurled rolls.
Selecting the appropriate drive roll type is essential for optimal wire feeding performance, reducing the risk of wire slippage, deformation, and feeding issues.
How do I adjust the tension on a MIG wire feeder?
1. **Turn Off the Machine**: Ensure the MIG welder is turned off and unplugged to prevent any accidental starts.
2. **Open the Feeder Compartment**: Access the wire feeder by opening the compartment where the spool and drive rolls are located.
3. **Check the Wire Spool**: Ensure the wire spool is properly installed and can rotate freely. It should not be too tight or too loose.
4. **Locate the Tension Adjustment Knob**: Identify the tension adjustment knob or screw on the drive roll assembly. This is usually located near the drive rolls.
5. **Adjust the Tension**:
- **Loosen the Tension**: Turn the knob counterclockwise to decrease tension if the wire is bird-nesting (tangling) or if the wire feed is erratic.
- **Increase the Tension**: Turn the knob clockwise to increase tension if the wire slips on the drive rolls or if the arc is inconsistent.
6. **Test the Tension**:
- **Manual Test**: Pull the wire by hand. It should come out smoothly without slipping or excessive resistance.
- **Operational Test**: Turn on the welder and feed the wire through the gun. Observe the wire feed consistency and adjust as necessary.
7. **Fine-Tune**: Make small adjustments and test repeatedly until the wire feeds smoothly and consistently without slipping or tangling.
8. **Secure the Compartment**: Once the desired tension is achieved, close the feeder compartment securely.
9. **Perform a Welding Test**: Conduct a test weld to ensure the wire feeds correctly during actual welding conditions.
10. **Regular Maintenance**: Regularly check and adjust the tension as needed, especially when changing wire sizes or types.
What maintenance is required for MIG wire feeders?
Maintenance for MIG wire feeders involves several key tasks to ensure optimal performance and longevity:
1. **Regular Cleaning**: Clean the wire feeder regularly to remove dust, dirt, and metal particles. Use compressed air to blow out debris from the drive rolls, wire guides, and other components.
2. **Inspect and Replace Drive Rolls**: Check the drive rolls for wear and tear. Worn-out drive rolls can cause feeding issues. Replace them if they are grooved or damaged.
3. **Check Wire Guides and Liners**: Inspect the wire guides and liners for blockages or wear. Clean or replace them as necessary to ensure smooth wire feeding.
4. **Adjust Tension Settings**: Ensure the tension on the drive rolls is set correctly. Too much tension can deform the wire, while too little can cause slippage.
5. **Lubricate Moving Parts**: Apply appropriate lubricants to moving parts as recommended by the manufacturer to prevent rust and ensure smooth operation.
6. **Inspect Electrical Connections**: Check all electrical connections for tightness and signs of corrosion. Loose or corroded connections can lead to poor performance or electrical failures.
7. **Check for Software Updates**: If the wire feeder is equipped with digital controls, ensure that the software is up to date to benefit from the latest features and improvements.
8. **Test the Feeder**: Regularly test the feeder to ensure it is operating correctly. Listen for unusual noises and check for consistent wire feed speed.
9. **Replace Consumables**: Regularly replace consumables like contact tips and nozzles to maintain good electrical conductivity and arc stability.
10. **Follow Manufacturer Guidelines**: Always refer to the manufacturer's maintenance guidelines for specific instructions and recommended maintenance intervals.
By performing these maintenance tasks, you can help ensure that your MIG wire feeder operates efficiently and reliably.
How do I troubleshoot wire feeding issues in a MIG welder?
1. **Check the Wire Spool**: Ensure the spool is properly installed and can rotate freely. Verify that the wire is not tangled or kinked.
2. **Inspect the Drive Rollers**: Confirm the drive rollers are clean and free of debris. Adjust the tension to ensure the wire feeds smoothly without slipping or crushing.
3. **Examine the Liner**: Check the liner for blockages or wear. Replace if necessary, ensuring it is the correct size for the wire being used.
4. **Verify the Contact Tip**: Ensure the contact tip is the correct size for the wire and is not worn or clogged. Replace if needed.
5. **Check the Gun and Cable**: Inspect the gun and cable for kinks, bends, or damage that could impede wire feeding.
6. **Adjust the Tension**: Set the tension on the spool hub and drive rolls correctly. Too much tension can crush the wire, while too little can cause slipping.
7. **Inspect the Wire Type and Size**: Ensure the wire type and size match the machine settings and are appropriate for the material being welded.
8. **Check Electrical Connections**: Ensure all electrical connections are secure and free of corrosion.
9. **Review Machine Settings**: Verify that the machine settings, such as voltage and wire feed speed, are appropriate for the task.
10. **Clean the Nozzle**: Remove any spatter or debris from the nozzle that could obstruct the wire.
11. **Test the Ground Connection**: Ensure the ground clamp is securely attached to clean metal.
12. **Consult the Manual**: Refer to the welder’s manual for specific troubleshooting tips related to your model.
13. **Seek Professional Help**: If issues persist, consult a professional technician for further diagnosis and repair.
What size wire can be used with my MIG wire feeder?
The size of wire that can be used with a MIG wire feeder depends on several factors, including the type of material being welded, the thickness of the material, the welding position, and the capabilities of the MIG welder itself. Common wire sizes for MIG welding include 0.023 inch, 0.030 inch, 0.035 inch, and 0.045 inch.
1. **Material Type and Thickness**:
- For thin materials (less than 1/8 inch), a smaller wire size like 0.023 inch or 0.030 inch is typically used. These sizes provide better control and reduce the risk of burning through the material.
- For thicker materials, 0.035 inch or 0.045 inch wires are more suitable as they provide deeper penetration and higher deposition rates.
2. **Welding Position**:
- In out-of-position welding (vertical, overhead), smaller wire sizes are often preferred to maintain better control and reduce spatter.
3. **Welder Capability**:
- Ensure that your MIG welder is compatible with the wire size you choose. Check the welder’s specifications for the recommended wire sizes and corresponding settings.
- The drive roll and contact tip must match the wire size to ensure smooth feeding and consistent arc performance.
4. **Shielding Gas**:
- The choice of shielding gas can also influence wire size selection. For example, a CO2 shielding gas might work better with larger wire sizes due to its deeper penetration characteristics.
5. **Application**:
- Consider the specific application and desired weld characteristics. For example, automotive bodywork might require smaller wires for precision, while structural steel might benefit from larger wires for strength.
Always refer to the manufacturer’s guidelines for your specific MIG welder and consult with welding professionals if unsure about the appropriate wire size for your application.
How do I clean and lubricate a MIG wire feeder?
1. **Turn Off Power**: Ensure the welding machine is turned off and unplugged to prevent any accidental activation.
2. **Remove the Wire Spool**: Detach the wire spool from the feeder. This allows you to access the feeder components more easily.
3. **Clean the Drive Rolls**: Use a wire brush or compressed air to remove any debris or metal shavings from the drive rolls. Ensure they are free of any obstructions that could affect wire feeding.
4. **Inspect and Clean the Liner**: Remove the liner from the torch cable. Use compressed air to blow out any dust or debris. If the liner is worn or damaged, replace it.
5. **Check the Contact Tip and Nozzle**: Remove the contact tip and nozzle. Clean them with a wire brush to remove any spatter or buildup. Replace if they are worn out.
6. **Lubricate the Drive Rolls**: Apply a small amount of light machine oil to the drive rolls. Avoid over-lubricating, as excess oil can attract dust and debris.
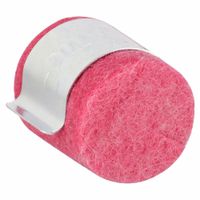
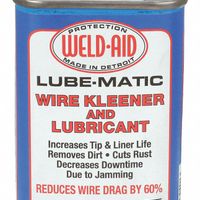
7. **Lubricate the Wire**: Use a felt pad or wire lubricator to apply a thin layer of lubricant to the wire as it feeds through the system. This reduces friction and wear.
8. **Reassemble the Feeder**: Reinstall the liner, contact tip, nozzle, and wire spool. Ensure everything is securely in place.
9. **Test the System**: Turn the machine back on and test the wire feed to ensure smooth operation. Adjust tension settings if necessary.
10. **Regular Maintenance**: Establish a routine maintenance schedule to keep the wire feeder in optimal condition, preventing future issues.
By following these steps, you can ensure your MIG wire feeder operates efficiently and prolong its lifespan.
What are common problems with MIG wire feeders and how can they be fixed?
Common problems with MIG wire feeders include:
1. **Birdnesting**: This occurs when the wire tangles at the drive rolls. To fix it, ensure proper tension on the drive rolls, use the correct liner size, and maintain a clean liner. Regularly check for blockages or kinks in the wire path.
2. **Burnback**: This happens when the wire melts into the contact tip. To resolve it, adjust the wire feed speed and voltage settings, and ensure the contact tip is not worn out. Use anti-spatter spray to prevent buildup.
3. **Erratic Wire Feeding**: This can be caused by incorrect tension, worn drive rolls, or a dirty liner. Adjust the tension, replace worn parts, and clean or replace the liner as needed.
4. **Wire Slippage**: Occurs when the drive rolls can't grip the wire properly. Check the drive roll tension and ensure the correct type and size of drive rolls are used for the wire.
5. **Liner Blockage**: Dirt or debris in the liner can obstruct wire feeding. Regularly clean the liner and replace it if necessary. Use a wire cleaner pad to keep the wire clean before it enters the liner.
6. **Inconsistent Arc**: This can result from poor electrical connections or worn contact tips. Tighten all connections and replace worn or damaged contact tips.
7. **Wire Jamming**: Often due to incorrect wire size or type for the liner and contact tip. Ensure compatibility between the wire, liner, and contact tip.
8. **Drive Roll Wear**: Worn drive rolls can cause feeding issues. Regularly inspect and replace them as needed.
Regular maintenance, proper setup, and using compatible components are key to preventing and fixing these issues.