Call +(254) 703 030 000 / 751 483 999 / 721 704 777
.....Read More
Frequently Asked Questions
What are the different types of router bits?
Router bits come in various types, each designed for specific tasks in woodworking. Here are some common types:
1. **Straight Bits**: Used for cutting straight, square-bottomed grooves, dados, and rabbets. They are versatile and come in various diameters.
2. **Flush Trim Bits**: Equipped with a bearing that guides the bit along the edge of a template or workpiece, these bits are ideal for trimming edges flush with another surface.
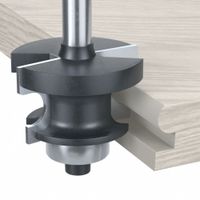
3. **Rabbeting Bits**: Designed to cut a rabbet or shoulder on the edge of a workpiece. They often come with interchangeable bearings to adjust the width of the cut.
4. **Chamfer Bits**: Used to cut a beveled edge on the workpiece, typically at a 45-degree angle, to create decorative edges or to ease sharp corners.
5. **Round-Over Bits**: These bits round the edges of a workpiece, creating a smooth, rounded profile. They are available in various radii.
6. **Cove Bits**: Used to cut a concave, rounded groove into the edge of a workpiece, often for decorative purposes.
7. **V-Groove Bits**: Create V-shaped grooves in the surface of a workpiece, useful for decorative patterns or lettering.
8. **Dovetail Bits**: Essential for creating dovetail joints, these bits cut a flared groove that interlocks with a corresponding piece.
9. **Edge Forming Bits**: Include a variety of profiles like ogee, beading, and classical, used for decorative edge work.
10. **Slot Cutting Bits**: Designed to cut slots or grooves in a workpiece, often used for biscuit joinery or to create tongue and groove joints.
11. **Specialty Bits**: Include a range of bits for specific tasks, such as keyhole bits for hanging frames or panel pilot bits for cutting openings in paneling.
Each type of router bit is designed for specific applications, and selecting the right one depends on the desired cut and finish.
How do I choose the right router bit for my project?
1. **Material Compatibility**: Choose a bit designed for the material you are working with, such as wood, plastic, or metal.
2. **Bit Type**: Select the appropriate bit type for your task:
- **Straight Bits**: For cutting straight edges, grooves, and dados.
- **Flush Trim Bits**: For trimming edges flush with a template or guide.
- **Rabbeting Bits**: For cutting rabbets or shoulders.
- **Round-Over Bits**: For creating rounded edges.
- **Chamfer Bits**: For cutting beveled edges.
- **Cove Bits**: For concave edges.
- **V-Groove Bits**: For decorative V-shaped grooves.
3. **Shank Size**: Choose between 1/4-inch and 1/2-inch shank sizes. 1/2-inch shanks offer better stability and less vibration.
4. **Cutting Diameter**: Match the bit’s cutting diameter to the size of the cut you need. Larger diameters remove more material but require more power.
5. **Profile and Design**: Consider the profile you want to achieve. Complex profiles may require specialized bits.
6. **Quality and Material**: Opt for carbide-tipped bits for durability and longer life, especially for hardwoods and frequent use.
7. **Router Compatibility**: Ensure the bit is compatible with your router’s speed and power. Some bits require variable speed routers.
8. **Project Requirements**: Consider the specific needs of your project, such as edge finishing, joinery, or decorative work.
9. **Budget**: Balance cost with quality. Investing in high-quality bits can save money in the long run.
10. **Brand and Reviews**: Choose reputable brands and check reviews for performance and reliability.
11. **Safety**: Ensure the bit is suitable for safe operation at the intended speed and depth of cut.
What materials can router bits be used on?
Router bits can be used on a variety of materials, including:
1. **Wood**: The most common material for router bits, suitable for hardwoods, softwoods, plywood, and MDF. They are used for shaping, cutting, and detailing.
2. **Plastic**: Router bits can be used on acrylics, polycarbonates, and other plastics, often requiring slower speeds to prevent melting.
3. **Metal**: Specialized router bits can work on non-ferrous metals like aluminum and brass. These bits are typically carbide-tipped for durability.
4. **Laminate**: Used for trimming and shaping laminate surfaces, such as those found on countertops.
5. **Composite Materials**: Router bits can handle composite woods like particleboard and fiberboard, often used in furniture and cabinetry.
6. **Foam**: High-density foam can be shaped and cut with router bits, useful in model making and prototyping.
7. **Solid Surface Materials**: Used for materials like Corian, often in countertop fabrication.
8. **Glass and Ceramics**: Specialized diamond-tipped bits are required for these materials, used in artistic and architectural applications.
9. **Rubber and Soft Materials**: Certain bits can be used for cutting and shaping softer materials, though care must be taken to avoid tearing.
Router bits must be chosen based on the material's hardness, thickness, and the desired finish. Proper speed, feed rate, and bit type are crucial to avoid damage to both the material and the bit.
How do I maintain and sharpen router bits?
To maintain and sharpen router bits, follow these steps:
1. **Cleaning**: Remove resin and pitch build-up using a commercial bit cleaner or a mixture of warm water and mild detergent. Use a soft brush to scrub the bits gently. Rinse and dry thoroughly to prevent rust.
2. **Inspection**: Check for any damage, such as chips or cracks. Discard any bits that are damaged beyond repair to ensure safety and precision.
3. **Sharpening**: Use a diamond hone or sharpening stone. Secure the bit in a vise or a bit holder to keep it steady. For carbide-tipped bits, focus on the flat surfaces of the cutting edges. Gently stroke the hone across the edge, maintaining the original angle. Avoid sharpening the sides or the profile to prevent altering the bit's shape.
4. **Lubrication**: Apply a light coat of machine oil to prevent rust and ensure smooth operation. Wipe off any excess oil before use.
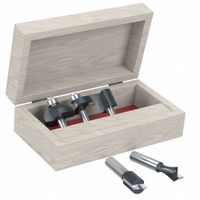
5. **Storage**: Store bits in a dry, organized manner. Use a dedicated bit holder or case to prevent them from knocking against each other, which can cause damage.
6. **Usage Tips**: Use the correct speed and feed rate for the material being cut. Avoid overheating by taking shallow passes and allowing the bit to cool between uses.
7. **Regular Maintenance**: Clean and inspect bits after each use. Regular maintenance extends the life of the bits and ensures optimal performance.
By following these steps, you can maintain sharp, efficient router bits, ensuring precision and safety in your woodworking projects.
What safety precautions should I take when using router bits?
1. **Wear Safety Gear**: Always wear safety glasses or goggles to protect your eyes from flying debris. Use hearing protection to guard against noise, and wear a dust mask to avoid inhaling wood dust.
2. **Inspect Router Bits**: Before use, check router bits for any damage or wear. Do not use bits that are chipped, cracked, or dull.
3. **Secure Workpiece**: Ensure the workpiece is securely clamped or held in place to prevent movement during routing.
4. **Use a Router Table**: When possible, use a router table for better control and stability, especially with small or intricate pieces.
5. **Correct Installation**: Insert the router bit fully into the collet, then pull it out slightly (about 1/8 inch) before tightening. This ensures a secure fit and prevents the bit from loosening.
6. **Set Proper Speed**: Adjust the router speed according to the size and type of the bit. Larger bits require slower speeds to prevent burning and kickback.
7. **Feed Direction**: Always feed the workpiece against the rotation of the bit to maintain control and prevent kickback.
8. **Avoid Distractions**: Stay focused and avoid distractions while operating the router. Keep your hands clear of the bit at all times.
9. **Power Off**: Ensure the router is turned off and unplugged when changing bits or making adjustments.
10. **Use Push Blocks**: For small or narrow pieces, use push blocks or sticks to keep your hands safe and maintain control.
11. **Check for Obstructions**: Ensure the path of the router bit is clear of any obstructions or foreign objects.
12. **Proper Lighting**: Work in a well-lit area to clearly see the workpiece and router bit.
13. **Regular Maintenance**: Keep the router and bits clean and well-maintained to ensure optimal performance and safety.
How do I install and change router bits on a router?
1. **Safety First**: Unplug the router to ensure safety while changing bits.
2. **Remove the Current Bit**:
- **Collet and Nut**: Locate the collet and collet nut at the base of the router. The collet holds the bit in place.
- **Wrench Use**: Use the provided wrench to loosen the collet nut. Some routers have a spindle lock button to hold the shaft steady while loosening.
- **Remove Bit**: Once the nut is loose, remove the current bit by pulling it out.
3. **Select the New Bit**:
- **Bit Type**: Choose the appropriate bit for your task. Ensure it is clean and free of damage.
- **Shank Size**: Ensure the bit’s shank matches the collet size.
4. **Install the New Bit**:
- **Insert Bit**: Insert the new bit into the collet. Leave a small gap (about 1/8 inch) between the collet and the bit’s shoulder to prevent binding.
- **Tighten Collet Nut**: Hand-tighten the collet nut, then use the wrench to secure it. Avoid over-tightening to prevent damage.
5. **Check Installation**:
- **Bit Security**: Ensure the bit is firmly in place and does not wobble.
- **Depth Adjustment**: Adjust the bit depth according to your project requirements.
6. **Test Run**:
- **Power On**: Plug in the router and perform a test run on scrap material to ensure the bit is installed correctly and operates smoothly.
7. **Safety Gear**: Always wear safety goggles and hearing protection when operating the router.
8. **Maintenance**: Regularly clean and inspect bits and collets for wear and tear to ensure optimal performance.
What are the common problems and solutions when using router bits?
Common problems when using router bits include:
1. **Burning**: Occurs due to excessive speed or feeding too slowly.
- **Solution**: Reduce the router speed and increase the feed rate. Ensure the bit is sharp.
2. **Chipping**: Happens when cutting against the grain or using a dull bit.
- **Solution**: Use a sharp bit and cut with the grain. Consider using a climb cut for delicate work.
3. **Tear-out**: Caused by cutting against the grain or using the wrong bit type.
- **Solution**: Use a backer board to support the cut and ensure the bit is appropriate for the material.
4. **Bit Slippage**: Occurs when the bit is not properly secured in the collet.
- **Solution**: Tighten the collet securely and ensure the bit is inserted to the correct depth.
5. **Vibration**: Results from an unbalanced bit or incorrect speed.
- **Solution**: Balance the bit and adjust the speed. Ensure the router is securely mounted.
6. **Overheating**: Due to prolonged use or excessive speed.
- **Solution**: Allow the bit to cool between uses and reduce the speed.
7. **Poor Edge Finish**: Caused by a dull bit or incorrect feed rate.
- **Solution**: Use a sharp bit and adjust the feed rate for a smoother finish.
8. **Bit Breakage**: Results from using the wrong bit for the material or excessive force.
- **Solution**: Select the correct bit for the material and apply moderate force.
9. **Dust Buildup**: Can obscure the work area and affect performance.
- **Solution**: Use dust extraction systems and regularly clean the work area.
10. **Incorrect Depth of Cut**: Leads to uneven or inaccurate cuts.
- **Solution**: Adjust the depth setting accurately before starting the cut.