Call +(254) 703 030 000 / 751 483 999 / 721 704 777
.....Read More
Frequently Asked Questions
What are the best plumbing power tools for restoring flow in pipes?
The best plumbing power tools for restoring flow in pipes include:
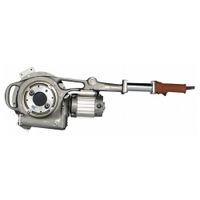
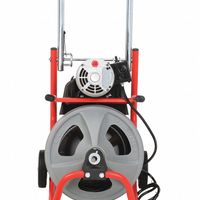
1. **Electric Drain Snake (Auger):** Ideal for clearing clogs in pipes, electric drain snakes can reach deep into plumbing systems to dislodge blockages. They come in various sizes, suitable for residential or commercial use, and can handle tough clogs caused by hair, grease, or other debris.
2. **Hydro Jetting Machine:** This tool uses high-pressure water jets to clean pipes and remove stubborn blockages. It's effective for clearing grease, scale, and other build-ups, and is often used for larger plumbing systems or severe clogs.
3. **Pipe Inspection Camera:** While not directly used for clearing blockages, a pipe inspection camera is essential for diagnosing the cause and location of a clog. It provides a visual assessment of the pipe's interior, helping plumbers decide the best course of action.
4. **Cordless Power Drill with Drain Cleaning Attachment:** For minor clogs, a cordless power drill with a drain cleaning attachment can be effective. It offers flexibility and ease of use, especially in tight spaces.
5. **Plumbing Power Plunger:** This tool uses compressed air to forcefully push blockages through the pipe. It's suitable for toilets and sinks and can be a quick solution for minor clogs.
6. **Electric Pipe Freezing Kit:** While not directly for clearing clogs, this tool can temporarily freeze water in pipes, allowing for repairs or modifications without shutting off the entire water system.
7. **Chemical Drain Cleaners (used with caution):** While not a power tool, chemical drain cleaners can be used in conjunction with power tools to dissolve organic material. However, they should be used sparingly to avoid pipe damage.
These tools, when used correctly, can effectively restore flow in pipes and maintain a healthy plumbing system.
How do drain cleaning power tools compare to manual tools?
Drain cleaning power tools offer significant advantages over manual tools in terms of efficiency, effectiveness, and ease of use. Power tools, such as electric drain snakes or augers, can quickly clear blockages with minimal physical effort. They are particularly effective for stubborn clogs and can reach deeper into pipes, making them suitable for both residential and commercial applications. The motorized action allows for consistent and powerful rotation, which can break through tough obstructions like tree roots or hardened grease.
In contrast, manual tools like plungers, hand-crank augers, or drain rods require more physical exertion and may not be as effective for severe clogs. They are generally more suitable for minor blockages or for use in smaller drains. Manual tools are often limited by the user's strength and endurance, and they may not reach as far into the plumbing system as power tools can.
However, manual tools have their own advantages. They are typically more affordable, require no electricity, and are easier to maintain. They are also less likely to cause damage to pipes if used correctly, as they rely on manual force rather than mechanical power. Additionally, manual tools are more portable and can be used in situations where power sources are unavailable.
In summary, power tools are ideal for heavy-duty and frequent drain cleaning tasks, offering speed and effectiveness, while manual tools are better suited for occasional use, smaller jobs, and situations where cost and portability are primary concerns. The choice between the two depends on the specific needs, budget, and the nature of the clog.
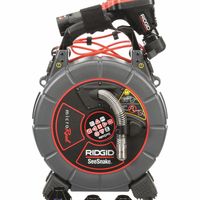
What equipment is used for pipe inspection without excavation?
Pipe inspection without excavation typically involves several advanced technologies and equipment designed to assess the condition of pipes from the inside. Key equipment includes:
1. **CCTV Cameras**: Closed-circuit television cameras are mounted on robotic crawlers or push rods to visually inspect the interior of pipes. They provide real-time video footage, allowing operators to identify blockages, cracks, or other defects.
2. **Robotic Crawlers**: These are remote-controlled vehicles equipped with cameras and sensors. They can navigate through pipes of various sizes and materials, providing detailed inspection data.
3. **Sonar Systems**: Used primarily in submerged pipes, sonar technology emits sound waves to map the interior surface of pipes. It is effective in detecting sediment build-up and structural anomalies.
4. **Laser Profiling**: This technology uses laser beams to measure the internal diameter and shape of pipes. It helps in identifying deformations, corrosion, and other structural issues.
5. **Pipe Penetrating Radar (PPR)**: Similar to ground-penetrating radar, PPR is used to detect voids, cracks, and other defects in non-metallic pipes by sending radar waves through the pipe walls.
6. **Acoustic Emission Testing**: This method involves listening for sound waves emitted by cracks or leaks in pressurized pipes. It is useful for detecting active leaks and structural weaknesses.
7. **Magnetic Flux Leakage (MFL)**: Used primarily for metal pipes, MFL detects corrosion and pitting by measuring changes in magnetic fields as the equipment passes through the pipe.
8. **Ultrasonic Testing**: This technique uses high-frequency sound waves to detect wall thickness and integrity, identifying corrosion and other defects.
These technologies enable comprehensive pipe inspection without the need for disruptive and costly excavation.
How do you prepare new pipe for installation using power tools?
To prepare a new pipe for installation using power tools, follow these steps:
1. **Measurement and Marking**: Use a tape measure to determine the required length of the pipe. Mark the cutting point with a permanent marker or chalk.
2. **Cutting**: Secure the pipe in a vise or pipe stand. Use a power saw, such as a reciprocating saw or a pipe cutter, to cut the pipe at the marked point. Ensure the cut is straight and clean.
3. **Deburring**: After cutting, use a power deburring tool or a rotary tool with a deburring attachment to remove any burrs or sharp edges from the cut end. This ensures a smooth surface for fitting.
4. **Cleaning**: Use a power brush or a wire wheel attachment on a drill to clean the pipe's exterior and interior surfaces. This removes any dirt, oil, or oxidation, ensuring a clean surface for joining.
5. **Beveling**: If required, use a power beveling tool to create a beveled edge on the pipe end. This is essential for certain types of welding or joining methods.
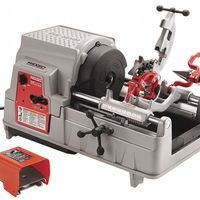
6. **Threading (if necessary)**: For threaded connections, use a power threading machine to cut threads onto the pipe end. Ensure the threads are clean and precise for a proper fit.
7. **Inspection**: Visually inspect the pipe for any defects or irregularities. Use a caliper or micrometer to check the dimensions and ensure they meet specifications.
8. **Final Cleaning**: Wipe the pipe with a clean cloth to remove any remaining debris or metal shavings.
9. **Safety Check**: Ensure all power tools are turned off and stored safely. Wear appropriate personal protective equipment (PPE) throughout the process, including gloves, goggles, and ear protection.
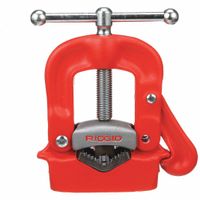
What are the benefits of using pipe stands and vises?
Pipe stands and vises offer several benefits in various industrial and construction settings:
1. **Stability and Support**: Pipe stands provide a stable platform for holding pipes during cutting, welding, or threading operations. This stability minimizes movement, ensuring precision and safety.
2. **Versatility**: They can accommodate different pipe sizes and materials, making them suitable for a wide range of applications. Adjustable heights and angles allow for customization based on specific project needs.
3. **Safety**: By securely holding pipes in place, pipe stands and vises reduce the risk of accidents and injuries. They prevent pipes from rolling or slipping, which is crucial when working with heavy or cumbersome materials.
4. **Efficiency**: These tools streamline workflow by allowing workers to focus on the task without worrying about pipe movement. This efficiency can lead to faster project completion and reduced labor costs.
5. **Durability**: Made from robust materials like steel or cast iron, pipe stands and vises are designed to withstand heavy use and harsh environments, ensuring long-term reliability.
6. **Portability**: Many pipe stands are lightweight and foldable, making them easy to transport and set up at different job sites. This portability is essential for contractors who work in multiple locations.
7. **Precision**: Vises provide a firm grip on pipes, allowing for precise cutting, threading, or welding. This precision is critical for ensuring that pipes fit correctly and function as intended.
8. **Cost-Effectiveness**: By enhancing safety, efficiency, and precision, pipe stands and vises can reduce material waste and rework, ultimately saving money on projects.
Overall, pipe stands and vises are essential tools that enhance the safety, efficiency, and quality of work in pipe-related tasks.
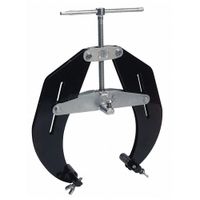
How do pipe alignment tools and flange spreaders work?
Pipe alignment tools and flange spreaders are essential in ensuring precise and safe assembly of piping systems.
Pipe alignment tools are used to align pipes accurately before welding or joining. These tools typically include clamps, jigs, and laser alignment systems. Clamps hold the pipes in place, ensuring they are level and aligned along the desired axis. Jigs provide a framework to maintain alignment during the welding process. Laser alignment systems project a laser beam along the pipe's length, allowing for precise adjustments to achieve perfect alignment. These tools help prevent misalignment, which can lead to leaks, structural weaknesses, and increased wear.
Flange spreaders are used to separate flanges safely and efficiently. Flanges are the flat, circular components at the end of pipes that allow them to be bolted together. Over time, or due to pressure, these flanges can become tightly sealed. Flange spreaders use mechanical or hydraulic force to gently separate the flanges without damaging them. Mechanical spreaders use a screw mechanism to apply force, while hydraulic spreaders use fluid pressure for more significant force. These tools ensure that maintenance, inspection, or gasket replacement can be performed without damaging the flanges or associated piping.
Both tools are crucial for maintaining the integrity and safety of piping systems, reducing downtime, and ensuring efficient operation.
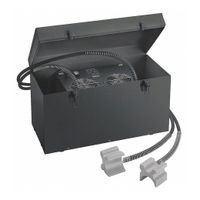
What is the process for using pipe freezing and thawing equipment for repairs?
Pipe freezing and thawing equipment is used to create a temporary ice plug in a pipe, allowing for repairs without draining the entire system. Here’s the process:
1. **Preparation**: Identify the section of the pipe to be frozen. Ensure the pipe material is suitable for freezing and that the system can handle the pressure changes. Gather necessary equipment, including the pipe freezing kit, safety gear, and repair tools.
2. **Installation**: Attach the freezing jacket or clamp around the pipe at the desired location. Ensure it fits snugly to prevent leaks. Connect the freezing unit to the jacket.
3. **Freezing**: Activate the freezing unit. It uses a refrigerant or liquid nitrogen to lower the temperature around the pipe, forming an ice plug. Monitor the temperature and pressure to ensure a solid freeze. This can take from 30 minutes to a few hours, depending on pipe size and material.
4. **Repair**: Once the ice plug is confirmed, proceed with the repair. Cut, replace, or fix the pipe section as needed. Ensure all connections are secure and leak-free.
5. **Thawing**: After repairs, deactivate the freezing unit. Allow the ice plug to melt naturally or use a thawing device if available. Monitor the process to prevent water hammer or pressure surges.
6. **Testing**: Once thawed, check the system for leaks. Gradually restore normal pressure and flow. Inspect the repair site to ensure stability and integrity.
7. **Cleanup**: Remove all equipment and dispose of any waste materials according to regulations. Document the repair process for future reference.
Safety precautions are crucial throughout the process to prevent accidents and ensure effective repairs.