Call +(254) 703 030 000 / 751 483 999 / 721 704 777
.....Read More
Frequently Asked Questions
What are the different types of nail guns?
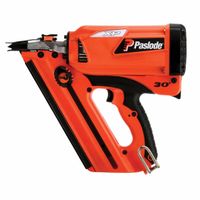
1. **Framing Nailers**: Used for heavy-duty tasks like framing houses, building decks, and constructing fences. They handle large nails and are designed for structural work.
2. **Finish Nailers**: Ideal for detailed work such as crown molding, baseboards, and cabinetry. They use smaller nails and provide a clean finish without splitting the wood.
3. **Brad Nailers**: Perfect for delicate trim work and small projects. They use very thin nails, minimizing the risk of splitting fine wood.
4. **Pin Nailers**: Used for ultra-fine work like small trim pieces and delicate moldings. They use headless pins, leaving virtually no visible mark.
5. **Roofing Nailers**: Specifically designed for installing roofing shingles. They use coil nails and are built to handle the repetitive nature of roofing tasks.
6. **Siding Nailers**: Used for attaching siding materials to the exterior of buildings. They are designed to handle the specific nails and angles required for siding.
7. **Flooring Nailers**: Designed for installing hardwood floors. They are often used with a mallet to drive nails at the correct angle and depth.
8. **Palm Nailers**: Compact and versatile, used for tight spaces where larger nailers can't fit. They are held in the palm and are suitable for various small projects.
9. **Staple Guns**: While not technically nailers, they are often grouped with them. Used for upholstery, insulation, and other tasks requiring staples instead of nails.
10. **Concrete Nailers**: Designed to drive nails into concrete or masonry surfaces. They are powerful and used for heavy-duty applications.
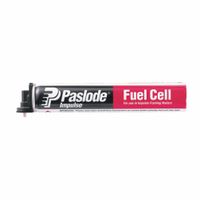
11. **Gas-Powered Nailers**: Use a fuel cell and battery to drive nails, offering portability without the need for a compressor.
12. **Pneumatic Nailers**: Operate using compressed air, providing consistent power and speed for various tasks.
How do I choose the right nail gun for my project?
1. **Project Type**: Identify the type of project (e.g., framing, finishing, roofing) to determine the nail gun category needed.
2. **Nail Gun Types**:
- **Framing Nailer**: For heavy-duty projects like building frames or decks.
- **Finish Nailer**: For interior work like molding or cabinetry.
- **Brad Nailer**: For delicate trim work or small crafts.
- **Roofing Nailer**: Specifically for installing shingles.
- **Flooring Nailer**: For hardwood floor installation.
3. **Power Source**:
- **Pneumatic**: Requires an air compressor; powerful and suitable for heavy-duty tasks.
- **Cordless/Battery-Powered**: Offers mobility; ideal for smaller projects or hard-to-reach areas.
- **Electric**: Plug-in models; less powerful but convenient for light tasks.
4. **Nail Size and Type**: Ensure the nail gun supports the size and type of nails required for your project.
5. **Weight and Ergonomics**: Choose a model that is comfortable to handle for extended periods, especially for overhead work.
6. **Depth Adjustment**: Look for a tool with adjustable depth settings for precision.
7. **Safety Features**: Consider models with features like trigger locks and anti-dry fire mechanisms.
8. **Budget**: Balance between cost and features; higher-end models offer more durability and features.
9. **Brand and Reviews**: Research reputable brands and read user reviews for reliability and performance insights.
10. **Warranty and Support**: Check for warranty terms and customer support availability.
By considering these factors, you can select a nail gun that best suits your project needs and ensures efficiency and safety.
What safety precautions should I take when using a nail gun?
1. **Read the Manual**: Familiarize yourself with the manufacturer's instructions and safety guidelines specific to your nail gun model.
2. **Wear Protective Gear**: Use safety glasses to protect your eyes from flying debris and ear protection to guard against noise. Consider wearing gloves and a hard hat if necessary.
3. **Inspect the Tool**: Check the nail gun for any damage or defects before use. Ensure that all safety mechanisms are functioning properly.
4. **Use the Right Nails**: Only use nails that are compatible with your nail gun to prevent jamming or misfiring.
5. **Secure the Work Area**: Ensure the work area is clean and free of hazards. Keep bystanders, especially children, at a safe distance.
6. **Check Air Pressure**: If using a pneumatic nail gun, ensure the air pressure is set according to the manufacturer's specifications.
7. **Proper Handling**: Always point the nail gun away from yourself and others. Never carry the tool with your finger on the trigger.
8. **Use Sequential Firing Mode**: If available, use the sequential firing mode instead of the bump firing mode for better control and safety.
9. **Disconnect Power Source**: When not in use, during maintenance, or when clearing jams, disconnect the nail gun from its power source.
10. **Avoid Awkward Positions**: Maintain a stable stance and avoid using the nail gun in awkward positions to prevent loss of control.
11. **Be Aware of Surroundings**: Know what is behind the material you are nailing to avoid hitting unintended targets.
12. **Training**: Ensure you are adequately trained in the use of the nail gun, especially if you are a beginner or using a new model.
13. **Regular Maintenance**: Keep the nail gun clean and well-maintained to ensure it operates safely and efficiently.
How do I maintain and clean a nail gun?
1. **Safety First**: Disconnect the nail gun from the power source or air supply. Remove any nails or fasteners.
2. **Regular Inspection**: Check for any visible damage or wear. Inspect the air hose and fittings for leaks if it's a pneumatic nail gun.
3. **Cleaning the Exterior**: Wipe the exterior with a clean, dry cloth to remove dust and debris. Use a damp cloth for stubborn dirt, but ensure the tool is dry before use.
4. **Clearing Jams**: Open the magazine and remove any jammed nails. Use pliers if necessary, but be gentle to avoid damaging the tool.
5. **Lubrication**: For pneumatic nail guns, apply a few drops of pneumatic tool oil into the air inlet before each use. This helps prevent rust and ensures smooth operation. Avoid over-lubricating.
6. **Cleaning the Magazine**: Remove any debris or dust from the magazine using a brush or compressed air. Ensure the magazine is free of obstructions.
7. **Checking the O-rings and Seals**: Inspect O-rings and seals for wear or damage. Replace them if necessary to prevent air leaks and ensure proper function.
8. **Tightening Screws and Bolts**: Check and tighten any loose screws or bolts. This helps maintain the structural integrity of the tool.
9. **Storing Properly**: Store the nail gun in a dry, cool place. Use a protective case if available to prevent dust accumulation and physical damage.
10. **Regular Maintenance Schedule**: Follow the manufacturer’s maintenance schedule for more detailed cleaning and part replacement instructions.
11. **Professional Servicing**: If the nail gun is not functioning properly despite regular maintenance, consider professional servicing.
What is the difference between a brad nailer and a finish nailer?
A brad nailer and a finish nailer are both types of nail guns used in woodworking, but they differ in size, application, and the type of nails they use.
A brad nailer uses smaller, thinner nails known as brads, typically 18-gauge. These nails are usually 5/8 to 2 inches long and have a smaller head, which makes them less visible and ideal for delicate trim work, such as attaching lightweight moldings or decorative pieces. The smaller size of the brads reduces the risk of splitting the wood, making the brad nailer suitable for thin or fragile materials. However, because brads have less holding power, they are not ideal for heavy-duty applications.
In contrast, a finish nailer uses larger, thicker nails, typically 15 or 16-gauge. These nails range from 1 to 2.5 inches in length and have a larger head, providing more holding power. Finish nailers are used for more substantial woodworking projects, such as installing baseboards, crown molding, or cabinetry. The larger nails can penetrate thicker materials and provide a stronger bond, but they may leave more visible holes that require filling.
In summary, the main differences between a brad nailer and a finish nailer are the size and type of nails they use, their holding power, and their suitability for different applications. A brad nailer is best for light, delicate work where minimal visibility and reduced risk of splitting are important, while a finish nailer is better suited for heavier, more structural tasks where stronger holding power is needed.
Can I use different brands of nails in my nail gun?
Yes, you can use different brands of nails in your nail gun, but there are important considerations to ensure compatibility and safety. First, check the specifications of your nail gun, which are usually found in the user manual or on the manufacturer's website. These specifications will detail the size, type, and gauge of nails that the tool can accommodate.
Nail guns are designed to work with specific types of nails, such as brad nails, finish nails, or framing nails, and using the wrong type can lead to jamming or damage. Additionally, the length and gauge of the nails must match the tool's capabilities.
While different brands may offer nails that fit these specifications, there can be slight variations in manufacturing tolerances. It's advisable to purchase nails from reputable brands known for quality and consistency. Some manufacturers also produce nails specifically designed for their tools, which can offer better performance and reduce the risk of malfunctions.
Before using a new brand, test a small batch to ensure they feed smoothly and fire correctly. Inspect the nails for any defects or irregularities that could cause issues. If you experience frequent jams or misfires, it may be necessary to switch to a different brand or consult the nail gun's manufacturer for recommendations.
In summary, while you can use different brands of nails, always prioritize compatibility with your nail gun's specifications and quality to ensure optimal performance and safety.
How do I troubleshoot common problems with nail guns?
1. **Check Power Source**: Ensure the nail gun is properly connected to its power source, whether it's pneumatic, electric, or battery-operated. For pneumatic guns, check the air compressor and hoses for leaks or blockages. For electric or battery models, ensure the battery is charged or the power cord is intact.
2. **Inspect Nails**: Verify that the correct type and size of nails are being used. Incorrect nails can cause jams or misfires. Ensure the nails are loaded properly in the magazine.
3. **Clear Jams**: If the nail gun is jammed, disconnect it from the power source. Open the magazine and remove any jammed nails. Use a tool to clear any obstructions in the firing mechanism.
4. **Check Air Pressure**: For pneumatic nail guns, ensure the air pressure is set to the manufacturer's recommended level. Low pressure can cause weak firing, while high pressure can damage the tool or work surface.
5. **Lubricate**: Regularly lubricate the moving parts of the nail gun, especially pneumatic models, to ensure smooth operation. Use the recommended oil and follow the manufacturer's guidelines.
6. **Examine Trigger and Safety Mechanisms**: Ensure the trigger and safety mechanisms are functioning correctly. A faulty trigger can cause continuous firing or failure to fire.
7. **Inspect Seals and O-rings**: Check for worn or damaged seals and O-rings, especially in pneumatic models, as these can cause air leaks and reduce performance.
8. **Test Firing**: After troubleshooting, test the nail gun on a scrap piece of material to ensure it is functioning correctly before returning to your project.
9. **Consult Manual**: Refer to the user manual for specific troubleshooting tips and maintenance instructions for your model.
10. **Professional Repair**: If problems persist, consider seeking professional repair services to avoid further damage.

