Call +(254) 703 030 000 / 751 483 999 / 721 704 777
.....Read More

Frequently Asked Questions
What are the differences between nail guns, staple guns, and riveting tools?
Nail guns, staple guns, and riveting tools are all fastening devices used in construction and manufacturing, but they differ in their applications and mechanisms.
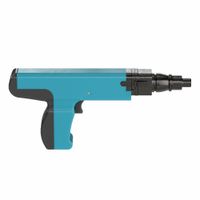
Nail guns are designed to drive nails into wood or other materials quickly and efficiently. They are commonly used in framing, roofing, and carpentry. Nail guns can be powered by compressed air (pneumatic), electricity, or combustion. They come in various types, such as framing nailers, finish nailers, and brad nailers, each suited for specific tasks and nail sizes.
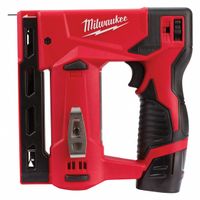
Staple guns, on the other hand, are used to drive heavy metal staples into materials. They are often used for upholstery, insulation, and carpeting. Staple guns can be manual, electric, or pneumatic. The choice of staple gun depends on the material being fastened and the required holding strength. Manual staple guns are suitable for light tasks, while electric and pneumatic versions are used for more demanding applications.
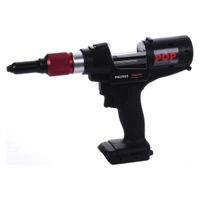
Riveting tools are used to join materials by inserting a metal pin, known as a rivet, through pre-drilled holes and deforming the pin to hold the materials together. Riveting is commonly used in metalworking, automotive, and aerospace industries. Riveting tools can be manual, pneumatic, or hydraulic. They are ideal for applications where welding is not feasible or where a permanent, strong joint is required.
In summary, nail guns are for driving nails, staple guns for inserting staples, and riveting tools for fastening with rivets. Each tool is specialized for different materials and applications, offering unique advantages in speed, strength, and efficiency.
How do I choose the right nail gun for my project?
To choose the right nail gun for your project, consider the following factors:
1. **Type of Project**: Identify the nature of your project. For framing, use a framing nailer; for finishing work, a finish nailer; for delicate trim, a brad nailer; and for upholstery, a staple gun.
2. **Power Source**: Decide between pneumatic (air-powered), electric (corded or cordless), or gas-powered nail guns. Pneumatic nailers are powerful and ideal for heavy-duty tasks but require an air compressor. Cordless electric nailers offer mobility and are suitable for lighter tasks. Gas-powered nailers provide portability and power but require fuel cells.
3. **Nail Size and Gauge**: Match the nail size and gauge to your project needs. Larger nails are used for structural work, while smaller nails are for finishing and trim.
4. **Frequency of Use**: For frequent use, invest in a durable, high-quality nail gun. For occasional use, a less expensive model may suffice.
5. **Weight and Ergonomics**: Choose a nail gun that is comfortable to hold and operate, especially for extended periods. Lightweight models reduce fatigue.
6. **Depth Adjustment**: Look for a nail gun with adjustable depth settings to control how deep the nails are driven.
7. **Safety Features**: Ensure the nail gun has safety features like a trigger lock and anti-dry fire mechanism to prevent accidents.
8. **Budget**: Consider your budget, balancing cost with the features and durability you need.
9. **Brand and Reviews**: Research brands and read reviews to ensure reliability and customer satisfaction.
10. **Warranty and Support**: Check for a good warranty and customer support for peace of mind.
By evaluating these factors, you can select a nail gun that best suits your project's requirements.
What safety precautions should I take when using a staple gun?
When using a staple gun, prioritize safety by following these precautions:
1. **Read the Manual**: Familiarize yourself with the specific model's instructions and safety guidelines.
2. **Wear Protective Gear**: Use safety goggles to protect your eyes from flying staples and gloves to safeguard your hands.
3. **Inspect the Tool**: Check for any damage or defects before use. Ensure the staple gun is clean and in good working condition.
4. **Use the Right Staples**: Ensure you are using the correct size and type of staples for your staple gun to prevent jams and misfires.
5. **Secure the Work Area**: Keep your workspace clean and free of clutter. Ensure the material you are stapling is stable and secure.
6. **Keep Fingers Clear**: Always keep your fingers and other body parts away from the stapling area to avoid accidental injury.
7. **Proper Positioning**: Hold the staple gun firmly and ensure it is perpendicular to the surface to ensure accurate stapling.
8. **Avoid Distractions**: Stay focused on the task at hand and avoid using the staple gun if you are tired or distracted.
9. **Unplug When Not in Use**: If using an electric staple gun, unplug it when not in use or when reloading staples.
10. **Store Safely**: Store the staple gun in a safe place, out of reach of children and unauthorized users.
11. **Dispose of Staples Properly**: Collect and dispose of used staples safely to prevent injury.
12. **Emergency Preparedness**: Know basic first aid and have a first aid kit nearby in case of an accident.
By adhering to these safety measures, you can minimize the risk of injury and ensure a safe working environment when using a staple gun.
How do I maintain and clean my riveting tool?
To maintain and clean your riveting tool, follow these steps:
1. **Regular Inspection**: Before each use, inspect the tool for any visible damage or wear. Check for loose parts, cracks, or any signs of malfunction.
2. **Cleaning**: After each use, wipe down the tool with a clean, dry cloth to remove dust and debris. For more thorough cleaning, use a soft brush to remove dirt from crevices. Avoid using water or harsh chemicals that could damage the tool.
3. **Lubrication**: Regularly lubricate moving parts to ensure smooth operation. Use a light machine oil or a lubricant recommended by the manufacturer. Apply a few drops to the pivot points and any other moving parts.
4. **Check the Jaws**: The jaws of the riveting tool can become worn or clogged with metal shavings. Remove and clean them periodically. If they are worn out, replace them according to the manufacturer's instructions.
5. **Storage**: Store the tool in a dry, clean place to prevent rust and corrosion. Use a protective case or cover to shield it from dust and moisture.
6. **Calibration**: If your riveting tool is adjustable, ensure it is calibrated correctly for the size of rivets you are using. Follow the manufacturer's guidelines for adjustments.
7. **Replacement Parts**: Keep spare parts like jaws and springs on hand. Replace any worn or damaged parts immediately to maintain the tool's efficiency.
8. **Professional Servicing**: For pneumatic or hydraulic riveting tools, consider professional servicing periodically to ensure all components are functioning correctly.
By following these steps, you can extend the life of your riveting tool and ensure it operates efficiently and safely.
Can I use a nail gun for metal work?
Yes, you can use a nail gun for metal work, but it depends on the type of metal and the specific nail gun. Pneumatic or cordless nail guns designed for metal, often referred to as "metal connector nailers" or "joist hanger nailers," are suitable for fastening metal connectors to wood. These nail guns use specialized nails, such as galvanized or stainless steel, to prevent corrosion and ensure a strong hold.
For light-gauge metal, such as sheet metal or metal studs, a nail gun with the appropriate power and nails can be effective. However, for thicker or harder metals, a nail gun may not be suitable, and other tools like a drill with metal screws or a rivet gun might be necessary.
When using a nail gun for metal work, ensure that the tool is compatible with the material and that you are using the correct type of nails. Safety precautions are crucial, as metal can be more challenging to penetrate than wood, increasing the risk of ricochet or tool malfunction. Always wear appropriate safety gear, such as goggles and gloves, and follow the manufacturer's guidelines for the nail gun and fasteners.
In summary, while a nail gun can be used for certain metal work applications, it is essential to choose the right tool and fasteners for the job and to prioritize safety.
What types of staples are compatible with my staple gun?
To determine the types of staples compatible with your staple gun, you need to consider several factors:
1. **Staple Gun Model**: Check the model number of your staple gun. The manufacturer's manual or website will often list compatible staple sizes and types.
2. **Staple Size**: Staple guns typically use staples of specific lengths and widths. Common sizes include 1/4 inch, 5/16 inch, 3/8 inch, 1/2 inch, and 9/16 inch. The size you need depends on the thickness of the material you are stapling.
3. **Staple Type**: There are different types of staples, such as standard, heavy-duty, and fine wire. Standard staples are used for general purposes, heavy-duty staples for tougher materials, and fine wire staples for delicate materials.
4. **Crown Width**: The crown width of the staple (the top part that remains visible) is also important. Narrow crown staples are used for thin materials, while wide crown staples are suitable for thicker materials.
5. **Material Compatibility**: Consider the material you are working with. For example, upholstery projects may require different staples than those used for wood or paper.
6. **Brand Recommendations**: Some staple guns work best with staples from the same brand. Using recommended staples can ensure optimal performance and prevent jamming.
7. **Universal Compatibility**: Some staple guns are designed to be compatible with a range of staple brands and sizes, offering more flexibility.
8. **Consultation**: If unsure, consult the retailer or manufacturer for advice on the best staples for your specific staple gun model.
By considering these factors, you can select the appropriate staples for your staple gun, ensuring efficient and effective use.
How do I properly set a rivet with a riveting tool?
To properly set a rivet with a riveting tool, follow these steps:
1. **Select the Right Rivet and Tool**: Choose a rivet that matches the materials being joined in terms of length and diameter. Ensure your riveting tool (manual, pneumatic, or electric) is compatible with the rivet size.
2. **Prepare the Materials**: Align the materials to be joined and clamp them securely to prevent movement. Drill a hole through the materials that matches the diameter of the rivet.
3. **Insert the Rivet**: Place the rivet through the hole, ensuring the head is on the side that will be visible. The tail should protrude through the other side.
4. **Set Up the Riveting Tool**: Attach the correct size nosepiece to the riveting tool. Insert the rivet’s mandrel (the pin) into the tool’s nosepiece.
5. **Position the Tool**: Hold the tool perpendicular to the surface of the material. Ensure the tool’s nosepiece is flush against the rivet head.
6. **Activate the Tool**: Squeeze the handles of a manual rivet tool or activate the trigger on a pneumatic or electric tool. This action pulls the mandrel, expanding the rivet body to form a secure joint.
7. **Complete the Riveting**: Continue applying pressure until the mandrel snaps off. This indicates the rivet is fully set. The mandrel will break at a pre-determined point, leaving the rivet in place.
8. **Inspect the Rivet**: Check that the rivet is flush with the material and that the joint is tight. The backside should show a properly formed bulge, indicating a secure hold.
9. **Clean Up**: Remove any debris and ensure the work area is tidy. Dispose of the broken mandrel pieces safely.
By following these steps, you can ensure a strong and reliable rivet joint.