Call +(254) 703 030 000 / 751 483 999 / 721 704 777
.....Read More
Frequently Asked Questions
What is the difference between a drill and a driver?
A drill and a driver are both essential tools in construction and DIY projects, but they serve different purposes and have distinct features.
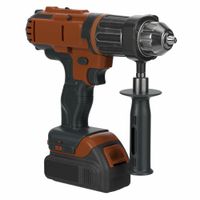
A drill is primarily designed for making holes in various materials such as wood, metal, and plastic. It uses a rotating drill bit to bore holes and is typically equipped with a chuck that can hold different sizes and types of bits. Drills often have adjustable speed settings and can be corded or cordless. They are versatile and can also be used for tasks like mixing paint or driving screws, although they are not optimized for the latter.
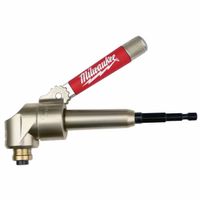
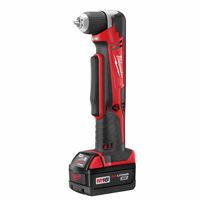
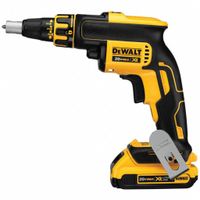
A driver, specifically an impact driver, is designed for driving screws and bolts with high torque. It uses a hammering action combined with rotation to drive fasteners into tough materials, making it more efficient for this task than a standard drill. Impact drivers are generally more compact and lightweight, making them easier to handle in tight spaces. They typically have a hexagonal socket for quick bit changes and are not suitable for drilling holes, as they lack the precision and control of a drill.
In summary, the main difference lies in their primary functions: drills are optimized for creating holes, while drivers are specialized for driving screws and bolts. Each tool has its own advantages, and choosing between them depends on the specific requirements of the task at hand.
How do I choose the right drill bit for my project?
To choose the right drill bit for your project, consider the following factors:
1. **Material**: Match the drill bit material to the material you're drilling. High-speed steel (HSS) is versatile for wood, plastic, and soft metals. Cobalt bits are ideal for hard metals like stainless steel. Carbide-tipped bits are best for masonry and concrete.
2. **Bit Type**: Select the bit type based on the task:
- **Twist Bits**: General-purpose, suitable for wood, metal, and plastic.
- **Brad Point Bits**: Ideal for wood, providing clean holes.
- **Masonry Bits**: Designed for concrete, brick, and stone.
- **Spade Bits**: Best for large holes in wood.
- **Forstner Bits**: Create flat-bottomed holes in wood.
- **Auger Bits**: Efficient for deep holes in wood.
- **Hole Saws**: Cut large diameter holes in wood, metal, or plastic.
3. **Size**: Choose the correct diameter and length. The diameter should match the size of the hole you need, while the length should accommodate the depth of the material.
4. **Shank Type**: Ensure compatibility with your drill. Round shanks fit most drills, while hex shanks provide a better grip and are often used in quick-change systems.
5. **Coating**: Consider coatings for enhanced performance. Titanium-coated bits last longer and reduce friction. Black oxide offers corrosion resistance.
6. **Project Requirements**: Assess the precision and finish needed. For delicate work, use bits that provide clean cuts and minimal tear-out.
7. **Budget and Frequency of Use**: For occasional use, standard bits may suffice. For frequent or professional use, invest in higher-quality bits for durability and performance.
By evaluating these factors, you can select the most suitable drill bit for your specific project needs.
Can I use a drill to drive screws?
Yes, you can use a drill to drive screws. Drills are versatile tools that can be used for both drilling holes and driving screws. To effectively use a drill for driving screws, follow these steps:
1. **Select the Right Drill Bit**: Use a screwdriver bit that matches the type and size of the screw head. Common types include Phillips, flathead, and Torx.
2. **Adjust the Torque Setting**: If your drill has a clutch, adjust the torque setting to prevent overdriving or stripping the screw. Start with a lower setting and increase as needed.
3. **Use the Correct Speed**: Set the drill to a lower speed setting for better control when driving screws. High speeds can cause the screw to strip or the bit to slip.
4. **Pre-drill Pilot Holes**: For harder materials or larger screws, pre-drill a pilot hole to prevent splitting the material and to make driving the screw easier.
5. **Secure the Material**: Ensure the material you are working with is securely clamped or held in place to prevent movement while driving the screw.
6. **Align the Bit Properly**: Hold the drill perpendicular to the surface to ensure the screw goes in straight. Misalignment can cause the screw to go in at an angle or strip the head.
7. **Apply Steady Pressure**: Apply consistent pressure while driving the screw, allowing the drill to do the work. Avoid pushing too hard, which can strip the screw or damage the material.
By following these steps, you can effectively use a drill to drive screws, making it a convenient tool for various DIY and construction projects.
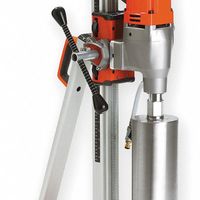
What is the purpose of a hammer drill?
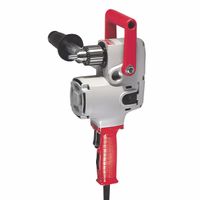
A hammer drill, also known as a percussion drill or impact drill, is a power tool designed primarily for drilling into hard materials such as concrete, brick, stone, and masonry. Its primary purpose is to combine the rotary drilling action of a standard drill with a hammering action, which allows it to break up the material as it drills. This dual-action mechanism makes it significantly more effective than a regular drill when working with tough surfaces.
The hammering action is achieved through a mechanism that rapidly moves the drill bit back and forth while it spins. This motion mimics the action of a hammer striking the material, which helps to pulverize the surface and create a hole more efficiently. The hammer drill can be used in various settings, from construction sites to home improvement projects, where drilling into hard surfaces is required.
Hammer drills often come with a switch to turn off the hammering action, allowing them to function as a regular drill for softer materials like wood or metal. This versatility makes them a valuable tool for both professional contractors and DIY enthusiasts.
In addition to drilling, hammer drills can also be used for tasks such as chiseling and removing tiles when equipped with the appropriate attachments. They are available in both corded and cordless models, providing flexibility depending on the user's needs and the work environment.
Overall, the purpose of a hammer drill is to provide an efficient and effective means of drilling into hard materials, making it an essential tool for construction, renovation, and various other applications where standard drills would struggle.
How do I maintain and care for my drill?
To maintain and care for your drill, follow these steps:
1. **Regular Cleaning**: After each use, wipe down the drill with a clean, dry cloth to remove dust and debris. Use compressed air to blow out dust from vents and crevices.
2. **Inspect the Cord/Battery**: For corded drills, check the power cord for any signs of wear or damage. For cordless drills, ensure the battery is charged and stored properly. Avoid overcharging to extend battery life.
3. **Lubrication**: Periodically lubricate the chuck and moving parts with a light machine oil to ensure smooth operation. Avoid over-lubricating, as excess oil can attract dust.
4. **Check the Chuck**: Ensure the chuck is functioning correctly by opening and closing it to check for smoothness. Tighten it properly to prevent bits from slipping.
5. **Bit Maintenance**: Keep drill bits sharp and clean. Dull bits can strain the motor. Store them in a dry place to prevent rust.
6. **Storage**: Store the drill in a cool, dry place. Use a case to protect it from dust and moisture. Avoid leaving it in extreme temperatures.
7. **Regular Inspection**: Periodically check for loose screws or parts. Tighten any that are loose to prevent malfunction.
8. **Use Properly**: Avoid overloading the drill. Use the correct bit for the material and let the drill do the work without applying excessive force.
9. **Follow Manufacturer’s Instructions**: Refer to the user manual for specific maintenance guidelines and safety instructions.
10. **Professional Servicing**: If the drill shows signs of malfunction or unusual noise, have it serviced by a professional to prevent further damage.
What safety precautions should I take when using a drill?
When using a drill, prioritize safety by following these precautions:
1. **Personal Protective Equipment (PPE):** Wear safety goggles to protect your eyes from flying debris. Use ear protection if the drill is loud, and wear a dust mask if drilling materials like wood or drywall. Gloves can protect your hands, but ensure they are tight-fitting to avoid entanglement.
2. **Inspect the Drill:** Before use, check the drill for any damage or defects. Ensure the power cord is intact and the chuck is secure. Verify that the drill bit is appropriate for the material and is tightly fastened.
3. **Work Area Safety:** Keep your work area clean and well-lit. Remove any clutter that could cause tripping or distractions. Ensure the workpiece is securely clamped or held in place to prevent movement.
4. **Proper Handling:** Use the drill with both hands for better control. Maintain a firm grip and be aware of the drill's kickback. Stand in a stable position to avoid losing balance.
5. **Correct Usage:** Select the right drill bit and speed for the material. Start drilling at a low speed to create a guide hole, then increase speed as needed. Avoid forcing the drill; let the bit do the work.
6. **Electrical Safety:** Ensure the drill is unplugged when changing bits or making adjustments. Use a Ground Fault Circuit Interrupter (GFCI) outlet to prevent electrical shocks.
7. **Avoid Loose Clothing and Jewelry:** These can get caught in the drill, leading to injury. Tie back long hair and remove any dangling accessories.
8. **Awareness of Surroundings:** Be mindful of others in the vicinity. Keep bystanders, especially children, at a safe distance.
9. **Post-Use Care:** After use, unplug the drill and store it safely. Clean the drill and bits to maintain their condition.
By adhering to these precautions, you can minimize risks and ensure a safer drilling experience.
How do I change the drill bit on my drill?
To change the drill bit on your drill, follow these steps:
1. **Safety First**: Ensure the drill is turned off and unplugged if it's corded. If it's a cordless drill, remove the battery to prevent accidental activation.
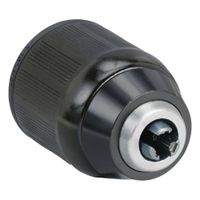
2. **Identify the Chuck Type**: Most drills have either a keyless chuck or a keyed chuck. A keyless chuck can be adjusted by hand, while a keyed chuck requires a chuck key.
3. **Loosen the Chuck**:
- **Keyless Chuck**: Hold the drill with one hand and rotate the chuck counterclockwise with the other hand. This will open the jaws of the chuck.
- **Keyed Chuck**: Insert the chuck key into the hole on the side of the chuck. Turn the key counterclockwise to loosen the chuck and open the jaws.
4. **Remove the Old Bit**: Once the chuck is loosened, remove the old drill bit by pulling it out.
5. **Insert the New Bit**: Insert the new drill bit into the chuck. Ensure the bit is centered and straight within the jaws.
6. **Tighten the Chuck**:
- **Keyless Chuck**: Hold the drill and rotate the chuck clockwise to tighten it around the bit. Ensure it is securely fastened.
- **Keyed Chuck**: Use the chuck key to turn the chuck clockwise, tightening it around the bit. Make sure the bit is firmly secured.
7. **Test the Bit**: Reattach the battery or plug in the drill. Briefly run the drill to ensure the bit is properly secured and spins correctly.
8. **Final Check**: Ensure the bit is tightly secured and aligned properly before starting your drilling task.