Call +(254) 703 030 000 / 751 483 999 / 721 704 777
.....Read More


Frequently Asked Questions
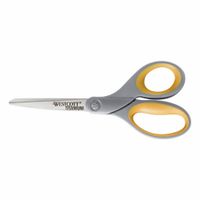
What are the best scissors for cutting fabric?
The best scissors for cutting fabric are those specifically designed for precision, comfort, and durability. Here are some top choices:
1. **Gingher 8-Inch Knife Edge Dressmaker's Shears**: Renowned for their sharpness and precision, these shears feature a bent handle to allow fabric to lie flat while cutting. The knife-edge blades ensure clean cuts through multiple layers of fabric.
2. **Kai 7250 10-Inch Professional Shears**: Made from high-carbon stainless steel, these shears are known for their superior sharpness and smooth cutting action. The ergonomic handle design provides comfort during extended use.
3. **Fiskars 8-Inch Razor-Edge Softgrip Scissors**: These scissors offer razor-edge blades for cutting through heavy fabrics with ease. The Softgrip handle reduces hand fatigue, making them ideal for long sewing sessions.
4. **Mundial Classic Forged Dressmaker Shears**: These shears are forged from high-quality steel, providing long-lasting sharpness and durability. The bent handle design ensures accuracy and ease of use.
5. **Singer ProSeries 8.5-Inch Scissors**: Designed for both right and left-handed users, these scissors feature tempered stainless steel blades for precise cuts. The rubberized comfort grip handle enhances control and reduces hand strain.
6. **LDH Scissors Midnight Edition Fabric Shears**: These shears are crafted from industrial-grade carbon steel, offering exceptional sharpness and longevity. The midnight black finish adds a stylish touch.
When selecting fabric scissors, consider the type of fabric you frequently work with, the weight and balance of the scissors, and the comfort of the handle. Regular maintenance, such as cleaning and sharpening, will also ensure optimal performance and longevity.
How do you sharpen scissors at home?
To sharpen scissors at home, you can use several methods:
1. **Sandpaper Method**:
- Obtain a piece of medium-grit sandpaper (150-200 grit).
- Fold the sandpaper in half with the abrasive sides facing out.
- Cut through the sandpaper several times, ensuring the entire blade length is used.
- Wipe the blades with a damp cloth to remove any residue.
2. **Aluminum Foil Method**:
- Take a piece of aluminum foil and fold it multiple times to create a thick strip.
- Cut through the foil with the scissors, making sure to use the full length of the blades.
- Repeat the process 10-15 times.
- Clean the blades with a damp cloth.
3. **Glass Jar Method**:
- Use the neck of a glass jar or bottle.
- Open the scissors and place the blades around the neck.
- Apply gentle pressure and slide the blades along the neck as if cutting it.
- Repeat several times for each blade.
4. **Sharpening Stone Method**:
- Wet the sharpening stone with water or oil.
- Open the scissors and place one blade flat against the stone.
- Maintain the blade's angle and move it across the stone in a sweeping motion.
- Repeat for the other blade.
- Clean the blades with a damp cloth.
5. **Screwdriver Method**:
- Use a screwdriver with a round shaft.
- Open the scissors and place the shaft between the blades.
- Close the scissors, applying pressure as if cutting the screwdriver.
- Repeat several times.
After sharpening, test the scissors on a piece of paper to ensure they cut smoothly. Adjust the tension screw if necessary for optimal performance.
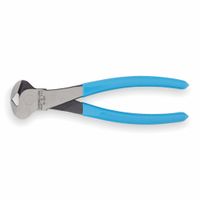
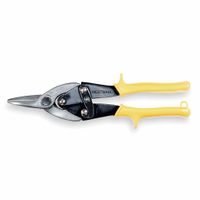
What is the difference between snips and shears?
Snips and shears are both cutting tools, but they differ in design, purpose, and application.
Snips, often referred to as tin snips, are hand tools used for cutting sheet metal and other tough materials. They resemble scissors but are specifically designed to handle the rigors of cutting metal. Snips come in various types, including straight-cut, left-cut, and right-cut, each designed to make different types of cuts. They are typically smaller and more precise, making them ideal for detailed work and cutting curves or intricate shapes in metal.
Shears, on the other hand, are larger cutting tools that can be used for a variety of materials, including fabric, paper, and metal. They are designed for making long, straight cuts and are often used in industrial settings. Shears can be manual or powered, with some models featuring long handles for increased leverage. This makes them suitable for cutting thicker or more rigid materials. In the context of metalworking, shears are often used for cutting large sheets of metal into smaller, more manageable pieces.
In summary, the primary difference lies in their size, design, and intended use. Snips are smaller, more precise, and suited for detailed work, while shears are larger, more robust, and designed for making long, straight cuts in various materials.
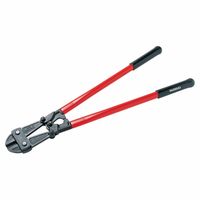
How do you use a bolt cutter properly?
To use a bolt cutter properly, follow these steps:
1. **Select the Right Size**: Choose a bolt cutter with appropriate jaw size and handle length for the material you intend to cut. Longer handles provide more leverage for thicker materials.
2. **Inspect the Tool**: Ensure the bolt cutter is in good condition. Check for sharp, undamaged blades and ensure the pivot points are well-lubricated for smooth operation.
3. **Wear Safety Gear**: Put on safety goggles and gloves to protect against flying debris and sharp edges.
4. **Position the Material**: Place the material to be cut between the jaws of the bolt cutter. Position it as close to the pivot point as possible for maximum cutting force.
5. **Align the Blades**: Ensure the blades are aligned correctly with the material. Misalignment can cause inefficient cutting and damage the tool.
6. **Apply Force Evenly**: Stand in a stable position. Grip the handles firmly and apply even pressure. Use your body weight to assist in closing the handles if necessary.
7. **Cut with a Steady Motion**: Squeeze the handles together in a smooth, controlled motion. Avoid jerky movements to prevent slipping or incomplete cuts.
8. **Check the Cut**: Once the material is cut, inspect the edges. If the cut is incomplete, reposition the material and repeat the process.
9. **Store Properly**: After use, clean the bolt cutter and store it in a dry place to prevent rust and maintain its condition.
10. **Regular Maintenance**: Sharpen the blades as needed and lubricate the pivot points regularly to ensure optimal performance.
By following these steps, you can use a bolt cutter effectively and safely.
What is the best tool for cutting thick wire?
The best tool for cutting thick wire is a pair of heavy-duty bolt cutters. Bolt cutters are specifically designed to handle tough materials, including thick wires, chains, and bolts. They come with long handles that provide the necessary leverage to cut through dense materials with minimal effort. The cutting jaws are made from hardened steel, ensuring durability and the ability to maintain sharpness over time.
For cutting particularly thick or hard wire, such as steel wire or rebar, a hydraulic bolt cutter may be more suitable. Hydraulic bolt cutters use a hydraulic mechanism to amplify the cutting force, making it easier to cut through very thick or tough materials without requiring excessive physical strength.
When selecting bolt cutters, consider the following factors:
1. **Jaw Size and Capacity**: Ensure the bolt cutter's jaw size is appropriate for the thickness of the wire you need to cut. The capacity should match or exceed the wire's diameter.
2. **Handle Length**: Longer handles provide more leverage, making it easier to cut through thick wire. However, they may also be heavier and less portable.
3. **Material and Build Quality**: Opt for bolt cutters made from high-quality materials, such as forged steel, to ensure durability and longevity.
4. **Adjustability**: Some bolt cutters come with adjustable jaws, allowing for precise cutting and the ability to handle different wire sizes.
5. **Ergonomics**: Look for bolt cutters with comfortable grips to reduce hand fatigue during use.
In summary, for cutting thick wire, heavy-duty bolt cutters or hydraulic bolt cutters are the most effective tools, offering the necessary strength and precision to handle tough materials.
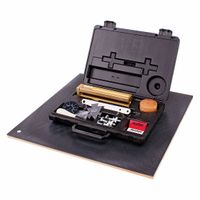
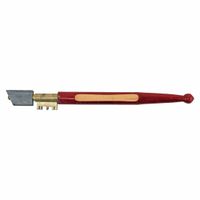
How do you cut glass without breaking it?
To cut glass without breaking it, follow these steps:
1. **Gather Tools**: You'll need a glass cutter, cutting oil, a straightedge or ruler, safety goggles, gloves, and a flat, stable work surface.
2. **Prepare the Glass**: Clean the glass thoroughly to remove any dust or debris. This ensures a smooth cut.
3. **Mark the Cut**: Use a non-permanent marker to draw a line where you want to cut. Place the straightedge along this line to guide your cutter.
4. **Apply Cutting Oil**: Dab a small amount of cutting oil along the line. This reduces friction and helps the cutter glide smoothly.
5. **Score the Glass**: Hold the glass cutter like a pencil and press it firmly against the glass at the start of your line. Roll the cutter along the straightedge in one continuous motion, applying even pressure. You should hear a consistent scratching sound. Avoid going over the same line twice.
6. **Break the Glass**: Position the scored line over the edge of your work surface. Apply gentle, even pressure on both sides of the line to snap the glass along the score. Alternatively, use running pliers to apply pressure directly on the score line.
7. **Smooth the Edges**: Use a glass file or sandpaper to smooth any sharp edges, preventing injury.
8. **Safety Precautions**: Always wear safety goggles and gloves to protect against sharp edges and glass shards.
By following these steps carefully, you can cut glass cleanly without breaking it.
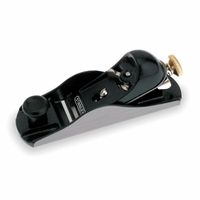
What are the different types of hand planes and their uses?
Hand planes are essential tools in woodworking, used for shaping, smoothing, and finishing wood surfaces. Here are the different types and their uses:
1. **Block Plane**: Small and versatile, ideal for trimming, fitting, and smoothing end grain. Its compact size makes it perfect for one-handed use.
2. **Bench Plane**: Includes several subtypes:
- **Jack Plane**: A medium-sized plane used for general-purpose planing, including flattening and smoothing rough lumber.
- **Jointer Plane**: Long and straight, used for flattening and straightening edges and surfaces, crucial for preparing boards for edge-joining.
- **Smoothing Plane**: Shorter than a jack plane, used for final smoothing and finishing of wood surfaces, leaving a fine finish.
3. **Rabbet Plane**: Designed for cutting rabbets or recesses along the edge of a board. It has a blade that extends to the full width of the tool.
4. **Shoulder Plane**: Used for trimming and fitting joints, especially tenons and shoulders, with a blade that extends the full width of the tool.
5. **Router Plane**: Used for cleaning out grooves and dados, ensuring a consistent depth across the surface.
6. **Plow Plane**: Designed for cutting grooves and slots, often used in making joints like tongue and groove.
7. **Spokeshave**: Though not a traditional plane, it's used for shaping and smoothing curved surfaces.
8. **Scrub Plane**: Has a narrow blade with a curved edge, used for rapid removal of material, especially in rough shaping.
9. **Compass Plane**: Features an adjustable sole for planing curved surfaces, both concave and convex.
Each type of hand plane serves a specific purpose, allowing woodworkers to achieve precision and quality in their projects.