Call +(254) 703 030 000 / 751 483 999 / 721 704 777
.....Read More


Frequently Asked Questions
What is the difference between a sledgehammer and a regular hammer?
A sledgehammer and a regular hammer differ primarily in size, weight, design, and intended use.
A sledgehammer is a large, heavy tool with a long handle, typically made of wood, fiberglass, or metal. The head of a sledgehammer is massive, often weighing between 4 to 20 pounds or more, and is designed for delivering powerful blows. It is used for tasks that require significant force, such as breaking concrete, driving stakes, or demolition work. The long handle allows for a two-handed grip, providing leverage and control to maximize impact.
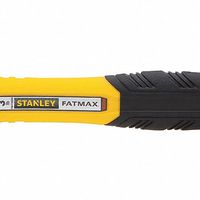
In contrast, a regular hammer, often referred to as a claw hammer, is smaller and lighter, with a head usually weighing between 8 to 16 ounces. It features a shorter handle, typically made of wood, fiberglass, or metal, designed for one-handed use. The head of a regular hammer has a flat striking surface on one side and a claw on the other, used for pulling nails. Regular hammers are versatile tools suitable for driving nails, fitting parts, and light demolition tasks.
The key differences lie in their applications: sledgehammers are used for heavy-duty tasks requiring substantial force, while regular hammers are used for more precise, lighter tasks. The size and weight of a sledgehammer make it less suitable for tasks requiring precision, whereas the regular hammer's design allows for more control and accuracy.
How do you choose the right hammer for a specific task?
To choose the right hammer for a specific task, consider the following factors:
1. **Task Type**: Identify the task. For driving nails, a claw hammer is ideal. For demolition, a sledgehammer is better. For delicate work, like upholstery, use a tack hammer.
2. **Hammer Weight**: Heavier hammers (16-20 oz) provide more force, suitable for framing or demolition. Lighter hammers (8-12 oz) are better for precision tasks.
3. **Handle Material**: Wood handles absorb shock but can break. Steel handles are durable but transmit more vibration. Fiberglass handles offer a balance of durability and shock absorption.
4. **Head Material**: Steel heads are common for general use. Brass or rubber mallets are used for non-marring applications.
5. **Head Design**: A smooth face is ideal for finish work to avoid surface marks. A milled face provides better grip on nails, useful for framing.
6. **Ergonomics**: Choose a hammer with a comfortable grip to reduce fatigue. Consider handle length; longer handles provide more leverage.
7. **Special Features**: Some hammers have magnetic nail holders or anti-vibration technology for added convenience and comfort.
8. **Safety**: Ensure the hammer is well-balanced and the head is securely attached to prevent accidents.
By evaluating these factors, you can select a hammer that enhances efficiency and safety for your specific task.
What are the safety precautions when using a hammer?
When using a hammer, several safety precautions should be observed to prevent accidents and injuries:
1. **Wear Protective Gear**: Always wear safety goggles to protect your eyes from flying debris. Use gloves to protect your hands from blisters and accidental hits.
2. **Inspect the Hammer**: Before use, check the hammer for any damage. Ensure the handle is not cracked or splintered and that the head is securely attached.
3. **Choose the Right Hammer**: Use a hammer that is appropriate for the task. Different hammers are designed for specific purposes, such as claw hammers for nails and sledgehammers for demolition.
4. **Secure the Workpiece**: Ensure the object you are hammering is stable and secure. Use clamps or a vise to hold it in place if necessary.
5. **Use Proper Technique**: Grip the hammer near the end of the handle for better control and leverage. Swing with your elbow and wrist, not just your arm, to maintain accuracy and power.
6. **Clear the Area**: Ensure the work area is free of clutter and that no one is standing too close. This minimizes the risk of accidental injury to yourself or others.
7. **Avoid Distractions**: Focus on the task at hand. Distractions can lead to mis-hits and accidents.
8. **Store Properly**: When not in use, store the hammer in a safe place, such as a tool belt or toolbox, to prevent it from falling or causing injury.
9. **Be Mindful of Surroundings**: Be aware of your surroundings, including overhead objects and other people, to avoid accidental contact.
10. **Use Adequate Lighting**: Ensure the work area is well-lit to see clearly and avoid mistakes.
By following these precautions, you can significantly reduce the risk of injury when using a hammer.
How do you properly maintain and store a hammer?
To properly maintain and store a hammer, follow these steps:
1. **Cleaning**: After each use, wipe the hammer with a clean cloth to remove dirt, dust, and debris. For stubborn grime, use a mild soap solution and a brush, then dry thoroughly to prevent rust.
2. **Rust Prevention**: Regularly inspect the hammer for signs of rust. If rust appears, gently remove it with fine-grit sandpaper or steel wool. Apply a light coat of machine oil or WD-40 to the metal parts to prevent future rusting.
3. **Handle Care**: For wooden handles, periodically apply linseed oil to keep the wood conditioned and prevent drying or cracking. For fiberglass or metal handles, inspect for cracks or damage and clean with a damp cloth.
4. **Inspection**: Regularly check the hammer for any signs of wear or damage, such as a loose head or splintered handle. Tighten any loose parts and replace damaged components to ensure safety and effectiveness.
5. **Storage**: Store the hammer in a dry, cool place to prevent moisture-related damage. Use a tool rack or pegboard to hang the hammer, keeping it off the ground and away from other tools to avoid accidental damage.
6. **Safety**: Always store the hammer with the head facing down or in a tool holder to prevent accidental injury. Ensure the storage area is organized to avoid clutter and potential hazards.
By following these maintenance and storage practices, you can extend the life of your hammer and ensure it remains a reliable tool for your projects.
What are the different types of hammers and their uses?
1. **Claw Hammer**: Used for driving nails into wood and removing them with the curved claw.
2. **Ball Peen Hammer**: Ideal for metalworking tasks like shaping metal and closing rivets.
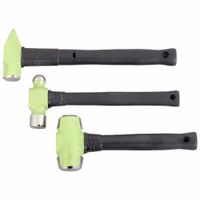
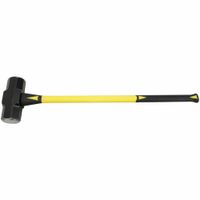
3. **Sledgehammer**: Used for heavy-duty tasks such as breaking concrete or driving stakes.
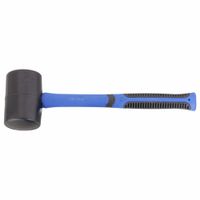
4. **Mallet**: Made of wood or rubber, used for tasks requiring a softer impact to avoid damage.
5. **Dead Blow Hammer**: Filled with sand or shot to minimize rebound, used in precision work.
6. **Tack Hammer**: Lightweight, used for driving small nails or tacks in upholstery work.
7. **Framing Hammer**: Heavier than a claw hammer, used in framing carpentry for driving large nails.
8. **Club Hammer**: Short-handled sledgehammer used for light demolition work.
9. **Cross Peen Hammer**: Used in metalworking for shaping and riveting.
10. **Brick Hammer**: Features a chisel-like blade for cutting bricks and a flat face for striking.
11. **Roofing Hammer**: Combines a hatchet and hammer, used for roofing tasks like cutting shingles.
12. **Soft-Faced Hammer**: Has replaceable soft faces, used to avoid marring surfaces.
13. **Joiner’s Mallet**: Used in woodworking to drive chisels without damaging them.
14. **Rock Hammer**: Used by geologists to break rocks and collect samples.
15. **Planishing Hammer**: Used in metalworking to smooth and finish surfaces.
16. **Power Hammer**: Mechanized hammer used in blacksmithing for shaping metal.
17. **Welder’s Hammer**: Used to remove slag from welds.
18. **Chasing Hammer**: Used in jewelry making for shaping and detailing metal.
19. **Riveting Hammer**: Used for driving rivets in metalworking.
20. **Scaling Hammer**: Used to remove scale, rust, and old paint from surfaces.
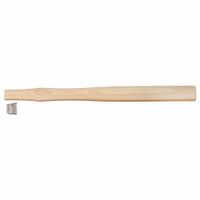
How do you replace a hammer handle?
To replace a hammer handle, first gather the necessary tools and materials: a new handle, a hammer, a punch or drift, a saw, sandpaper, wood glue, and wedges (usually included with the handle).
1. **Remove the Old Handle**: Secure the hammer head in a vise. Use a saw to cut the old handle close to the hammer head. With a punch or drift, drive out the remaining wood and any metal wedges from the eye of the hammer head.
2. **Prepare the New Handle**: Ensure the new handle fits the hammer head. The handle should be slightly larger than the eye of the hammer head. Sand the handle if necessary for a snug fit.
3. **Attach the Hammer Head**: Insert the new handle into the hammer head. The handle should extend slightly beyond the top of the hammer head. Tap the bottom of the handle on a hard surface to seat the head securely.
4. **Secure the Handle**: Insert the wooden wedge into the slot at the top of the handle. Tap it in with a hammer until it is tight. This expands the handle within the hammer head, securing it.
5. **Add Metal Wedges**: For additional security, drive metal wedges perpendicular to the wooden wedge. This further expands the handle within the hammer head.
6. **Finish the Handle**: Trim any excess wood and wedges protruding from the top of the hammer head. Sand the handle smooth and apply wood glue to seal and protect the wood.
7. **Test the Hammer**: Ensure the hammer head is firmly attached by striking a few test blows on a solid surface.
Your hammer is now ready for use with a new handle securely in place.
What is a dead-blow hammer and when should it be used?
A dead-blow hammer is a specialized tool designed to minimize damage to the struck surface and control the striking force. It features a hollow head filled with sand, lead shot, or steel shot, which absorbs the impact and reduces rebound. This design allows for more controlled and precise strikes compared to traditional hammers.
The head of a dead-blow hammer is often made of non-marring materials like rubber or polyurethane, which further protects surfaces from damage. The handle is typically made of steel or fiberglass, providing durability and strength.
Dead-blow hammers are used in various applications where precision and surface protection are crucial. They are ideal for:
1. **Automotive Work**: Used for tasks like aligning parts, removing dents, or assembling components without damaging the vehicle's surface.
2. **Woodworking**: Useful for assembling joints or adjusting pieces without leaving marks or causing splits in the wood.
3. **Metalworking**: Employed to position metal pieces or adjust machinery without deforming the metal.
4. **Construction**: Used for tasks like setting tiles or bricks, where precision and surface integrity are important.
5. **Machinery Maintenance**: Ideal for loosening or tightening parts without causing damage to the machinery.
6. **Assembly and Disassembly**: Useful in assembling or disassembling parts where controlled force is needed to avoid damage.
In summary, a dead-blow hammer is essential for tasks requiring controlled force and surface protection, making it a versatile tool in various trades and applications.