Call +(254) 703 030 000 / 751 483 999 / 721 704 777
.....Read More
Frequently Asked Questions
What are the essential tools for flooring installation?
The essential tools for flooring installation include:
1. **Measuring Tape**: Accurate measurements are crucial for cutting flooring materials to fit the space.
2. **Chalk Line**: Used to create straight lines on the subfloor, ensuring the flooring is laid out evenly.
3. **Utility Knife**: Essential for cutting vinyl, carpet, and other soft flooring materials.
4. **Flooring Cutter or Saw**: A power saw or specialized flooring cutter is necessary for cutting hardwood, laminate, or tile.
5. **Tapping Block and Pull Bar**: These tools help fit planks together snugly without damaging the edges.
6. **Rubber Mallet**: Used to gently tap flooring pieces into place without causing damage.
7. **Spacers**: Maintain consistent gaps between flooring and walls for expansion.
8. **Level**: Ensures the subfloor and installed flooring are even, preventing future issues.
9. **Adhesive Trowel**: For spreading adhesive evenly when installing tile or certain types of vinyl.
10. **Knee Pads**: Protects knees during prolonged periods of kneeling.
11. **Floor Roller**: Ensures adhesive bonds properly by applying even pressure across the flooring.
12. **Tile Cutter or Wet Saw**: Necessary for cutting ceramic or porcelain tiles.
13. **Grout Float and Sponge**: Used for applying and smoothing grout between tiles.
14. **Nail Gun or Stapler**: For securing certain types of flooring, like hardwood or engineered wood.
15. **Moisture Meter**: Checks moisture levels in subfloors to prevent future damage.
16. **Vacuum or Broom**: Keeps the work area clean and free of debris.
These tools are fundamental for ensuring a professional and durable flooring installation.
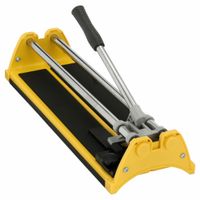
How do I choose the right tile cutter for my project?
To choose the right tile cutter for your project, consider the following factors:
1. **Tile Material and Thickness**: Different materials like ceramic, porcelain, glass, or stone require specific cutters. Manual cutters work well for ceramic and porcelain, while electric wet saws are better for thicker, harder materials like stone.
2. **Project Size**: For small projects or simple cuts, a manual tile cutter is sufficient. For larger projects or intricate cuts, an electric wet saw offers precision and efficiency.
3. **Cut Type**: Straight cuts can be handled by manual cutters, but for curves, angles, or intricate designs, a wet saw or a tile nipper is necessary.
4. **Budget**: Manual cutters are generally more affordable, while electric wet saws are more expensive but offer versatility and precision.
5. **Portability**: Manual cutters are lightweight and portable, ideal for on-site work. Wet saws are bulkier and require a stable setup.
6. **Skill Level**: Beginners may find manual cutters easier to use, while experienced users can handle the complexity of wet saws.
7. **Frequency of Use**: For one-time projects, renting a wet saw might be cost-effective. For frequent use, investing in a quality cutter is advisable.
8. **Brand and Quality**: Opt for reputable brands known for durability and performance. Read reviews and seek recommendations.
9. **Safety Features**: Ensure the cutter has safety features like blade guards and anti-slip bases to prevent accidents.
10. **Maintenance**: Consider the ease of maintenance and availability of replacement parts.
By evaluating these factors, you can select a tile cutter that aligns with your project needs, ensuring efficiency and quality in your tile installation.
What is the best way to cut carpet for installation?
To cut carpet for installation, follow these steps for precision and efficiency:
1. **Preparation**: Clear the area where the carpet will be installed. Ensure the subfloor is clean, dry, and smooth. Gather necessary tools: a utility knife with sharp blades, a straightedge or T-square, a measuring tape, and a chalk line.
2. **Measuring**: Measure the room accurately, accounting for any alcoves or irregularities. Add a few extra inches to each measurement to allow for trimming and fitting.
3. **Marking**: Roll out the carpet in a spacious area. Use the measurements to mark the back of the carpet with a chalk line. Ensure the lines are straight and accurate.
4. **Cutting**: Place a straightedge along the chalk line. Use a utility knife to make the initial cut. Start with a shallow cut to avoid fraying, then deepen the cut with subsequent passes. Replace the blade frequently to maintain sharpness.
5. **Fitting**: Lay the carpet in the room, ensuring it fits snugly against walls and corners. Trim excess carpet using the utility knife, cutting from the back to prevent damage to the pile.
6. **Seaming**: If multiple pieces are needed, align the edges carefully. Use a seam cutter to trim the edges for a precise fit. Apply seam tape underneath and use a seam iron to activate the adhesive, pressing the edges together for a seamless look.
7. **Final Adjustments**: Tuck the carpet edges under baseboards or moldings using a carpet tucker or stair tool. Ensure the carpet is stretched and secured properly to avoid wrinkles or bubbles.
By following these steps, you can achieve a professional-looking carpet installation with clean, precise cuts.
How do I properly use a flooring nailer?
To properly use a flooring nailer, follow these steps:
1. **Preparation**: Ensure the subfloor is clean, dry, and level. Acclimate the hardwood flooring to the room's temperature and humidity for at least 48 hours.
2. **Safety Gear**: Wear safety glasses and ear protection to protect against flying debris and noise.
3. **Tool Setup**: Choose the correct nailer for your flooring type (manual or pneumatic). Load the nailer with the appropriate fasteners, typically cleats or staples, as specified by the flooring manufacturer.
4. **Compressor Settings**: If using a pneumatic nailer, set the air compressor to the recommended PSI (usually between 70-90 PSI) to ensure proper nail penetration without damaging the wood.
5. **Positioning**: Start at the longest, straightest wall. Place the first row of boards with the tongue facing the wall, leaving a 1/4-inch expansion gap.
6. **Nailing Technique**: Position the nailer’s base plate snugly against the board’s tongue. Ensure the nailer is perpendicular to the floor to avoid angled nails. Strike the nailer’s plunger with a mallet to drive the fastener through the tongue at a 45-degree angle.
7. **Spacing**: Space nails or staples 6-8 inches apart and 2-3 inches from the board ends. Ensure each board is securely fastened before proceeding to the next.
8. **Progression**: Continue laying and nailing boards across the room. Use a tapping block and mallet to snugly fit boards together before nailing.
9. **Final Rows**: For the last few rows, where the nailer may not fit, use a finish nailer or hand nailer to secure the boards.
10. **Inspection**: Check for any loose boards or missed nails and address them as needed.
11. **Cleanup**: Remove any debris and ensure the floor is clean before applying any finishes.
What tools are needed for grouting tile floors?
To grout tile floors, you will need the following tools:
1. **Grout Float**: A rubber tool used to spread grout into the spaces between tiles. It helps to press the grout into the joints and remove excess grout from the tile surface.
2. **Grout Sponge**: A large, damp sponge used to clean the tiles after applying grout. It helps to smooth the grout lines and remove any grout haze from the tile surface.
3. **Bucket**: Used for mixing grout and holding water for cleaning. A sturdy bucket is essential for preparing the grout mixture and rinsing the sponge.
4. **Grout Mixer or Drill with Mixing Paddle**: For mixing grout to the right consistency. A grout mixer or a drill with a mixing paddle attachment ensures a smooth, lump-free mixture.
5. **Trowel or Margin Trowel**: Used to scoop grout from the bucket and apply it onto the tiles. A margin trowel is particularly useful for smaller areas and detailed work.
6. **Grout Saw or Grout Removal Tool**: If you need to remove old grout before applying new grout, a grout saw or removal tool is necessary.
7. **Rubber Gloves**: To protect your hands from the grout, which can be abrasive and irritating to the skin.
8. **Knee Pads**: To protect your knees while working on the floor for extended periods.
9. **Sealant Applicator**: If sealing the grout is necessary, a sealant applicator or brush will be needed to apply the grout sealer.
10. **Clean Cloths or Rags**: For wiping up spills and cleaning tools.
11. **Measuring Cup**: To accurately measure water and grout for mixing.
These tools will help ensure a professional finish and make the grouting process more efficient and effective.
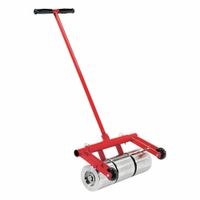
How can I ensure a seamless carpet installation?
To ensure a seamless carpet installation, follow these steps:
1. **Choose the Right Carpet**: Select a carpet that suits your space and needs. Consider factors like material, pile type, and color.
2. **Accurate Measurements**: Measure the room precisely, accounting for doorways, closets, and any irregularities. Add extra for trimming and pattern matching.
3. **Prepare the Subfloor**: Ensure the subfloor is clean, dry, and level. Remove old flooring, repair any damage, and vacuum thoroughly.
4. **Acclimate the Carpet**: Allow the carpet to acclimate to the room's temperature and humidity for at least 24 hours before installation.
5. **Use Quality Underlay**: Invest in a good-quality underlay to enhance comfort, insulation, and carpet longevity.
6. **Professional Installation**: Hire experienced installers who follow industry standards. They should use the right tools and techniques, such as power stretching, to avoid wrinkles and bubbles.
7. **Seam Placement**: Plan seam placement strategically, avoiding high-traffic areas. Ensure seams run parallel to the main light source to minimize visibility.
8. **Seam Sealing**: Use a seam sealer to prevent fraying and ensure a tight bond between carpet pieces.
9. **Proper Stretching**: Ensure the carpet is stretched properly to prevent buckling. Installers should use a power stretcher for best results.
10. **Trim and Tuck**: Trim excess carpet and tuck edges neatly under baseboards or moldings for a clean finish.
11. **Post-Installation Care**: Vacuum the carpet to remove loose fibers. Avoid heavy furniture placement for at least 24 hours to allow the adhesive to set.
12. **Regular Maintenance**: Follow a regular cleaning and maintenance schedule to keep the carpet in good condition and extend its life.
By following these steps, you can achieve a seamless and professional carpet installation.
What safety precautions should I take when using flooring hand tools?
When using flooring hand tools, prioritize safety by following these precautions:
1. **Personal Protective Equipment (PPE):** Wear safety goggles to protect your eyes from flying debris. Use gloves to prevent cuts and blisters. Wear knee pads to protect your knees during prolonged kneeling.
2. **Proper Tool Selection:** Use the right tool for the job to avoid accidents. Ensure tools are in good condition and suitable for the specific flooring material.
3. **Tool Inspection:** Regularly inspect tools for damage or wear. Replace or repair any defective tools to prevent malfunctions.
4. **Secure Work Area:** Keep the work area clean and free of clutter to prevent tripping hazards. Ensure adequate lighting to clearly see your work.
5. **Correct Handling:** Use tools according to the manufacturer’s instructions. Maintain a firm grip and stable stance to avoid slips and loss of control.
6. **Cutting Safety:** When using cutting tools, cut away from your body and keep hands clear of the blade. Use a straightedge for precise cuts and to guide the tool safely.
7. **Storage:** Store tools properly when not in use to prevent accidental injuries. Keep sharp tools in protective sheaths or cases.
8. **Lifting Techniques:** Use proper lifting techniques to avoid back injuries. Bend at the knees and keep the load close to your body.
9. **Ventilation:** Ensure proper ventilation when using adhesives or sealants to avoid inhaling harmful fumes.
10. **Training:** Be adequately trained in the use of each tool. Understand the potential risks and how to mitigate them.
11. **Emergency Preparedness:** Have a first aid kit readily available. Know the location of emergency exits and how to quickly access medical help if needed.
By adhering to these safety precautions, you can minimize the risk of accidents and injuries while using flooring hand tools.