Call +(254) 703 030 000 / 751 483 999 / 721 704 777
.....Read More
Frequently Asked Questions
What is the accuracy of desk and wall-mount thermometers and hygrometers?
The accuracy of desk and wall-mount thermometers and hygrometers can vary based on the quality, brand, and technology used in the devices. Generally, for thermometers, the accuracy is typically within ±0.5°C to ±1°C. High-quality digital thermometers may offer better precision, sometimes within ±0.1°C. Analog thermometers might have slightly less accuracy due to mechanical limitations.
For hygrometers, which measure humidity, the accuracy is usually within ±2% to ±5% relative humidity (RH). Digital hygrometers tend to provide more precise readings compared to analog ones. High-end models can offer accuracy within ±1% to ±2% RH. Factors such as calibration, environmental conditions, and sensor quality can influence the accuracy of both thermometers and hygrometers.
Regular calibration and maintenance are essential to ensure these devices remain accurate over time. Environmental factors like temperature fluctuations, dust, and exposure to direct sunlight can affect their performance. Therefore, it's crucial to place them in a stable environment and recalibrate them periodically according to the manufacturer's instructions.
How do I calibrate a digital thermometer or hygrometer?
To calibrate a digital thermometer:
1. **Ice Water Method**: Fill a glass with ice and add cold water. Stir and let it sit for a few minutes. Insert the thermometer probe into the ice water without touching the sides. It should read 32°F (0°C). If not, adjust the thermometer according to the manufacturer's instructions.
2. **Boiling Water Method**: Boil water and insert the thermometer probe without touching the pot's sides. It should read 212°F (100°C) at sea level. Adjust if necessary, considering altitude variations.
To calibrate a digital hygrometer:
1. **Salt Test**: Place a tablespoon of salt in a small container and add a few drops of water to make a paste. Put this container and the hygrometer in a sealed plastic bag or airtight container. After 6-8 hours, the hygrometer should read 75% relative humidity. Adjust if needed.
2. **Two-Point Calibration**: Use a saturated solution of magnesium chloride for 33% humidity and sodium chloride for 75% humidity. Place the hygrometer in separate sealed environments with each solution for 6-8 hours. Adjust the readings accordingly.
3. **Compare with a Calibrated Device**: Place the hygrometer next to a professionally calibrated device in a stable environment. After a few hours, compare readings and adjust if necessary.
Always refer to the manufacturer's manual for specific calibration instructions and adjustments.
Can these devices be used outdoors?
Yes, these devices can be used outdoors, but several factors need to be considered to ensure optimal performance and longevity. First, check the device's IP (Ingress Protection) rating, which indicates its resistance to dust and water. A higher IP rating, such as IP65 or IP67, suggests better protection against environmental elements, making the device more suitable for outdoor use.
Consider the device's operating temperature range. Outdoor environments can experience extreme temperatures, so ensure the device can function effectively within the expected temperature range. Additionally, assess the device's resistance to UV radiation, as prolonged exposure to sunlight can degrade materials and affect performance.
Power supply is another critical factor. If the device requires a constant power source, ensure there is a reliable outdoor power solution, such as weatherproof outlets or solar panels. For battery-operated devices, check the battery life and consider how often it will need recharging or replacing.
Connectivity is essential for devices that rely on Wi-Fi, Bluetooth, or cellular networks. Ensure that the device can maintain a stable connection in outdoor settings, which may require additional equipment like signal boosters or outdoor-rated antennas.
Finally, consider the device's physical security. Outdoor devices are more susceptible to theft or vandalism, so secure them with locks, enclosures, or mounting brackets designed for outdoor use.
In summary, while many devices can be used outdoors, it is crucial to evaluate their IP rating, temperature tolerance, UV resistance, power supply, connectivity, and security to ensure they function effectively and remain durable in outdoor environments.
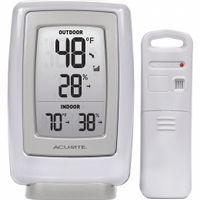
What is the range of temperature and humidity they can measure?
The range of temperature and humidity that a device can measure depends on the specific type of sensor or instrument being used.
For temperature sensors:
- Thermocouples can measure a wide range, typically from -200°C to 1750°C, depending on the type (e.g., Type K, J, T).
- Resistance Temperature Detectors (RTDs) generally measure from -200°C to 850°C.
- Thermistors are usually effective from -80°C to 150°C.
- Infrared sensors can measure from -70°C to 1000°C or more, depending on the model.
For humidity sensors:
- Capacitive humidity sensors typically measure relative humidity from 0% to 100%.
- Resistive humidity sensors also cover a range from 0% to 100% relative humidity.
- Thermal conductivity humidity sensors are used for specific ranges, often from 0% to 100% but are more common in industrial applications.
The specific range for any given sensor will depend on its design, materials, and intended application. Always refer to the manufacturer's specifications for precise capabilities.
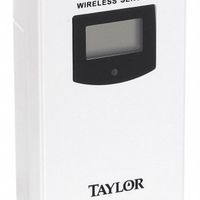
How do wireless sensors work with these devices?
Wireless sensors work with devices by using radio frequency (RF) communication to transmit data. These sensors collect data from their environment, such as temperature, humidity, or motion, and convert it into electrical signals. The data is then processed by an onboard microcontroller and transmitted wirelessly to a receiver or gateway device.
The communication between wireless sensors and devices typically occurs over standard wireless protocols like Wi-Fi, Bluetooth, Zigbee, or LoRa. Each protocol has its own range, power consumption, and data rate characteristics, making them suitable for different applications. For instance, Bluetooth is often used for short-range, low-power applications, while LoRa is used for long-range, low-data-rate applications.
Once the data reaches the receiver or gateway, it is forwarded to a central system or cloud platform for further processing and analysis. This system can be a computer, a smartphone, or a dedicated IoT platform. The data can then be used to trigger actions, generate alerts, or provide insights through dashboards and reports.
Wireless sensors often operate in networks, known as wireless sensor networks (WSNs), where multiple sensors communicate with each other and a central hub. This network can be configured in various topologies, such as star, mesh, or tree, depending on the application requirements.
Power management is crucial for wireless sensors, as they are often battery-powered. Energy-efficient protocols and low-power components are used to extend battery life. Some sensors also incorporate energy-harvesting technologies to recharge themselves from environmental sources like solar or kinetic energy.
Overall, wireless sensors enable seamless data collection and communication, facilitating automation, monitoring, and control in various applications, including smart homes, industrial automation, and environmental monitoring.
Are there any specific brands recommended for commercial use?
Yes, several brands are highly recommended for commercial use across various industries due to their reliability, durability, and performance. In the realm of commercial kitchen equipment, brands like Hobart, Vulcan, and True Refrigeration are well-regarded for their robust appliances that withstand heavy use. For office equipment, brands such as HP, Canon, and Xerox are favored for their efficient printers and copiers. In the construction industry, Caterpillar and John Deere are trusted for their heavy machinery and equipment. For commercial cleaning, brands like Tennant and Karcher are known for their high-quality cleaning machines. In the realm of IT and networking, Cisco and Dell are preferred for their reliable servers and networking solutions. These brands are often chosen for their strong customer support, extensive warranties, and the availability of replacement parts, making them ideal for commercial environments where downtime can be costly.
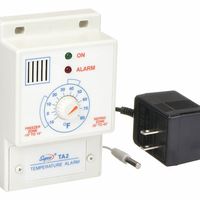
How do I install a fixed-position digital thermometer on a refrigeration system?
1. **Select Location**: Choose a spot on the refrigeration system where the thermometer can accurately measure the temperature, typically near the evaporator coil or inside the refrigerated compartment.
2. **Power Supply**: Ensure the thermometer is compatible with the power supply available. Some thermometers require batteries, while others may need a direct connection to the system's power source.
3. **Mounting**: Use the mounting hardware provided with the thermometer. Drill holes if necessary, ensuring not to damage any components of the refrigeration system. Secure the thermometer in place using screws or adhesive, depending on the model.
4. **Sensor Placement**: If the thermometer has a separate sensor probe, insert it into the refrigeration area. Ensure the probe is placed where it can accurately measure the air temperature without being obstructed by shelves or food items.
5. **Wiring**: If the thermometer requires wiring, connect the wires according to the manufacturer's instructions. This may involve connecting to a power source or integrating with the system's control panel.
6. **Calibration**: Once installed, calibrate the thermometer if necessary. Follow the manufacturer's instructions to ensure accurate readings. This may involve adjusting settings or using a reference thermometer for comparison.
7. **Testing**: Power on the thermometer and check the display to ensure it is functioning correctly. Verify that the temperature readings are accurate and consistent with the expected range for the refrigeration system.
8. **Secure Cables**: If there are any exposed wires or cables, secure them with cable ties to prevent damage or interference with the refrigeration system's operation.
9. **Regular Maintenance**: Periodically check the thermometer for accuracy and replace batteries if needed. Ensure the sensor remains unobstructed and clean for optimal performance.