Call +(254) 703 030 000 / 751 483 999 / 721 704 777
.....Read More
Frequently Asked Questions
What are the best tools for opening paint can lids?
The best tools for opening paint can lids include:
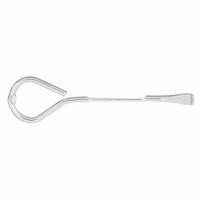
1. **Paint Can Opener**: Specifically designed for this task, these openers have a flat, curved end that fits under the lid's lip, allowing for easy leverage. They are often given for free at paint stores.
2. **Flathead Screwdriver**: A common household tool, a flathead screwdriver can be used to pry open the lid by inserting it under the lip and gently twisting. Care should be taken to avoid damaging the lid or can.
3. **Putty Knife**: A flexible putty knife can be used similarly to a screwdriver. Its wider blade can provide more even pressure, reducing the risk of bending the lid.
4. **Butter Knife**: In the absence of other tools, a butter knife can be used. It should be inserted carefully to avoid bending or breaking the knife.
5. **Multi-tool**: Many multi-tools include a flat edge or a dedicated can opener that can be used to open paint cans.
6. **Pry Bar**: A small pry bar can be effective for stubborn lids, providing significant leverage. However, caution is needed to avoid damaging the can.
7. **Coin**: A large coin, like a quarter, can be used in a pinch by inserting it under the lid and twisting.
8. **Bottle Opener**: Some bottle openers have a flat edge that can be used to pry open paint cans.
9. **Utility Knife**: For cans with a plastic lid, a utility knife can be used to cut around the edge, though this is not recommended for metal lids.
These tools vary in effectiveness based on the type of paint can and lid, but they all provide leverage to safely and efficiently open paint cans without causing damage.
How do you use a paint can opener?
To use a paint can opener, follow these steps:
1. **Select the Opener**: Choose a paint can opener, which typically resembles a flathead screwdriver with a curved end or a bottle opener with a flat edge.
2. **Position the Can**: Place the paint can on a stable, flat surface to prevent spills or accidents.
3. **Insert the Opener**: Hold the handle of the opener firmly. Insert the curved or flat edge of the opener under the lip of the paint can lid. Ensure the opener is positioned between the lid and the can's rim.
4. **Apply Leverage**: Gently push down on the handle of the opener. This action will use leverage to lift the lid slightly. Be careful not to apply too much force to avoid bending the lid or damaging the can.
5. **Work Around the Lid**: Move the opener around the circumference of the lid, repeating the insertion and leverage process. Lift the lid incrementally by working in small sections to ensure an even and safe removal.
6. **Remove the Lid**: Once the lid is sufficiently loosened, you can lift it off by hand. If it remains tight, continue using the opener until it is free.
7. **Check for Spills**: Inspect the rim of the can for any paint drips or spills. Wipe away excess paint with a cloth to maintain a clean working area.
8. **Store the Opener**: After use, clean the opener if necessary and store it in a safe place for future use.
By following these steps, you can safely and effectively open a paint can without damaging the lid or the can itself.
What is a pour-and-store paint lid?
A pour-and-store paint lid is a specialized accessory designed to replace the original lid of a paint can, providing a more convenient and efficient way to pour, store, and preserve paint. These lids are typically made from durable plastic and feature a spout or nozzle that allows for controlled pouring, minimizing spills and drips. This design is particularly useful for both professional painters and DIY enthusiasts who need to transfer paint into trays or smaller containers without creating a mess.
In addition to the pouring spout, many pour-and-store paint lids come with an airtight seal or gasket that helps to preserve the paint's freshness by preventing air exposure, which can lead to drying or skinning over time. Some models also include a built-in strainer to filter out any lumps or debris, ensuring a smooth application.
These lids are often reusable and can fit standard paint can sizes, such as one-gallon or quart cans. They are easy to attach and remove, often featuring a snap-on or twist-lock mechanism for secure fitting. Some designs may also include a handle for easier carrying and handling of the paint can.
Overall, a pour-and-store paint lid enhances the painting process by providing a cleaner, more efficient way to handle paint, reducing waste, and extending the life of the paint by maintaining its quality during storage.
How do magnetic clips help with painting?
Magnetic clips assist with painting by providing a convenient and efficient way to hold and organize various painting tools and materials. They are particularly useful in the following ways:
1. **Tool Organization**: Magnetic clips can securely hold brushes, rollers, and other metal tools, keeping them within easy reach. This reduces the need to constantly search for tools, thereby saving time and maintaining workflow efficiency.
2. **Space Management**: By attaching magnetic clips to metal surfaces like ladders, scaffolding, or metal easels, painters can maximize their workspace. This is especially beneficial in small or cluttered areas where space is limited.
3. **Paint Can Stability**: Magnetic clips can be used to stabilize paint cans by attaching them to metal surfaces, preventing spills and accidents. This ensures a cleaner work environment and reduces paint wastage.
4. **Hands-Free Operation**: Painters can use magnetic clips to hold tools when they need both hands free for other tasks, such as adjusting a canvas or mixing paint. This enhances safety and efficiency.
5. **Drying and Storage**: After cleaning, brushes and other tools can be clipped to dry, preventing bristle damage and maintaining tool longevity. Magnetic clips can also be used to store tools neatly when not in use.
6. **Versatility**: Magnetic clips are adaptable to various surfaces and can be repositioned easily, offering flexibility in different painting scenarios.
Overall, magnetic clips streamline the painting process by enhancing organization, safety, and efficiency, making them a valuable tool for both amateur and professional painters.
Can hooks for ladders: how do they work?
Hooks for ladders are designed to enhance safety and stability when using ladders, particularly on sloped or uneven surfaces. They work by securing the ladder to a fixed structure, preventing it from slipping or tipping over. Here's how they function:
1. **Attachment**: Hooks are typically attached to the top rung or the side rails of the ladder. They can be permanently fixed or removable, depending on the design.
2. **Design**: The hooks are usually made of durable materials like steel or aluminum and are shaped to grip securely onto surfaces such as roof edges, gutters, or scaffolding.
3. **Stability**: By anchoring the ladder, hooks prevent lateral movement and reduce the risk of the ladder sliding sideways. This is particularly useful when working on roofs or other elevated areas.
4. **Ease of Use**: Many ladder hooks are designed to be easily engaged and disengaged, allowing for quick setup and takedown. Some models feature adjustable mechanisms to fit different ladder sizes and structures.
5. **Safety**: Using hooks reduces the likelihood of accidents by ensuring the ladder remains in place, even if the user shifts their weight or if there are external forces like wind.
6. **Versatility**: Hooks can be used in various settings, including construction sites, home maintenance, and any situation where ladder stability is crucial.
7. **Compliance**: Many ladder hooks are designed to meet safety standards and regulations, providing an additional layer of assurance for users.
In summary, ladder hooks are a practical safety accessory that enhances the stability and security of ladders, making them an essential tool for anyone working at heights.
What are the benefits of using lid tools for paint cans?
Lid tools for paint cans offer several benefits that enhance the painting process and ensure efficiency and safety. Firstly, they provide an easy and effective way to open paint cans without damaging the lid or the can itself. This prevents paint spills and splatters, maintaining a clean workspace.
Secondly, these tools help in resealing the paint cans securely, which is crucial for preserving the paint's quality and preventing it from drying out. A well-sealed can ensures that the paint remains usable for future projects, reducing waste and saving costs.
Additionally, lid tools often come with features that allow for easy pouring and mixing. Some tools are designed to fit snugly on the can, providing a spout for controlled pouring, which minimizes drips and spills. This is particularly beneficial when dealing with large quantities of paint or when precision is required.
Moreover, using lid tools reduces the risk of injury. Traditional methods of opening paint cans, such as using screwdrivers or knives, can be hazardous and may lead to cuts or other injuries. Lid tools are specifically designed to be safe and user-friendly, making them a better option for both professionals and DIY enthusiasts.
Finally, these tools contribute to a more organized and efficient workflow. By simplifying the process of opening, pouring, and sealing paint cans, they allow painters to focus more on the actual painting task, improving productivity and the overall quality of the work.
In summary, lid tools for paint cans offer convenience, safety, and efficiency, making them an essential accessory for anyone involved in painting projects.
How to prevent paint spills when opening a can?
1. **Prepare the Area**: Lay down a drop cloth or plastic sheeting around the area where you will open the paint can to catch any accidental drips or spills.
2. **Use the Right Tools**: Use a paint can opener instead of a screwdriver to gently pry open the lid. This tool is specifically designed to minimize the risk of bending the lid or causing splashes.
3. **Clean the Lid**: Before opening, wipe the top of the can with a damp cloth to remove any dust or debris that could fall into the paint.
4. **Open Slowly**: Insert the paint can opener under the lid and gently lift it in small increments around the circumference of the can. This gradual process helps prevent sudden spills.
5. **Control the Lid**: Once the lid is loose, carefully lift it off the can, keeping it level to avoid any paint on the underside from dripping.
6. **Use a Paint Pouring Spout**: Attach a paint pouring spout to the rim of the can. This tool helps control the flow of paint and reduces the risk of spills when pouring.
7. **Stir with Care**: If stirring is necessary, do so slowly to avoid splashing. Use a paint stir stick and ensure it is fully submerged before stirring.
8. **Secure the Lid**: When finished, clean the rim of the can to remove any paint residue, then gently tap the lid back into place with a rubber mallet to ensure a tight seal without damaging the can.
9. **Store Properly**: Store the paint can in a stable, upright position to prevent leaks or spills.
What is a paint can opener used for?
A paint can opener is a tool specifically designed to open paint cans efficiently and safely. It typically features a flat, curved end that fits under the lip of the paint can lid, allowing the user to leverage the lid open without damaging the can or the lid itself. This tool is essential for both professional painters and DIY enthusiasts as it ensures that the paint can is opened cleanly, preventing spills and preserving the integrity of the can for future use.
In addition to opening paint cans, many paint can openers are multifunctional. They often include a bottle opener, a screwdriver tip, or a small hole for hanging. The design is usually compact and ergonomic, making it easy to handle and store. Some models are made of metal for durability, while others might be plastic for lightweight convenience.
Using a paint can opener is straightforward: insert the curved end under the lid's edge and gently pry upwards, working around the can until the lid is fully loosened. This method reduces the risk of splattering paint and ensures a tight seal can be re-established when closing the can.
Overall, a paint can opener is a simple yet indispensable tool in any painting toolkit, facilitating the opening process and contributing to a more efficient and tidy painting experience.
How do you use a paint stirrer?
To use a paint stirrer, follow these steps:
1. **Preparation**: Ensure you have the right type of stirrer for your paint. Manual stirrers are suitable for small jobs, while mechanical ones are better for larger quantities.
2. **Open the Paint Can**: Use a flathead screwdriver or a paint can opener to carefully pry open the lid of the paint can.
3. **Inspect the Paint**: Check for any separation of the paint components. If the paint has been sitting for a while, the solids may have settled at the bottom.
4. **Insert the Stirrer**: For manual stirring, insert a wooden or plastic stir stick into the can. For mechanical stirring, attach the paint stirrer to a drill and insert it into the paint.
5. **Stir the Paint**:
- **Manual Stirring**: Move the stir stick in a circular motion, reaching the bottom and sides of the can. Stir for at least 5 minutes, ensuring the paint is uniformly mixed.
- **Mechanical Stirring**: Start the drill at a low speed to avoid splashing. Move the stirrer up and down and around the can for about 2-3 minutes until the paint is consistent.
6. **Check Consistency**: Lift the stirrer out of the paint and let it drip back into the can. The paint should flow smoothly without lumps.
7. **Clean the Stirrer**: If you plan to reuse the stirrer, clean it immediately with water for water-based paints or the appropriate solvent for oil-based paints.
8. **Seal the Can**: Once the paint is mixed, wipe the rim of the can and securely replace the lid to prevent drying out.
9. **Use the Paint**: Your paint is now ready for application. Stir occasionally during use to maintain consistency.
What is the purpose of a pour spout on a paint can?
The purpose of a pour spout on a paint can is to facilitate a clean, controlled, and efficient pouring process. It helps prevent spills and drips that can occur when pouring paint directly from the can, which can lead to messes and wasted product. The spout provides a directed flow, allowing the user to pour paint into a tray or another container with precision. This is particularly useful for maintaining a clean workspace and ensuring that the paint is applied evenly without splatters.
Additionally, a pour spout helps in minimizing the paint that accumulates in the can's rim, which can make resealing the can difficult and lead to the paint drying out. By reducing the mess around the rim, the spout aids in maintaining the integrity of the paint for future use. It also makes it easier to clean the can after use, as there is less paint residue left behind.
Overall, a pour spout enhances the user experience by making the process of transferring paint more manageable, reducing waste, and maintaining the quality of the paint for subsequent applications.
How do you reseal a paint can with a paint can lid?
To reseal a paint can with a paint can lid, follow these steps:
1. **Clean the Rim**: Use a damp cloth or paper towel to wipe away any paint residue from the rim of the can. This ensures a tight seal and prevents the lid from sticking.
2. **Align the Lid**: Place the lid on top of the can, ensuring it is properly aligned with the rim. The lid should sit evenly without any gaps.
3. **Press Down**: Use your hands to press the lid down gently. Start from the center and work your way outwards to ensure the lid is seated evenly.
4. **Use a Rubber Mallet**: If the lid is not fully sealed, use a rubber mallet to tap it down. Gently tap around the edges of the lid, moving in a circular pattern. Avoid using a metal hammer, as it can damage the lid or can.
5. **Check the Seal**: Once the lid is in place, check for any gaps by running your fingers around the edge. If you find any, tap those areas again with the mallet.
6. **Store Properly**: Store the can upside down to create an airtight seal. This helps prevent the paint from drying out by allowing the paint to form a seal around the lid.
7. **Label the Can**: If the paint is not used frequently, label the can with the date and color for easy identification in the future.
By following these steps, you can effectively reseal a paint can, preserving the paint for future use.
What is a paint scraper used for?
A paint scraper is a tool used primarily for removing paint, varnish, or other finishes from surfaces. It is designed to help in the preparation of surfaces for repainting or refinishing by scraping off old, peeling, or flaking paint. The tool typically consists of a handle and a flat, sharp-edged blade, which can be made of metal or plastic.
Paint scrapers are versatile and can be used on various surfaces, including wood, metal, and plaster. They are particularly useful for reaching into corners, edges, and other hard-to-reach areas where paint may have accumulated. In addition to paint removal, scrapers can also be used to remove wallpaper, adhesive residues, and other surface contaminants.
There are different types of paint scrapers, including flat scrapers, which are ideal for large, flat surfaces, and contoured scrapers, which are designed for more detailed work on curved or intricate surfaces. Some scrapers come with replaceable blades, allowing for continued use even after the blade becomes dull.
Using a paint scraper requires care to avoid damaging the underlying surface. It is important to hold the scraper at the correct angle and apply even pressure to effectively remove the paint without gouging or scratching the material beneath. For stubborn paint, a heat gun or chemical paint remover may be used in conjunction with a scraper to soften the paint, making it easier to remove.
Overall, a paint scraper is an essential tool for anyone involved in painting, renovation, or restoration projects, providing an efficient means of surface preparation to ensure a smooth, clean finish.