Call +(254) 703 030 000 / 751 483 999 / 721 704 777
- Home
- Material Handling
- Dock Loading Equipment
- Dock Doors Curtains Openers
- Garage Door Hardware
.....Read More
Frequently Asked Questions
How do I install garage door springs and cables?
1. **Safety First**: Disconnect the garage door opener and ensure the door is fully closed. Wear safety glasses and gloves.
2. **Release Tension**: Use winding bars to carefully unwind the tension from the existing springs. Insert the winding bar into the winding cone and slowly loosen the set screws. Use a second winding bar to control the tension as you unwind.
3. **Remove Old Springs**: Once tension is released, remove the old springs by unscrewing the bolts that hold them in place on the center bracket and the end brackets.
4. **Install New Springs**: Attach the new springs to the center bracket. Ensure the spring is oriented correctly (right-wound for the left side and left-wound for the right side). Secure the springs with bolts.
5. **Wind the Springs**: Use winding bars to wind the new springs. Typically, 30 quarter turns (7.5 full turns) are needed, but check the manufacturer’s instructions. Tighten the set screws on the winding cone.
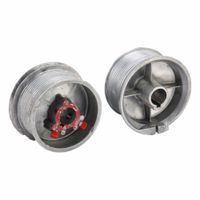
6. **Install Cables**: Attach the new cables to the bottom brackets on the door. Run the cables up to the cable drums on the torsion bar. Ensure they are properly seated in the grooves.
7. **Tighten Cables**: Turn the cable drums to take up slack in the cables. Secure the drums by tightening the set screws.
8. **Test the Door**: Reconnect the garage door opener. Manually lift the door to ensure it moves smoothly and stays open. Adjust spring tension if necessary.
9. **Final Check**: Ensure all bolts and screws are tight. Test the door with the opener to confirm proper operation.
10. **Safety Inspection**: Double-check all components for secure installation and proper alignment.
Always consult the manufacturer's instructions specific to your garage door model. If unsure, consider hiring a professional.
What are the signs that my garage door rollers need replacement?
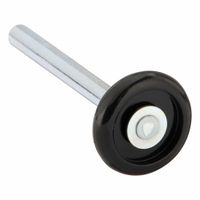
1. **Noisy Operation**: If your garage door makes grinding, squeaking, or screeching noises, it may indicate worn-out rollers.
2. **Vibrations or Shaking**: Excessive vibrations or shaking when the door is in motion can be a sign that the rollers are not gliding smoothly.
3. **Visible Wear and Tear**: Inspect the rollers for visible signs of wear, such as cracks, chips, or flat spots.
4. **Slow or Stuck Movement**: If the door moves slower than usual or gets stuck, it could be due to faulty rollers.
5. **Misalignment**: Check if the door is off-balance or misaligned, which can be caused by uneven or damaged rollers.
6. **Frequent Derailment**: If the door frequently comes off its tracks, the rollers might be worn out or damaged.
7. **Excessive Vibration**: Noticeable vibration during operation can indicate that the rollers are not functioning properly.
8. **Rust or Corrosion**: Metal rollers can rust over time, leading to poor performance and the need for replacement.
9. **Flat Spots**: Rollers with flat spots can cause the door to operate unevenly or make thumping noises.
10. **Age**: If the rollers are several years old, they may be nearing the end of their lifespan and require replacement.
11. **Manual Operation Difficulty**: Difficulty in manually opening or closing the door can suggest roller issues.
12. **Increased Energy Bills**: Poorly functioning rollers can cause the door to not seal properly, affecting insulation and increasing energy costs.
13. **Physical Damage**: Any physical damage to the rollers, such as bending or breaking, necessitates replacement.
14. **Frequent Repairs**: If you find yourself frequently repairing the door, it might be time to replace the rollers.
How do I maintain and lubricate garage door hinges?
1. **Gather Supplies**: You will need a lubricant (preferably a silicone-based or lithium grease), a clean cloth, and a step ladder if necessary.
2. **Safety First**: Disconnect the garage door opener to prevent accidental operation. Ensure the door is closed and stable.
3. **Clean Hinges**: Use a clean cloth to wipe away dust, dirt, and old lubricant from the hinges. This ensures the new lubricant adheres properly.
4. **Inspect Hinges**: Check for any signs of wear, rust, or damage. Replace any damaged hinges before proceeding with lubrication.
5. **Apply Lubricant**:
- **Type of Lubricant**: Use a silicone-based spray or lithium grease. Avoid WD-40 as it is a degreaser, not a lubricant.
- **Application**: Spray or apply the lubricant directly onto the pivot points and moving parts of each hinge. Ensure even coverage but avoid over-application to prevent dripping.
6. **Operate the Door**: Manually open and close the garage door a few times to distribute the lubricant evenly across the hinges.
7. **Wipe Excess**: Use a clean cloth to wipe away any excess lubricant to prevent dirt accumulation.
8. **Regular Maintenance**: Repeat this process every six months or as needed, especially if you notice squeaking or stiffness.
9. **Check Other Components**: While maintaining hinges, also check and lubricate other moving parts like rollers, tracks, and springs for optimal performance.
10. **Reconnect Opener**: Once maintenance is complete, reconnect the garage door opener and test the door’s operation.
By following these steps, you can ensure smooth operation and extend the lifespan of your garage door hinges.
What should I do if my garage door is making loud noises?
1. **Inspect the Tracks and Rollers**: Check for debris or obstructions in the tracks. Clean them and ensure they are aligned properly. Examine the rollers for wear and tear; replace them if necessary.
2. **Lubricate Moving Parts**: Apply a high-quality garage door lubricant to the rollers, hinges, tracks, and springs. Avoid using grease, as it can attract dirt and cause more noise.
3. **Tighten Hardware**: Use a wrench to tighten any loose bolts or screws on the door and track. Vibrations can cause these to loosen over time.
4. **Check the Springs**: Inspect the springs for signs of wear or damage. If they appear worn, contact a professional for replacement, as handling springs can be dangerous.
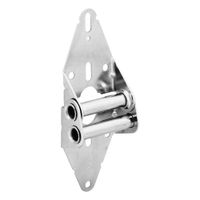
5. **Examine the Hinges**: Look for worn or damaged hinges. Replace any that are cracked or have holes.
6. **Balance the Door**: Disconnect the opener by pulling the release handle. Manually lift the door halfway. If it doesn’t stay in place, the springs may need adjustment by a professional.
7. **Inspect the Opener**: Listen to the garage door opener. If it’s the source of the noise, consider replacing it with a quieter model or consult a technician for repairs.
8. **Check the Door Panels**: Ensure the panels are not damaged or misaligned. Adjust or replace them if necessary.
9. **Weatherstripping**: Inspect the weatherstripping for wear. Replace it if it’s cracked or damaged to prevent noise from vibrations.
10. **Consult a Professional**: If the noise persists after these steps, contact a garage door technician to diagnose and fix the issue.
How do I adjust garage door tracks for smooth operation?
1. **Safety First**: Disconnect the garage door opener and ensure the door is fully closed. Use clamps or locking pliers on the tracks to prevent the door from moving.
2. **Inspect the Tracks**: Check for any debris, dents, or misalignments. Clean the tracks with a damp cloth to remove dirt and grime.
3. **Check Track Alignment**: Use a level to ensure the vertical tracks are plumb. The horizontal tracks should slightly angle down towards the back of the garage.
4. **Loosen the Bolts**: Use a wrench to slightly loosen the bolts holding the tracks to the brackets. Do not remove them completely.
5. **Adjust the Tracks**:
- For vertical tracks, gently tap the bottom of the track with a rubber mallet to align it.
- For horizontal tracks, adjust the angle by moving the track slightly up or down.
6. **Tighten the Bolts**: Once the tracks are properly aligned, tighten the bolts securely.
7. **Check Track Spacing**: Ensure the tracks are equidistant from the door at all points. Adjust if necessary by loosening the bolts and moving the track.
8. **Lubricate the Tracks**: Apply a silicone-based lubricant to the tracks, rollers, and hinges to ensure smooth operation.
9. **Test the Door**: Reconnect the garage door opener and test the door’s operation. It should move smoothly without any sticking or jerking.
10. **Final Adjustments**: If the door still doesn’t operate smoothly, check for other issues such as worn rollers or hinges and replace them if necessary.
11. **Regular Maintenance**: Regularly inspect and maintain the tracks to prevent future issues.
How can I secure my garage door with locks and latches?
1. **Deadbolt Locks**: Install a heavy-duty deadbolt lock on the door leading from the garage to the house. This adds an extra layer of security.
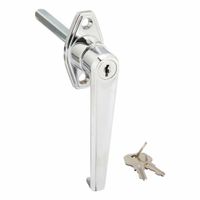
2. **T-Handle Locks**: Replace the standard garage door handle with a T-handle lock, which requires a key to open, making it more difficult for intruders to gain access.
3. **Slide Bolt Locks**: Install slide bolt locks on the inside of the garage door. These can be manually engaged when the door is closed, preventing it from being opened from the outside.
4. **Padlocks**: Use padlocks on the garage door tracks. Drill a hole in the track above one of the rollers and insert a padlock to prevent the door from being lifted.
5. **Electronic Locks**: Consider installing an electronic keypad lock for keyless entry. Ensure it has a rolling code feature to prevent code grabbing.
6. **Latch Guards**: Install latch guards on any side doors to prevent tampering with the latch mechanism.
7. **Reinforced Hinges**: Use heavy-duty, tamper-resistant hinges on all doors to prevent them from being easily removed.
8. **Garage Door Defender**: Use a garage door defender, a device that locks into the ground in front of the door, preventing it from being opened.
9. **Smart Locks**: Integrate smart locks with your home security system for remote monitoring and control.
10. **Security Bars**: Install security bars on any windows in the garage to prevent break-ins.
11. **Regular Maintenance**: Regularly inspect and maintain all locks and latches to ensure they are functioning properly.
12. **Lighting and Cameras**: Enhance security with motion-sensor lighting and security cameras to deter potential intruders.
What is the best way to seal my garage door against drafts?
To effectively seal your garage door against drafts, follow these steps:
1. **Inspect and Clean**: Begin by inspecting the garage door for any existing gaps or damage. Clean the door and surrounding areas to ensure proper adhesion of sealing materials.
2. **Weatherstripping**: Install weatherstripping along the sides and top of the garage door. Use a high-quality rubber or vinyl weatherstrip that can withstand temperature changes. Ensure it is tightly fitted to prevent air leaks.
3. **Bottom Seal**: Replace or install a new bottom seal. Choose a U-shaped rubber gasket that fits into the channel at the bottom of the door. This will compress against the floor to block drafts.
4. **Threshold Seal**: Consider adding a threshold seal on the garage floor where the door meets the ground. This creates an additional barrier against drafts, water, and pests.
5. **Insulation**: If your garage door is not insulated, consider adding insulation panels. This not only helps with drafts but also improves energy efficiency. Use foam board or reflective insulation kits designed for garage doors.
6. **Caulking**: Apply caulk around the door frame and any other gaps or cracks in the garage walls. Use a silicone-based caulk for durability and flexibility.
7. **Adjust Door Alignment**: Ensure the garage door is properly aligned and balanced. Misalignment can create gaps that allow drafts. Adjust the tracks and rollers if necessary.
8. **Regular Maintenance**: Regularly check and maintain all seals and insulation. Replace any worn or damaged materials promptly to maintain effectiveness.
By following these steps, you can significantly reduce drafts and improve the comfort and energy efficiency of your garage.
