Call +(254) 703 030 000 / 751 483 999 / 721 704 777
.....Read More
Frequently Asked Questions
What is the purpose of a drill press guard?
The purpose of a drill press guard is to enhance safety and protect the operator from potential hazards associated with the operation of a drill press. It serves several key functions:
1. **Physical Barrier**: The guard acts as a physical barrier between the operator and the rotating parts of the drill press, such as the chuck and drill bit. This helps prevent accidental contact, which could lead to serious injuries like cuts, lacerations, or entanglement.
2. **Debris Containment**: During drilling operations, materials such as metal shavings, wood chips, or other debris can be ejected at high speeds. The guard helps contain these particles, reducing the risk of eye injuries or other harm to the operator and nearby personnel.
3. **Prevention of Clothing Entanglement**: Loose clothing, jewelry, or long hair can easily become entangled in the moving parts of a drill press. The guard minimizes this risk by covering the rotating components, thereby preventing such accidents.
4. **Enhanced Focus**: By providing a clear boundary around the dangerous parts of the machine, the guard helps the operator maintain focus on the task at hand, reducing the likelihood of distractions that could lead to accidents.
5. **Compliance with Safety Regulations**: Many workplace safety standards and regulations require the use of guards on machinery to protect workers. Using a drill press guard ensures compliance with these regulations, helping to avoid legal issues and potential fines.
Overall, the drill press guard is an essential safety feature that contributes to a safer working environment by minimizing the risk of accidents and injuries during the operation of a drill press.
How do drill press guards prevent injuries?
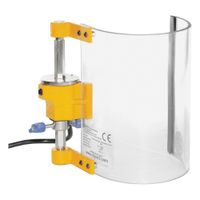
Drill press guards prevent injuries by providing a physical barrier between the operator and the moving parts of the machine, such as the drill bit and chuck. These guards are designed to protect against accidental contact, which can lead to severe injuries like cuts, lacerations, or even amputations. By enclosing the rotating components, the guards minimize the risk of clothing, hair, or body parts being caught in the machine.
Additionally, drill press guards often include transparent materials, such as polycarbonate, allowing operators to maintain visibility of the workpiece and the drilling process while staying protected. This transparency ensures that safety does not compromise operational efficiency or precision.
Some guards are equipped with interlocking systems that prevent the machine from operating unless the guard is in place. This feature ensures that the drill press cannot be used without the necessary safety measures, reducing the likelihood of accidents due to negligence or oversight.
Furthermore, drill press guards help contain debris, such as metal shavings or wood chips, which can be ejected at high speeds during operation. By containing these particles, the guards protect the operator's eyes and skin from potential harm and maintain a cleaner work environment.
Overall, drill press guards are a crucial safety feature that reduces the risk of injury by preventing direct contact with hazardous components, ensuring the machine is only operable when safe, and containing debris generated during the drilling process.
What materials are drill press guards made from?
Drill press guards are typically made from a variety of materials, each chosen for its specific properties to ensure safety, durability, and visibility. Common materials include:
1. **Polycarbonate**: Known for its high impact resistance and clarity, polycarbonate is often used for transparent guards. It allows operators to see the workpiece while providing protection from flying debris and accidental contact with moving parts.
2. **Acrylic**: Similar to polycarbonate, acrylic offers good visibility and moderate impact resistance. It is less expensive but can be more prone to cracking under high stress compared to polycarbonate.
3. **Steel**: Used for more robust and durable guards, steel provides excellent protection against mechanical impacts. It is often used in industrial settings where heavy-duty protection is required. Steel guards may be perforated or have mesh sections to allow visibility and airflow.
4. **Aluminum**: Lighter than steel, aluminum offers a good balance of strength and weight. It is resistant to corrosion and is often used in environments where moisture or chemicals are present.
5. **Mesh or Wire Screen**: Made from steel or aluminum, mesh guards provide a barrier while allowing visibility and ventilation. They are suitable for applications where full transparency is not necessary.
6. **ABS Plastic**: This material is used for its toughness and resistance to impact. It is less transparent than polycarbonate or acrylic but offers good protection and is cost-effective.
These materials are often combined to create guards that offer the best features of each, such as a polycarbonate window set in a steel frame. The choice of material depends on the specific requirements of the application, including the level of protection needed, the environment, and budget considerations.
How do you install a drill press guard?
1. **Safety First**: Ensure the drill press is unplugged to prevent accidental activation during installation.
2. **Gather Tools and Materials**: You will need the drill press guard kit, a screwdriver, a wrench set, and possibly a drill if new holes are required.
3. **Read the Manual**: Review the installation instructions provided with the guard kit to understand specific requirements and components.
4. **Identify Mounting Points**: Locate the pre-drilled holes on the drill press where the guard will be attached. If there are no pre-drilled holes, mark the spots where the guard will be mounted.
5. **Install the Mounting Bracket**: Use the screws and bolts provided to attach the mounting bracket to the drill press. Ensure it is securely fastened and aligned properly.
6. **Attach the Guard**: Position the guard onto the mounting bracket. Secure it using the appropriate screws or bolts. Ensure the guard can move freely if it is adjustable.
7. **Adjust the Guard**: If the guard is adjustable, set it to the desired position to provide maximum protection while allowing for operational efficiency.
8. **Test the Movement**: Manually move the drill press components to ensure the guard does not obstruct any moving parts and that it provides adequate coverage.
9. **Tighten All Fasteners**: Double-check all screws and bolts to ensure they are tight and secure.
10. **Final Safety Check**: Plug in the drill press and perform a test run to ensure the guard functions correctly without interfering with the operation.
11. **Regular Maintenance**: Periodically check the guard for wear and tear and ensure all fasteners remain tight. Adjust as necessary to maintain safety standards.
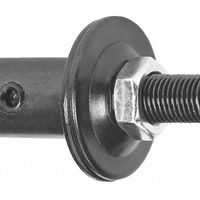
What are the benefits of using a drill press arbor?
A drill press arbor offers several benefits that enhance the functionality and efficiency of a drill press:
1. **Precision and Stability**: The arbor provides a stable connection between the drill press spindle and the tool, ensuring precise alignment. This stability reduces vibrations, leading to more accurate drilling and a smoother finish on the workpiece.
2. **Versatility**: Arbors allow for the use of various attachments and tools, such as drill chucks, reamers, and hole saws. This versatility enables the drill press to perform a wide range of tasks beyond simple drilling, such as boring and countersinking.
3. **Ease of Tool Change**: With a drill press arbor, changing tools is quick and straightforward. Many arbors use a taper fit, such as Morse taper, which allows for easy insertion and removal of tools without the need for additional tools or complex procedures.
4. **Increased Torque**: The design of the arbor can enhance the torque applied to the tool, making it easier to drill through tougher materials. This increased torque is particularly beneficial when working with hard metals or dense woods.
5. **Durability**: Arbors are typically made from high-quality materials, such as hardened steel, which ensures longevity and resistance to wear and tear. This durability means less frequent replacements and maintenance, saving time and costs.
6. **Safety**: By securely holding the tool in place, the arbor minimizes the risk of the tool slipping or coming loose during operation, enhancing user safety.
7. **Improved Workflow**: The efficiency and ease of use provided by a drill press arbor contribute to a smoother workflow, reducing downtime and increasing productivity in both professional and hobbyist settings.
How do you replace a drill press arbor?
1. **Safety First**: Disconnect the drill press from the power source to ensure safety.
2. **Remove the Chuck**:
- Lower the quill to access the chuck.
- Use a chuck key to open the jaws fully.
- Insert a drift key or wedge into the slot above the chuck and tap gently with a mallet to release the chuck from the arbor.
3. **Remove the Old Arbor**:
- Locate the quill's access slot or opening.
- Insert a drift key or wedge into the slot and tap gently with a mallet to dislodge the arbor from the spindle.
4. **Select the New Arbor**:
- Ensure the new arbor is compatible with both the drill press spindle and the chuck.
5. **Install the New Arbor**:
- Clean the spindle and the new arbor to remove any debris or oil.
- Insert the new arbor into the spindle, aligning it properly.
- Tap gently with a mallet to seat it securely.
6. **Reattach the Chuck**:
- Clean the taper of the new arbor and the chuck.
- Align the chuck with the arbor and press it into place.
- Use a mallet to tap the chuck gently, ensuring it is seated firmly on the arbor.
7. **Test the Setup**:
- Reconnect the drill press to the power source.
- Run the drill press at a low speed to ensure the chuck and arbor are properly aligned and secure.
8. **Final Check**:
- Verify that the chuck is holding drill bits securely and that there is no wobble during operation.
Always refer to the drill press manual for specific instructions related to your model.
What are the different types of drill press arbors available?
The different types of drill press arbors available include:
1. **Morse Taper Arbors**: These are the most common type used in drill presses. They have a tapered shank that fits into the spindle of the drill press and a tapered socket to hold the drill chuck or other tool. They are available in various sizes, typically ranging from MT1 to MT5, depending on the size and capacity of the drill press.
2. **Jacobs Taper Arbors**: These are used to mount drill chucks with a Jacobs taper onto a drill press spindle. The Jacobs taper is a short, self-holding taper that provides a secure fit for the chuck. Common sizes include JT1, JT2, JT3, etc.
3. **Straight Shank Arbors**: These have a straight cylindrical shank that fits into the drill press spindle. They are often used for lighter-duty applications and are available in various diameters to match the spindle size.
4. **R8 Arbors**: Commonly used in milling machines, R8 arbors can also be used in drill presses that have an R8 spindle. They provide a secure and precise fit for various tooling applications.
5. **B16/B18 Arbors**: These are European standard tapers used for mounting drill chucks. They are similar to Jacobs tapers but follow different sizing standards.
6. **Threaded Arbors**: These have a threaded end that screws into the drill chuck or other tool. They are less common but can be used for specific applications where a threaded connection is preferred.
7. **Keyless Arbors**: Designed for use with keyless chucks, these arbors allow for quick and easy tool changes without the need for a chuck key.
Each type of arbor is designed for specific applications and compatibility with different drill press models and tooling requirements.