Call +(254) 703 030 000 / 751 483 999 / 721 704 777
.....Read More
Frequently Asked Questions
What is the purpose of a machine vise?
A machine vise is a mechanical device used to secure an object firmly in place while machining operations are performed on it. Its primary purpose is to hold workpieces steady, ensuring precision and safety during processes such as drilling, milling, grinding, or shaping. By providing a stable platform, a machine vise minimizes vibrations and movement, which can lead to inaccuracies or defects in the finished product.
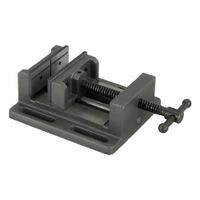
Machine vises are typically mounted on machine tools like drill presses or milling machines. They consist of a fixed jaw and a movable jaw, which can be adjusted to accommodate different sizes of workpieces. The jaws are often lined with hardened steel or other materials to prevent damage to the workpiece and to enhance grip.
The design of a machine vise allows for quick and easy adjustments, enabling operators to change workpieces efficiently, thus improving productivity. Some vises come with swivel bases, allowing for angular adjustments, which is particularly useful for complex machining tasks that require precise angles.
In addition to holding workpieces securely, machine vises also contribute to operator safety. By keeping the workpiece stable, they reduce the risk of accidents caused by slipping or shifting materials. This stability is crucial when working with high-speed machinery, where even minor movements can lead to significant hazards.
Overall, the purpose of a machine vise is to enhance the accuracy, efficiency, and safety of machining operations, making it an indispensable tool in manufacturing and metalworking environments.
How do you mount a machine vise to a worktable?
1. **Select Location**: Choose a stable, flat area on the worktable where the vise will not interfere with other tools or operations. Ensure there is enough space around the vise for the workpiece and for you to operate comfortably.
2. **Mark Holes**: Place the vise on the selected spot. Use a pencil or marker to outline the base of the vise and mark the positions of the mounting holes on the worktable.
3. **Drill Holes**: Use a drill with a bit that matches the size of the bolts you will use. Drill holes through the worktable at the marked positions. Ensure the holes are straight and clean.
4. **Align Vise**: Position the vise over the drilled holes. Align the mounting holes of the vise with the drilled holes on the worktable.
5. **Insert Bolts**: Insert bolts through the mounting holes of the vise and into the drilled holes on the worktable. Use bolts that are long enough to pass through the vise and the table, with enough length to secure with nuts underneath.
6. **Secure with Nuts**: From underneath the worktable, place washers and nuts onto the protruding ends of the bolts. Use a wrench to tighten the nuts securely, ensuring the vise is firmly attached to the table.
7. **Check Stability**: Once mounted, check the stability of the vise. Ensure it does not wobble or shift. Tighten the bolts further if necessary.
8. **Test Operation**: Open and close the vise jaws to ensure smooth operation. Make any necessary adjustments to the alignment or tightness of the bolts.
9. **Final Inspection**: Inspect the entire setup to ensure safety and functionality before use.
What are the differences between drill press vises and milling machine vises?
Drill press vises and milling machine vises are both used to secure workpieces, but they differ in design, precision, and application.
1. **Design and Construction**:
- **Drill Press Vises**: Typically simpler in design, they are constructed to hold workpieces steady during drilling operations. They often have a flat base and jaws that open and close via a screw mechanism. They are generally lighter and made from materials like cast iron or steel.
- **Milling Machine Vises**: More robust and complex, these vises are designed to withstand the lateral forces of milling operations. They often feature a swivel base for angular adjustments and are made from high-strength materials to ensure stability and precision.
2. **Precision and Accuracy**:
- **Drill Press Vises**: Offer basic clamping with moderate precision, suitable for less demanding tasks. They are not designed for high precision as the primary force is vertical.
- **Milling Machine Vises**: Provide high precision and accuracy, essential for milling operations where lateral forces are significant. They often include features like precision-ground surfaces and adjustable gibs for maintaining alignment.
3. **Application**:
- **Drill Press Vises**: Used primarily for drilling operations where the main force is vertical. They are suitable for tasks that do not require high precision or complex positioning.
- **Milling Machine Vises**: Used in milling, shaping, and other machining operations that require precise positioning and the ability to withstand lateral forces. They are essential for tasks that demand high accuracy and repeatability.
4. **Cost**:
- **Drill Press Vises**: Generally less expensive due to their simpler design and construction.
- **Milling Machine Vises**: More costly, reflecting their precision engineering and robust construction.
In summary, drill press vises are simpler and suited for vertical drilling, while milling machine vises are more complex, precise, and designed for lateral machining forces.
How do you adjust the jaws on a machine vise?
1. **Safety First**: Ensure the machine is turned off and unplugged. Wear appropriate safety gear, such as gloves and safety glasses.
2. **Loosen the Locking Mechanism**: Most vises have a locking mechanism, such as a screw or lever, that holds the jaws in place. Loosen this mechanism to allow the jaws to move freely.
3. **Open the Jaws**: Turn the handle or lead screw counterclockwise to open the jaws to the desired width. Ensure there is enough space to accommodate the workpiece.
4. **Position the Workpiece**: Place the workpiece between the jaws. Ensure it is aligned properly and positioned for the task at hand.
5. **Adjust the Jaws**: Turn the handle or lead screw clockwise to close the jaws around the workpiece. Apply even pressure to ensure the workpiece is held securely.
6. **Check Alignment**: Ensure the workpiece is level and aligned correctly. Adjust as necessary by slightly loosening the jaws and repositioning the workpiece.
7. **Tighten the Locking Mechanism**: Once the workpiece is securely in place, tighten the locking mechanism to prevent the jaws from moving during operation.
8. **Test the Setup**: Gently attempt to move the workpiece to ensure it is held firmly. If it moves, readjust the jaws and locking mechanism.
9. **Final Safety Check**: Ensure all tools and hands are clear of the vise before starting the machine. Double-check that the workpiece is secure.
10. **Begin Operation**: Once everything is secure and aligned, proceed with the machining operation.
Always refer to the machine's manual for specific instructions and safety guidelines.
What factors determine the size of workpieces a vise can hold?
The size of workpieces a vise can hold is determined by several key factors:
1. **Jaw Width**: This is the horizontal measurement across the vise jaws. Wider jaws provide a larger surface area for gripping, allowing the vise to hold larger workpieces securely.
2. **Jaw Opening**: This refers to the maximum distance the jaws can open. A larger jaw opening allows the vise to accommodate wider workpieces. This is a critical factor in determining the maximum size of the workpiece that can be clamped.
3. **Throat Depth**: This is the vertical distance from the top of the jaws to the top of the slide below. A deeper throat allows the vise to hold taller workpieces more securely, as it provides more contact area.
4. **Jaw Design**: The design and texture of the jaws, such as serrated or smooth, can affect the grip on different materials. Some vises have replaceable or adjustable jaws to accommodate various shapes and sizes.
5. **Vise Type**: Different types of vises, such as bench vises, pipe vises, or machine vises, are designed for specific applications and workpiece sizes. The type of vise influences its capacity and suitability for certain tasks.
6. **Material and Construction**: The material and build quality of the vise determine its strength and durability. A robust construction allows the vise to handle larger and heavier workpieces without deforming or breaking.
7. **Mounting Method**: How the vise is mounted (e.g., bolted to a workbench) can affect its stability and the size of workpieces it can handle. A securely mounted vise can support larger workpieces.
8. **Additional Features**: Some vises come with features like swivel bases or quick-release mechanisms, which can enhance their versatility and capacity to hold various workpiece sizes.
These factors collectively determine the maximum size and type of workpieces a vise can effectively hold.
How do you ensure precision when using a toolmaker vise?
To ensure precision when using a toolmaker vise, follow these steps:
1. **Surface Preparation**: Ensure the workbench or machine table is clean and flat. Any debris or unevenness can affect the vise's alignment.
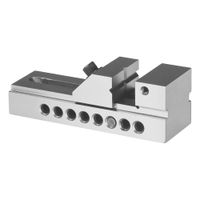
2. **Vise Inspection**: Check the vise for any wear or damage. Ensure the jaws are parallel and the base is flat. Clean the vise thoroughly to remove any dirt or metal shavings.
3. **Alignment**: Use a dial indicator to check the alignment of the vise with the machine table. Adjust the vise until it is perfectly aligned. This ensures that the workpiece is held parallel to the machine's axis.
4. **Clamping**: Secure the vise to the machine table using appropriate clamps or bolts. Ensure that the vise is tightly secured to prevent any movement during machining.
5. **Jaw Parallelism**: Verify that the jaws are parallel by using a feeler gauge or a test indicator. Adjust if necessary to ensure that the workpiece is held evenly.
6. **Workpiece Positioning**: Place the workpiece in the vise and use parallels or spacers to ensure it is level and properly supported. This prevents deflection and ensures consistent machining.
7. **Tightening**: Tighten the vise evenly to avoid distorting the workpiece. Use a torque wrench if necessary to apply consistent pressure.
8. **Re-check Alignment**: After securing the workpiece, re-check the alignment with a dial indicator to ensure nothing has shifted during clamping.
9. **Machining**: Proceed with machining, monitoring the process to ensure the workpiece remains secure and aligned.
10. **Regular Maintenance**: Regularly maintain the vise by cleaning and lubricating moving parts to ensure smooth operation and longevity.
By following these steps, precision can be maintained, ensuring accurate and consistent results in machining operations.
What materials are machine vises typically made from?
Machine vises are typically made from materials that provide strength, durability, and precision. The most common materials include:
1. **Cast Iron**: This is the most prevalent material used for machine vises due to its excellent compressive strength and stability. Cast iron vises are robust and can withstand significant pressure and wear, making them ideal for heavy-duty applications.
2. **Ductile Iron**: An alternative to cast iron, ductile iron offers improved tensile strength and impact resistance. It combines the strength of cast iron with added flexibility, making it suitable for applications requiring more resilience.
3. **Steel**: Some machine vises are made from steel, particularly tool steel, which provides high strength and wear resistance. Steel vises are often used in precision applications where accuracy and durability are critical.
4. **Aluminum**: For lighter-duty applications, aluminum vises are used. They are lightweight and resistant to corrosion, making them suitable for environments where weight is a concern or where the vise may be exposed to moisture.
5. **Plastic and Composite Materials**: In some cases, vises are made from high-strength plastics or composite materials. These are typically used in applications where metal could damage the workpiece or where electrical conductivity needs to be minimized.
6. **Bronze and Brass**: These materials are less common but are used in specific applications where non-sparking or non-magnetic properties are required.
Each material offers distinct advantages depending on the application, such as resistance to wear, ability to absorb vibrations, or resistance to corrosion. The choice of material is influenced by the intended use, the environment in which the vise will operate, and the specific requirements of the machining process.


