Call +(254) 703 030 000 / 751 483 999 / 721 704 777
.....Read More
Frequently Asked Questions
What is the difference between a live center and a dead center?
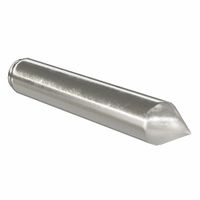
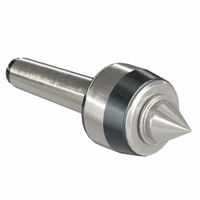
A live center and a dead center are both used in machining to support the free end of a workpiece in a lathe. The primary difference between the two lies in their construction and functionality.
A live center has a bearing assembly that allows the center to rotate with the workpiece. This rotation reduces friction and heat generation, making it suitable for high-speed operations. Live centers are typically used in applications where precision and surface finish are critical, as the rotating action minimizes wear on both the center and the workpiece. They are ideal for long production runs and can handle higher loads due to their design.
In contrast, a dead center is fixed and does not rotate with the workpiece. It is usually made from hardened steel and is used in applications where the workpiece is not rotating at high speeds. The dead center relies on lubrication to reduce friction between the center and the workpiece. It is more suitable for low-speed operations or when the workpiece material is soft. Dead centers are simpler and less expensive than live centers but require more maintenance due to the increased friction and wear.
In summary, the key difference is that a live center rotates with the workpiece, reducing friction and heat, while a dead center remains stationary, relying on lubrication to minimize wear. Live centers are preferred for high-speed, precision applications, whereas dead centers are used for simpler, low-speed tasks.
How do you choose the right lathe chuck for a specific application?
To choose the right lathe chuck for a specific application, consider the following factors:
1. **Workpiece Size and Shape**: Determine the size and shape of the workpiece. For round workpieces, a 3-jaw chuck is suitable, while irregular shapes may require a 4-jaw independent chuck for better grip and flexibility.
2. **Material**: Consider the material of the workpiece. Softer materials may require a chuck with softer jaws to prevent damage, while harder materials need a robust chuck.
3. **Precision and Tolerance**: For high precision and tight tolerances, a collet chuck is ideal as it offers superior concentricity and grip.
4. **Type of Operation**: Identify the type of operation (e.g., turning, facing, drilling). Quick-change chucks are beneficial for operations requiring frequent tool changes.
5. **Spindle Size and Mounting**: Ensure the chuck is compatible with the lathe’s spindle size and mounting system (e.g., threaded, cam-lock, or tapered).
6. **Jaw Configuration**: Decide between self-centering chucks for quick setup or independent chucks for more control over each jaw.
7. **Load Capacity**: Check the chuck’s load capacity to ensure it can handle the weight and force of the workpiece during machining.
8. **Speed and Torque Requirements**: Match the chuck to the lathe’s speed and torque capabilities to ensure safe and efficient operation.
9. **Budget and Quality**: Balance cost with quality. Investing in a high-quality chuck can improve performance and longevity.
10. **Safety Features**: Look for chucks with safety features like anti-ejection mechanisms to prevent accidents.
By evaluating these factors, you can select a lathe chuck that meets the specific needs of your application, ensuring efficiency, precision, and safety in your machining operations.
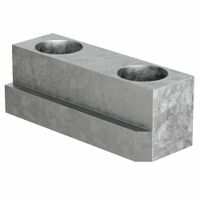
What are the types of lathe chucks available?
Lathe chucks are essential components used to hold workpieces securely during machining operations. The main types of lathe chucks include:
1. **Three-Jaw Chuck (Self-Centering Chuck):** This is the most common type, featuring three jaws that move simultaneously when adjusted. It is ideal for holding round or hexagonal workpieces and is known for its ease of use and quick setup.
2. **Four-Jaw Chuck (Independent Chuck):** Each of the four jaws can be adjusted independently, allowing for precise centering of irregularly shaped workpieces. It is versatile and can hold square, rectangular, or asymmetrical objects.
3. **Combination Chuck:** This chuck combines features of both three-jaw and four-jaw chucks. It can operate as a self-centering chuck or allow independent jaw movement, providing flexibility for various tasks.
4. **Collet Chuck:** Collet chucks use collets to hold workpieces. They provide excellent concentricity and are ideal for small, precision parts. Collets are available in various sizes to accommodate different diameters.
5. **Magnetic Chuck:** Utilized for holding ferromagnetic workpieces, magnetic chucks use magnetic force to secure the material. They are often used in grinding operations and allow for quick setup and removal.
6. **Air or Hydraulic Chuck:** These chucks use pneumatic or hydraulic pressure to operate the jaws. They are suitable for high-volume production environments where speed and repeatability are crucial.
7. **Faceplate:** While not a chuck in the traditional sense, a faceplate is used to mount irregularly shaped workpieces that cannot be held by standard chucks. Workpieces are secured using clamps or bolts.
8. **Drill Chuck:** Typically used in tailstocks, drill chucks hold drill bits or other cylindrical tools. They are not designed for heavy-duty workholding but are essential for drilling operations.
Each type of chuck has its specific applications, advantages, and limitations, making the selection dependent on the workpiece shape, size, and machining requirements.
How do you maintain and care for lathe centers and chucks?
To maintain and care for lathe centers and chucks, follow these steps:
1. **Regular Cleaning**: After each use, clean the centers and chucks thoroughly to remove metal shavings, dust, and debris. Use a brush and compressed air to reach tight spaces.
2. **Lubrication**: Apply a light coat of machine oil to prevent rust and ensure smooth operation. Focus on moving parts and contact surfaces.
3. **Inspection**: Regularly inspect for wear, damage, or misalignment. Check for burrs or nicks on the centers and ensure the chuck jaws are not worn unevenly.
4. **Alignment**: Ensure the centers are properly aligned to avoid inaccuracies in machining. Use a dial indicator to check alignment and make necessary adjustments.
5. **Tightening**: Avoid over-tightening the chuck jaws, which can cause damage. Use the appropriate torque and ensure even pressure distribution.
6. **Storage**: Store centers and chucks in a dry, clean environment. Use protective covers or cases to prevent dust accumulation and physical damage.
7. **Rust Prevention**: Use rust inhibitors or desiccants in storage areas to protect against moisture. Regularly check for signs of rust and address immediately.
8. **Calibration**: Periodically calibrate the centers and chucks to maintain precision. Use precision measuring tools to verify accuracy.
9. **Replacement**: Replace worn or damaged parts promptly to maintain performance and safety. Keep spare parts on hand for quick replacements.
10. **Training**: Ensure operators are trained in proper handling and maintenance procedures to prevent misuse and extend the lifespan of the equipment.
By following these steps, you can ensure the longevity and optimal performance of lathe centers and chucks.
What are the common materials used for lathe jaws?
Common materials used for lathe jaws include:
1. **Steel**: Often used for its strength and durability, steel is a popular choice for lathe jaws. It can withstand high pressure and is suitable for heavy-duty applications. Hardened steel is particularly common for its wear resistance.
2. **Cast Iron**: Known for its excellent vibration damping properties, cast iron is used in lathe jaws to provide stability during machining. It is less prone to deformation under stress compared to other materials.
3. **Aluminum**: Lightweight and corrosion-resistant, aluminum is used for lathe jaws when working with softer materials or when weight is a concern. It is not as strong as steel or cast iron but is easier to machine.
4. **Brass**: Used for its non-marring properties, brass is ideal for applications where the workpiece surface must remain unblemished. It is softer than steel and is often used for delicate or precision work.
5. **Nylon and Other Plastics**: These materials are used for soft jaws, which are designed to prevent damage to delicate workpieces. They are suitable for light-duty applications and provide a good grip without marring the surface.
6. **Copper**: Similar to brass, copper is used for its non-marring characteristics. It is softer and provides a good grip on delicate materials without causing damage.
7. **Carbide**: Used in specialized applications, carbide-tipped jaws offer extreme hardness and wear resistance. They are suitable for high-precision work and can handle abrasive materials.
Each material offers distinct advantages depending on the specific requirements of the machining task, such as the type of material being worked on, the precision needed, and the durability required.
How do you properly align a workpiece between the headstock and tailstock?
To properly align a workpiece between the headstock and tailstock, follow these steps:
1. **Select the Right Centers**: Use appropriate centers for both the headstock and tailstock. A live center is typically used in the tailstock to reduce friction, while a drive center or chuck is used in the headstock.
2. **Prepare the Workpiece**: Ensure the workpiece has center holes drilled at both ends. These should be accurately centered and of the correct size to fit the centers.
3. **Mount the Workpiece**: Insert the workpiece between the centers. Ensure the headstock center is securely engaged with the workpiece. Adjust the tailstock to bring the live center into contact with the workpiece, applying enough pressure to hold it firmly without causing deflection.
4. **Align the Tailstock**: Check the alignment of the tailstock. It should be directly in line with the headstock spindle. Use the tailstock adjustment screws to correct any misalignment.
5. **Check for Runout**: Rotate the workpiece by hand to check for runout. If the workpiece wobbles, it indicates misalignment. Adjust the tailstock or reposition the workpiece as necessary.
6. **Secure the Tailstock**: Once aligned, lock the tailstock in place using its clamping mechanism. Ensure it is firmly secured to prevent movement during machining.
7. **Test Alignment**: Perform a test cut or use a dial indicator to check the alignment. The indicator should show minimal deviation as the workpiece rotates.
8. **Final Adjustments**: Make any final adjustments to the tailstock or workpiece position to achieve perfect alignment.
By following these steps, you ensure the workpiece is properly aligned, reducing the risk of inaccuracies and improving the quality of the machining process.
What are the safety precautions when using lathe centers and chucks?
1. **Personal Protective Equipment (PPE):** Always wear safety goggles or a face shield to protect against flying debris. Use hearing protection if the noise level is high. Wear snug-fitting clothing and avoid jewelry or loose items that could get caught.
2. **Machine Inspection:** Before use, inspect the lathe for any damage or wear. Ensure that all guards and safety devices are in place and functioning properly.
3. **Workpiece Security:** Ensure the workpiece is securely fastened in the chuck or between centers. Use the appropriate size and type of chuck or center for the workpiece.
4. **Tool Setup:** Use the correct tool for the job and ensure it is sharp and properly mounted. Adjust tool rest to the correct height and distance from the workpiece.
5. **Speed and Feed Rates:** Set the correct speed and feed rates for the material and operation. Avoid excessive speeds that could cause the workpiece to become unstable.
6. **Clear Work Area:** Keep the area around the lathe clean and free of obstructions. Remove any tools or materials that are not in use.
7. **Emergency Stops:** Familiarize yourself with the location and operation of emergency stop controls.
8. **Operational Awareness:** Never leave the lathe running unattended. Stay focused and avoid distractions while operating the machine.
9. **Chuck Key Safety:** Never leave the chuck key in the chuck. Always remove it immediately after use to prevent accidental starting.
10. **Use of Centers:** When using centers, ensure they are properly aligned and lubricated to prevent overheating and damage.
11. **Regular Maintenance:** Perform regular maintenance checks and follow the manufacturer's guidelines for lubrication and part replacement.
12. **Training and Supervision:** Ensure operators are properly trained and supervised, especially if they are inexperienced with lathe operations.