Call +(254) 703 030 000 / 751 483 999 / 721 704 777
.....Read More
Frequently Asked Questions
What are the different types of audio-video cables and connectors?
Audio-video cables and connectors are essential for transmitting sound and visual signals between devices. Here are the main types:
1. **HDMI (High-Definition Multimedia Interface):** Transmits both high-definition video and audio. Common in TVs, monitors, and gaming consoles.
2. **DisplayPort:** Similar to HDMI, used for video and audio, often found in computer monitors and graphics cards.
3. **DVI (Digital Visual Interface):** Primarily for video, used in older monitors and computers. Comes in DVI-D (digital), DVI-A (analog), and DVI-I (integrated).
4. **VGA (Video Graphics Array):** Analog video connector, used in older computers and monitors.
5. **RCA Connectors:** Comprises three cables: yellow for video, red and white for audio. Common in older TVs and DVD players.
6. **Component Video:** Uses three RCA cables (red, green, blue) for video, providing better quality than composite RCA.
7. **S-Video (Separate Video):** Transmits video using two separate signals for color and brightness, better than composite but less than component.
8. **Optical (TOSLINK):** Transmits digital audio using light, common in home theater systems.
9. **Coaxial Digital Audio:** Uses RCA connectors for digital audio, often found in home audio systems.
10. **3.5mm Audio Jack:** Standard for headphones and portable audio devices, transmits analog audio.
11. **XLR Connectors:** Used in professional audio equipment for balanced audio signals, reducing noise.
12. **USB (Universal Serial Bus):** Transfers digital audio and video, common in webcams and microphones.
13. **Thunderbolt:** High-speed interface for video, audio, and data, used in Apple devices and high-end peripherals.
14. **Ethernet (Cat5e/Cat6):** Used for networked audio-video systems, especially in professional settings.
These connectors vary in quality, compatibility, and application, catering to different audio-video needs.
How do I connect my TV to a sound system using audio-video cables?
1. **Identify Audio Outputs on TV**: Locate the audio output ports on your TV. These could be RCA (red and white), optical (TOSLINK), or HDMI ARC (Audio Return Channel).
2. **Identify Audio Inputs on Sound System**: Check the available audio input ports on your sound system. These might include RCA, optical, HDMI ARC, or a 3.5mm auxiliary input.
3. **Select Appropriate Cables**:
- **RCA Cables**: Use if both TV and sound system have RCA ports. Connect the red and white cables from the TV’s audio output to the corresponding inputs on the sound system.
- **Optical Cable**: Use if both devices have optical ports. Connect the optical cable from the TV’s optical output to the sound system’s optical input.
- **HDMI ARC**: Use if both devices support HDMI ARC. Connect an HDMI cable from the TV’s HDMI ARC port to the sound system’s HDMI ARC port.
- **3.5mm Auxiliary Cable**: Use if the TV has a headphone jack and the sound system has a 3.5mm input. Connect the cable from the TV’s headphone jack to the sound system’s input.
4. **Configure TV Audio Settings**: Access the TV’s audio settings menu. Select the appropriate audio output option (e.g., external speakers, optical, HDMI ARC) to ensure the sound is directed to the sound system.
5. **Configure Sound System Settings**: Set the sound system to the correct input source (e.g., AUX, optical, HDMI) to receive audio from the TV.
6. **Test the Connection**: Play audio or video content on the TV to test the connection. Adjust the volume on both the TV and sound system as needed.
7. **Troubleshoot if Necessary**: If there’s no sound, recheck connections, ensure cables are securely plugged in, and verify settings on both devices.
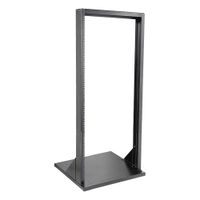
What is the best way to organize and store audio-video equipment?
To effectively organize and store audio-video equipment, follow these steps:
1. **Categorize Equipment**: Group items by type (e.g., cameras, microphones, cables) or by function (e.g., recording, playback).
2. **Use Shelving Units**: Install sturdy shelves to store larger items like speakers and amplifiers. Adjustable shelves offer flexibility for different equipment sizes.
3. **Label Everything**: Use clear labels for shelves, bins, and cables. This makes it easy to find and return items to their designated spots.
4. **Cable Management**: Use cable ties, Velcro straps, or cable organizers to prevent tangling. Label each cable with its function or destination.
5. **Protective Cases**: Store delicate equipment like cameras and lenses in padded cases. Hard cases with foam inserts offer maximum protection during transport.
6. **Drawer Systems**: Use drawers for smaller items like adapters, batteries, and memory cards. Dividers can help keep these items organized.
7. **Wall Mounts and Hooks**: Utilize wall space for hanging items like headphones, cables, or smaller speakers. Pegboards can be customized for various tools and accessories.
8. **Climate Control**: Ensure the storage area is dry and temperature-controlled to prevent damage from humidity and extreme temperatures.
9. **Inventory System**: Maintain a digital or physical inventory list to track equipment, noting serial numbers and condition. This aids in managing loans and maintenance schedules.
10. **Regular Maintenance**: Schedule regular checks to clean and test equipment, ensuring everything is in working order and stored correctly.
11. **Secure Storage**: Use lockable cabinets or rooms for valuable equipment to prevent theft.
By implementing these strategies, you can maintain an organized, efficient, and safe storage system for your audio-video equipment.
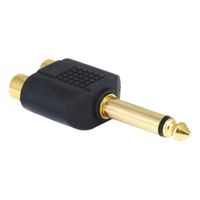
How do audio-video splitters and adapters work?
Audio-video splitters and adapters are devices used to manage and distribute audio and video signals between different devices.
Audio-video splitters take a single input signal and duplicate it to multiple outputs. For example, an HDMI splitter receives an HDMI signal from a source like a Blu-ray player and sends identical signals to multiple displays. This is achieved through electronic circuitry that replicates the input signal without degrading its quality. Splitters can be passive, relying on the input signal's strength, or active, using external power to amplify the signal for longer distances or multiple outputs.
Adapters, on the other hand, convert signals from one format to another. They are essential when connecting devices with different interfaces. For instance, a VGA to HDMI adapter converts an analog VGA signal to a digital HDMI signal, allowing older computers to connect to modern displays. This conversion often requires processing to ensure compatibility, such as converting analog signals to digital or adjusting resolution and aspect ratio.
Both splitters and adapters may include additional features like signal amplification, resolution scaling, or audio extraction, depending on the complexity of the conversion or distribution required. They are crucial in home theaters, conference rooms, and any setup requiring multiple displays or mixed device connections.
What is the purpose of an audio-video scaler or converter?
An audio-video scaler or converter is a device designed to modify the resolution and format of audio and video signals to ensure compatibility between different devices and display systems. Its primary purpose is to bridge the gap between various audio-video standards and technologies, allowing seamless integration and optimal performance across diverse equipment.
1. **Resolution Scaling**: Scalers adjust the resolution of video signals to match the native resolution of the display device. For instance, they can upscale a 720p signal to 1080p or 4K, or downscale a 4K signal to 1080p, ensuring the best possible image quality on the target display.
2. **Format Conversion**: Converters change the format of audio and video signals to be compatible with different input and output interfaces. This includes converting analog signals to digital (e.g., VGA to HDMI) or vice versa, and adapting between different digital formats (e.g., HDMI to DisplayPort).
3. **Signal Processing**: These devices often include features like deinterlacing, noise reduction, and color correction to enhance the quality of the output signal. This processing ensures that the video and audio are clear and free from artifacts.
4. **Audio Management**: Audio-video scalers can also handle audio signal conversion, such as converting digital audio to analog or embedding audio into a video signal. This ensures that audio and video remain synchronized and compatible with the playback system.
5. **Compatibility and Connectivity**: By supporting a wide range of input and output connections, scalers and converters enable older devices to connect with modern systems, extending the usability of legacy equipment.
Overall, audio-video scalers and converters are essential for achieving high-quality, compatible, and synchronized audio-visual experiences across different devices and media formats.
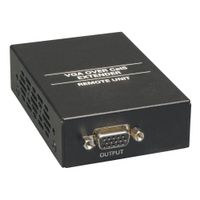
How can I extend the range of my audio-video signal?
To extend the range of your audio-video signal, consider the following methods:
1. **Use Signal Boosters/Repeaters**: These devices amplify the signal, allowing it to travel further without degradation. Place them strategically between the source and the destination.
2. **Upgrade to Higher Quality Cables**: Use high-quality HDMI or coaxial cables with better shielding to reduce signal loss over long distances.
3. **Employ Wireless Extenders**: Wireless HDMI extenders can transmit signals over long distances without the need for cables. Ensure they support the required resolution and have a strong enough signal for your environment.
4. **Opt for Fiber Optic Cables**: Fiber optic cables can carry signals over much longer distances than traditional copper cables with minimal loss. They are ideal for high-definition signals.
5. **Use Ethernet Extenders**: Convert HDMI signals to Ethernet using HDMI over Ethernet extenders. This method can extend the range significantly using Cat5e/6 cables.
6. **Leverage Powerline Adapters**: These use your home’s electrical wiring to transmit signals, effectively extending the range without additional cabling.
7. **Install a Distribution Amplifier**: This device splits the signal to multiple outputs while maintaining signal strength, useful for sending signals to multiple locations.
8. **Adjust Antenna Position**: For wireless signals, ensure antennas are optimally positioned to maximize range and reduce interference.
9. **Reduce Interference**: Minimize obstacles and electronic interference between the transmitter and receiver. Use devices that operate on different frequencies to avoid overlap.
10. **Upgrade Equipment**: Use modern equipment that supports longer ranges and higher resolutions, such as HDMI 2.1 or newer wireless standards.
By implementing these strategies, you can effectively extend the range of your audio-video signal to meet your needs.
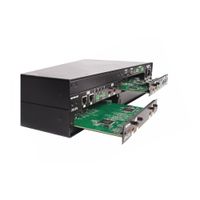
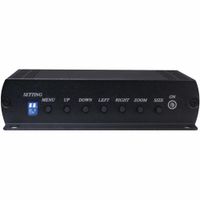
What are the benefits of using audio-video modular switches and extenders?
Audio-video modular switches and extenders offer several benefits:
1. **Scalability**: Modular systems allow for easy expansion. Users can add or remove modules as needed, accommodating future growth without overhauling the entire system.
2. **Flexibility**: These systems support various signal types (HDMI, DVI, VGA, etc.) and can be customized to meet specific needs, making them suitable for diverse environments like conference rooms, educational institutions, and control centers.
3. **Improved Signal Quality**: Extenders maintain high-quality audio and video signals over long distances, reducing degradation and ensuring clear, crisp output.
4. **Centralized Control**: Modular switches enable centralized management of multiple AV sources and displays, simplifying operations and reducing the need for multiple remote controls or manual switching.
5. **Cost-Effectiveness**: By allowing for incremental upgrades and reducing the need for multiple standalone devices, these systems can be more cost-effective in the long run.
6. **Reduced Cable Clutter**: By centralizing connections, these systems minimize the number of cables required, leading to a cleaner, more organized setup.
7. **Enhanced Reliability**: High-quality components and design reduce the risk of failure, ensuring consistent performance and minimizing downtime.
8. **Ease of Installation and Maintenance**: Modular designs simplify installation and maintenance, as individual modules can be easily replaced or upgraded without affecting the entire system.
9. **Versatility**: They can be used in various applications, from simple home theater setups to complex commercial installations, providing a versatile solution for different AV needs.
10. **Future-Proofing**: With the ability to integrate new technologies and standards as they emerge, modular systems help protect investments against obsolescence.