Call +(254) 703 030 000 / 751 483 999 / 721 704 777
.....Read More
Frequently Asked Questions
What are the best cable organizers for tight spaces?
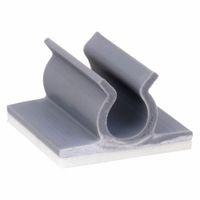
1. **Cable Clips**: These small, adhesive-backed clips can be attached to walls, desks, or any flat surface. They hold individual cables in place, preventing tangling and keeping them out of sight.
2. **Cable Sleeves**: Made from flexible materials like neoprene, cable sleeves bundle multiple cables together. They can be cut to size and are ideal for organizing cables behind entertainment centers or under desks.
3. **Cable Ties**: Velcro or reusable cable ties are perfect for bundling cables together. They are adjustable and can be easily opened and closed, making them a versatile option for managing cables in tight spaces.
4. **Cable Management Boxes**: These boxes hide power strips and excess cable lengths, keeping them out of sight. They are especially useful for organizing cables on the floor or under desks.
5. **Under-Desk Cable Trays**: Mounted under desks, these trays hold power strips and excess cables, keeping them off the floor and out of sight. They are ideal for maintaining a clean workspace.
6. **Cable Management Sleeves with Zippers**: These sleeves zip up to enclose multiple cables, providing a neat and tidy appearance. They are flexible and can be easily adjusted to fit different cable lengths.
7. **Cord Concealers**: These are flat, adhesive-backed channels that stick to walls or baseboards, hiding cables running along them. They can be painted to match the wall color, making them nearly invisible.
8. **Magnetic Cable Organizers**: These use magnets to hold cables in place on a metal surface. They are easy to reposition and ideal for frequently used cables.
9. **Cable Management Boxes with Compartments**: These boxes have separate compartments for different cables, making it easy to organize and access them without tangling.
10. **Cable Spiral Wraps**: These wraps coil around multiple cables, keeping them together and protected. They are flexible and can be cut to the desired length.
How do cable J-hooks differ from cable hangers?
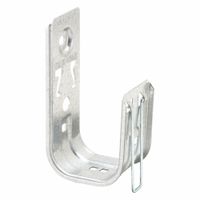
Cable J-hooks and cable hangers are both used for supporting and organizing cables, but they differ in design, application, and installation.
Cable J-hooks are typically J-shaped metal or plastic hooks that provide a simple and flexible solution for cable management. They are often used in environments where cables need to be supported along a path but not tightly secured. J-hooks allow for easy installation and reconfiguration, as cables can be added or removed without the need to unfasten the hook. They are ideal for low-voltage cabling, such as data and communication cables, and are often used in commercial and industrial settings. J-hooks can be mounted on walls, ceilings, or beams and are available in various sizes to accommodate different cable capacities.
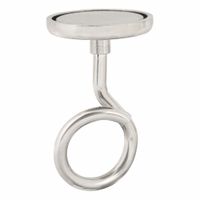
Cable hangers, on the other hand, are more structured and secure systems designed to hold cables in place. They often consist of a bracket or clamp that tightly secures the cables, preventing movement and providing more stability. Cable hangers are commonly used in environments where cables need to be held firmly, such as in electrical installations or where cables are exposed to vibrations or movement. They are suitable for heavier cables and can be used in both indoor and outdoor applications. Cable hangers may require more precise installation and are often used in conjunction with other support systems.
In summary, the main differences between cable J-hooks and cable hangers lie in their design and application. J-hooks offer flexibility and ease of use for lighter, low-voltage cables, while cable hangers provide a more secure and stable solution for heavier or more critical cable installations.
What materials are commonly used for cable clips and organizers?
Cable clips and organizers are essential for managing and tidying cables in various settings. Common materials used for these products include:
1. **Plastic**: Often used due to its lightweight, cost-effectiveness, and versatility. Types of plastic like polypropylene and ABS are popular for their durability and flexibility.
2. **Silicone**: Known for its flexibility and non-slip properties, silicone is used in cable organizers that require a soft touch and grip, making it ideal for holding cables securely without damage.
3. **Metal**: Materials such as stainless steel or aluminum are used for their strength and durability. Metal clips are often used in industrial settings where robustness is required.
4. **Rubber**: Provides excellent grip and flexibility, making it suitable for cable ties and clips that need to hold cables firmly without slipping.
5. **Velcro (Hook and Loop)**: Used in cable ties and straps, Velcro is favored for its reusability and ease of adjustment, allowing for quick and easy cable management.
6. **Wood**: Occasionally used for aesthetic purposes in home or office settings, wooden cable organizers offer a natural look and are often combined with other materials for functionality.
7. **Fabric**: Used in cable sleeves and wraps, fabric materials like neoprene or polyester provide flexibility and protection for bundled cables.
8. **Magnetic Materials**: Employed in some cable organizers to allow for easy attachment and detachment, often used in combination with other materials for added functionality.
These materials are chosen based on factors like durability, flexibility, cost, and the specific requirements of the cable management task.
How do you install cable grommets in panel walls?
To install cable grommets in panel walls, follow these steps:
1. **Select the Grommet**: Choose a grommet that fits the size and type of cables you plan to pass through the panel wall. Ensure it is suitable for the wall material.
2. **Mark the Location**: Determine where the grommet will be installed. Use a pencil to mark the center point on the panel wall where the cables will pass through.
3. **Drill a Pilot Hole**: Use a drill with a small bit to create a pilot hole at the marked center point. This helps guide the larger hole saw or drill bit.
4. **Cut the Hole**: Select a hole saw or drill bit that matches the outer diameter of the grommet. Attach it to the drill and carefully cut through the panel wall at the pilot hole. Ensure the hole is clean and free of debris.
5. **Prepare the Grommet**: If the grommet comes in two parts or has a removable center, disassemble it as needed. Some grommets have a slit or removable section to allow easy cable insertion.
6. **Insert the Grommet**: Push the grommet into the hole. If it’s a tight fit, gently tap it with a rubber mallet. Ensure it sits flush against the wall surface.
7. **Secure the Grommet**: If the grommet has a locking mechanism or requires adhesive, secure it according to the manufacturer's instructions.
8. **Run the Cables**: Feed the cables through the grommet. If the grommet has a removable center or slit, reassemble it around the cables to ensure a snug fit.
9. **Check Installation**: Ensure the grommet is secure and the cables are not pinched or stressed. Adjust as necessary.
This process ensures a neat and professional installation, protecting cables from damage and maintaining the panel wall's integrity.
What are the benefits of using adjustable straps for cable management?
Adjustable straps for cable management offer several benefits:
1. **Flexibility**: They can be easily adjusted to accommodate different cable sizes and quantities, making them versatile for various applications.
2. **Reusability**: Unlike single-use ties, adjustable straps can be reused multiple times, which is cost-effective and environmentally friendly.
3. **Ease of Use**: They are simple to apply and remove, allowing for quick adjustments and reconfigurations without the need for tools.
4. **Protection**: Adjustable straps are typically made from soft materials that prevent damage to cables, reducing wear and tear compared to rigid ties.
5. **Organization**: They help keep cables neatly bundled, reducing clutter and making it easier to identify and access individual cables.
6. **Safety**: By securing cables, they minimize tripping hazards and prevent cables from becoming tangled or damaged.
7. **Aesthetic Appeal**: They contribute to a cleaner and more professional appearance in both home and office environments.
8. **Scalability**: As cable needs change, adjustable straps can be easily modified to accommodate additional cables without needing replacement.
9. **Durability**: Made from robust materials, they withstand repeated use and environmental factors, ensuring long-term reliability.
10. **Cost-Effectiveness**: Their reusability and durability reduce the need for frequent replacements, offering long-term savings.
11. **Versatility**: Suitable for various settings, including home, office, and industrial environments, they can manage cables for electronics, appliances, and more.
12. **Customization**: Available in different colors and sizes, they can be tailored to specific organizational needs and preferences.
How do you choose the right size cable hanger for your needs?
To choose the right size cable hanger, consider the following factors:
1. **Cable Type and Size**: Identify the type and diameter of the cable you need to support. This ensures the hanger can accommodate the cable without causing damage or slippage.
2. **Load Capacity**: Determine the weight of the cable and any additional load it may carry. Select a hanger that can support this weight to prevent sagging or failure.
3. **Environment**: Consider the installation environment. For corrosive or outdoor environments, choose hangers made from materials like stainless steel or galvanized steel for durability.
4. **Spacing and Support**: Calculate the spacing between hangers based on the cable's weight and flexibility. Ensure the hangers are spaced closely enough to prevent excessive sagging.
5. **Installation Method**: Decide on the installation method (e.g., wall-mounted, ceiling-mounted, or suspended). Choose hangers compatible with the installation surface and method.
6. **Regulatory Compliance**: Ensure the hangers meet any industry standards or regulations relevant to your application, such as NEC or IEEE standards.
7. **Future Expansion**: Consider potential future cable additions. Opt for hangers with extra capacity if you anticipate adding more cables later.
8. **Manufacturer Specifications**: Review the manufacturer's specifications and recommendations for the hangers to ensure compatibility with your cables and installation requirements.
9. **Cost and Availability**: Balance the cost with the quality and availability of the hangers. Ensure they are readily available for purchase and within your budget.
10. **Aesthetic and Design**: If aesthetics are important, choose hangers that blend with the environment or match the design requirements.
By evaluating these factors, you can select the appropriate cable hanger size that meets your specific needs and ensures a safe and efficient cable management system.
What are the most durable cable management solutions for outdoor use?
The most durable cable management solutions for outdoor use include:
1. **Conduit Systems**: Rigid and flexible conduits made from materials like PVC, metal, or fiberglass provide excellent protection against environmental elements. They shield cables from physical damage, UV rays, moisture, and temperature fluctuations.
2. **Cable Trays**: Outdoor-rated cable trays, often made from galvanized steel or aluminum, offer robust support and organization for multiple cables. They are resistant to corrosion and can withstand harsh weather conditions.
3. **Cable Ties and Clips**: UV-resistant cable ties and clips are essential for securing cables in outdoor environments. They prevent sagging and movement, reducing wear and tear. Stainless steel ties are particularly durable and resistant to extreme temperatures and UV exposure.
4. **Weatherproof Junction Boxes**: These enclosures protect cable connections from moisture, dust, and other environmental factors. Made from materials like polycarbonate or stainless steel, they ensure long-term durability and safety.
5. **Cable Protectors**: Heavy-duty cable protectors, often made from rubber or polyurethane, safeguard cables from physical damage due to foot or vehicle traffic. They are ideal for temporary outdoor setups.
6. **Burying Cables**: For permanent installations, burying cables underground using direct burial-rated cables or conduits offers maximum protection from environmental exposure and physical damage.
7. **Heat Shrink Tubing**: This provides a waterproof seal around cable connections, protecting them from moisture and corrosion. It is particularly useful for exposed cable ends and joints.
8. **Cable Glands**: These are used to secure cables entering enclosures, providing strain relief and sealing against dust and moisture. They are available in various materials suitable for outdoor use.
Selecting the right combination of these solutions based on specific environmental conditions and cable types will ensure long-lasting and effective cable management outdoors.