Call +(254) 703 030 000 / 751 483 999 / 721 704 777
.....Read More
Frequently Asked Questions
What is a time-delay relay and how does it work?
A time-delay relay is an electromechanical or electronic device that controls the opening or closing of contacts in a circuit after a predetermined time interval. It is used to delay the operation of a circuit or device, providing precise timing control in various applications.
Time-delay relays consist of a timing mechanism, a control circuit, and one or more sets of contacts. The timing mechanism can be based on mechanical, electronic, or digital components, depending on the relay type. Common types include on-delay, off-delay, interval, and one-shot relays.
In an on-delay relay, the timing begins when the control voltage is applied. After the set time elapses, the relay's contacts change state, either closing or opening the circuit. This type is often used for applications requiring a delay before a device starts, such as motor starters.
An off-delay relay, conversely, starts timing when the control voltage is removed. The contacts remain in their current state until the time delay expires, then change state. This is useful for applications needing a delay after a device is turned off, like keeping a fan running after a heater is turned off.
Interval relays activate their contacts for a set time period once triggered, regardless of the duration of the input signal. One-shot relays, on the other hand, change the state of their contacts for a single, fixed time period upon activation.
Time-delay relays are widely used in industrial automation, HVAC systems, lighting controls, and other applications requiring precise timing for operations. They enhance system performance, protect equipment, and ensure safety by coordinating the timing of various processes.
What are the different types of time-delay relays?
Time-delay relays are used to control the timing of electrical circuits. The main types include:
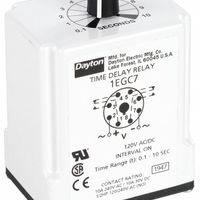
1. **On-Delay Relay**: Activates after a set time once the input is energized. Used for applications requiring a delay before turning on a load.
2. **Off-Delay Relay**: Deactivates after a set time once the input is de-energized. Useful for applications needing a delay before turning off a load.
3. **Interval Relay**: Energizes for a set time period once activated, then deactivates. Ideal for applications requiring a load to be on for a specific duration.
4. **One-Shot Relay**: Activates for a single time period upon receiving a trigger, regardless of the duration of the trigger signal. Used in applications needing a single timed pulse.
5. **Flasher Relay**: Alternates between on and off states at set intervals. Commonly used in signaling applications like indicator lights.
6. **Repeat Cycle Relay**: Continuously cycles between on and off states for set durations. Suitable for applications requiring periodic operation.
7. **Star-Delta Timer**: Used in motor starting applications to switch from star to delta configuration after a set time, reducing starting current.
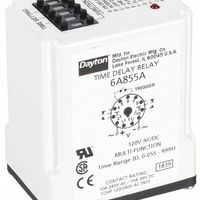
8. **Multi-Function Relay**: Combines multiple timing functions in one unit, offering flexibility for various applications.
9. **Programmable Timer Relay**: Allows for custom timing sequences and complex operations, often used in automation systems.
Each type serves specific applications, providing precise control over the timing of electrical operations.
How do you set the timing on a time-delay relay?
1. **Identify the Relay Type**: Determine if the relay is analog or digital, as the setting method will differ.
2. **Consult the Manual**: Refer to the manufacturer's manual for specific instructions and settings related to your relay model.
3. **Power Off**: Ensure the power supply to the relay is turned off to prevent electrical hazards.
4. **Access the Relay**: Open the relay cover if necessary to access the timing controls.
5. **Set the Timing**:
- **Analog Relays**: Use a screwdriver to adjust the dial or potentiometer on the relay. The dial will typically have markings indicating time intervals (e.g., seconds, minutes).
- **Digital Relays**: Use the buttons or keypad to input the desired time delay. Follow the display prompts to set the time accurately.
6. **Select Time Range**: If the relay has multiple time ranges, ensure the correct range is selected for your application.
7. **Test the Setting**: Power on the relay and conduct a test to verify that the timing is set correctly. Observe the relay operation to ensure it activates and deactivates at the desired intervals.
8. **Adjust if Necessary**: If the timing is not accurate, power off the relay and make further adjustments as needed.
9. **Secure the Relay**: Once the timing is set correctly, secure any covers or panels that were removed.
10. **Document the Settings**: Record the settings for future reference and maintenance.
11. **Safety Check**: Ensure all connections are secure and that the relay is functioning safely within its operational parameters.
What are the applications of time-delay relays?
Time-delay relays are used in various applications to control the timing of electrical circuits. Here are some key applications:
1. **Motor Control**: They provide a delay to prevent motors from starting simultaneously, reducing inrush current and preventing electrical overloads.
2. **Lighting Control**: Used in lighting systems to delay the switch-off time, allowing lights to remain on for a set period after being triggered, such as in stairwells or corridors.
3. **Sequential Control**: In industrial processes, they ensure operations occur in a specific sequence, such as starting conveyor belts in stages to prevent mechanical stress.
4. **Safety Systems**: Employed in safety circuits to delay the activation of alarms or emergency systems, allowing time for corrective actions before triggering.
5. **HVAC Systems**: Used to stagger the start of compressors and fans, reducing the load on electrical systems and improving energy efficiency.
6. **Pumping Systems**: Prevents water hammer by delaying the start or stop of pumps, allowing for gradual pressure changes in pipelines.
7. **Heating Systems**: Controls the timing of heating elements to prevent simultaneous activation, reducing peak power demand.
8. **Automated Machinery**: Ensures components operate in the correct order, preventing mechanical failures and ensuring smooth operation.
9. **Telecommunications**: Used in switching systems to manage signal timing and prevent data collisions.
10. **Traffic Control**: Manages the timing of traffic lights to ensure smooth traffic flow and reduce congestion.
11. **Elevator Systems**: Controls the timing of door operations and floor selection to enhance safety and efficiency.
12. **Power Distribution**: Used in circuit breakers to provide a delay before tripping, allowing transient faults to clear without interrupting power.
These applications highlight the versatility of time-delay relays in enhancing system efficiency, safety, and reliability across various industries.
How do you troubleshoot a time-delay relay?
1. **Identify the Problem**: Determine if the issue is with the relay itself or another component in the circuit.
2. **Visual Inspection**: Check for physical damage, corrosion, or burnt components on the relay and its connections.
3. **Check Power Supply**: Ensure the relay is receiving the correct voltage. Use a multimeter to measure the input voltage and compare it with the relay's specifications.
4. **Inspect Connections**: Verify that all connections are secure and free from corrosion. Loose or corroded connections can cause malfunction.
5. **Test the Coil**: Use a multimeter to measure the resistance of the relay coil. Compare the reading with the manufacturer's specifications to ensure it is within range.
6. **Check Timing Function**: Manually activate the relay and measure the time delay using a stopwatch. Compare the actual delay with the expected delay to see if it matches.
7. **Test Contacts**: Use a multimeter to check the continuity of the relay contacts. Ensure they open and close properly when the relay is activated.
8. **Inspect Control Circuit**: Examine the control circuit for issues such as faulty timers, switches, or sensors that might affect the relay's operation.
9. **Replace Components**: If any component is found to be faulty, replace it with a new one that matches the specifications.
10. **Re-test the System**: After making repairs, test the entire system to ensure the relay operates correctly within the circuit.
11. **Consult Documentation**: Refer to the relay's datasheet or manual for specific troubleshooting tips and specifications.
12. **Seek Professional Help**: If the problem persists, consult with a professional technician or the relay manufacturer for further assistance.
What is the difference between single-function and multifunction time-delay relays?
Single-function time-delay relays are designed to perform one specific timing function, such as delay-on-make, delay-on-break, or interval timing. They are straightforward, with a fixed or adjustable time setting, and are used in applications where only one timing operation is needed. These relays are cost-effective and simple to install and configure, making them ideal for applications with straightforward timing requirements.
Multifunction time-delay relays, on the other hand, are versatile devices capable of performing multiple timing functions within a single unit. They can be configured to execute various operations such as delay-on-make, delay-on-break, interval, one-shot, and more. These relays often come with digital displays or dip switches for easy programming and adjustment of timing parameters. Multifunction relays are suitable for complex applications where different timing functions might be required at different times or where flexibility and adaptability are important.
The primary difference lies in their functionality and application scope. Single-function relays are limited to one specific task, making them simpler and often more economical for straightforward applications. Multifunction relays offer greater flexibility and can replace multiple single-function relays, which can save space and reduce wiring complexity in more complex systems. However, they tend to be more expensive and may require more initial setup and programming.
How do time-delay relays protect against voltage spikes?
Time-delay relays do not directly protect against voltage spikes. Instead, they provide a controlled delay in the activation or deactivation of circuits, which can indirectly help manage the effects of voltage spikes. When a voltage spike occurs, it can cause immediate and potentially damaging effects on electrical equipment. By using a time-delay relay, the relay can be set to delay the activation of the circuit until the spike has subsided, thereby preventing the equipment from being exposed to the spike.
Additionally, time-delay relays can be used in conjunction with other protective devices, such as surge protectors or voltage regulators, to enhance overall system protection. These devices are specifically designed to handle voltage spikes by either diverting excess voltage away from sensitive components or by regulating the voltage to a safe level. The time-delay relay can ensure that the circuit remains inactive until these protective devices have had time to respond to the spike.
In summary, while time-delay relays do not directly mitigate voltage spikes, they can be part of a broader strategy to protect electrical systems by ensuring that circuits are only activated under stable voltage conditions, thereby reducing the risk of damage from transient voltage events.