Call +(254) 703 030 000 / 751 483 999 / 721 704 777
.....Read More
Frequently Asked Questions
What is the best type of caulk gun for home use?
The best type of caulk gun for home use is typically a manual ratchet rod caulk gun. These are affordable, easy to use, and suitable for most household projects. They feature a ratcheting mechanism that allows for controlled dispensing of caulk, making them ideal for sealing windows, doors, and small gaps.
For more frequent use or larger projects, a dripless caulk gun is recommended. These guns have a smooth rod mechanism that reduces hand fatigue and prevents excess caulk from oozing out when the trigger is released, ensuring a cleaner application.
For those who require precision and ease, a battery-powered or electric caulk gun might be the best choice. These guns offer consistent pressure and are excellent for extensive projects, though they are more expensive and require charging or batteries.
When choosing a caulk gun, consider the following features:
1. **Thrust Ratio**: A higher thrust ratio (e.g., 10:1 or 18:1) means less effort is needed to dispense thicker materials.
2. **Rotating Frame**: Allows the tube to rotate for better control around corners.
3. **Built-in Cutter and Puncture Tool**: Convenient for opening caulk tubes without additional tools.
4. **Ergonomic Design**: Comfortable grip and trigger reduce hand strain during prolonged use.
Ultimately, the best caulk gun for home use depends on the frequency of use, the type of projects, and personal preference for manual versus powered tools.
How do you load a caulk gun?
1. **Prepare the Caulk Tube**: Remove the nozzle cap from the caulk tube. Use a utility knife to cut the tip of the nozzle at a 45-degree angle to the desired bead size. Puncture the inner seal of the tube using a long, sharp object like a nail or the built-in puncture tool on some caulk guns.
2. **Release the Plunger**: Locate the release trigger at the back of the caulk gun. Press it to retract the plunger rod fully.
3. **Insert the Caulk Tube**: Place the caulk tube into the gun. Position the nozzle through the front opening, ensuring it fits snugly. The bottom of the tube should rest against the plunger.
4. **Engage the Plunger**: Squeeze the trigger to advance the plunger rod until it makes contact with the bottom of the caulk tube. This ensures the caulk is ready to be dispensed.
5. **Test the Flow**: Squeeze the trigger gently to test the flow of the caulk. Adjust the pressure as needed to achieve a consistent bead.
6. **Apply the Caulk**: Position the nozzle at the starting point of the area to be caulked. Squeeze the trigger steadily while moving the gun along the joint or seam.
7. **Release Pressure**: After use, press the release trigger to relieve pressure on the plunger, preventing excess caulk from oozing out.
8. **Seal the Nozzle**: If there is leftover caulk, cover the nozzle with a cap or wrap it with plastic wrap to prevent drying.
9. **Clean the Gun**: Wipe off any excess caulk from the gun to maintain its condition for future use.
What are the differences between manual, cordless, and air-powered caulk guns?
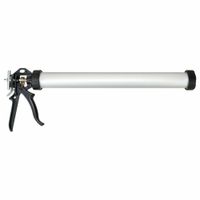
Manual caulk guns are the most basic type, requiring physical effort to operate. They consist of a trigger mechanism that pushes a rod forward, dispensing the caulk. These are cost-effective, lightweight, and suitable for small to medium projects. However, they can cause hand fatigue with prolonged use and may not provide consistent flow.
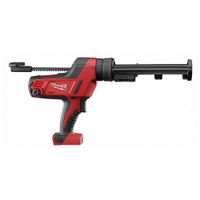
Cordless caulk guns are battery-operated, offering more convenience and ease of use compared to manual ones. They provide a consistent flow of caulk with minimal effort, making them ideal for larger projects or professional use. The speed and pressure can often be adjusted, allowing for precise application. However, they are more expensive, heavier, and require battery maintenance.
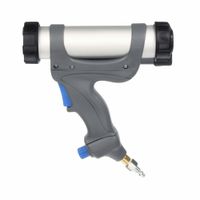
Air-powered caulk guns, also known as pneumatic caulk guns, use compressed air to dispense caulk. They are highly efficient and provide a smooth, consistent flow, making them suitable for industrial or large-scale applications. They require an air compressor, which adds to the cost and limits portability. These guns are less physically demanding but require some setup and maintenance of the air system.
How do you clean a caulk gun after use?
To clean a caulk gun after use, follow these steps:
1. **Release Pressure**: Immediately after use, release the pressure on the caulk gun by pressing the release lever. This prevents more caulk from being pushed out and makes cleaning easier.
2. **Remove the Cartridge**: Take out the caulk cartridge from the gun. If there is any leftover caulk, seal the cartridge with a cap or plastic wrap to preserve it for future use.
3. **Wipe Excess Caulk**: Use a rag or paper towel to wipe off any excess caulk from the nozzle and the gun. Be sure to clean the trigger and any other areas where caulk may have dripped.
4. **Clean the Nozzle**: If the nozzle is removable, take it off and soak it in warm, soapy water. Use a brush or a toothpick to remove any dried caulk from inside the nozzle.
5. **Use Solvent for Stubborn Caulk**: For stubborn or dried caulk, use a solvent like mineral spirits or rubbing alcohol. Apply the solvent to a cloth and rub the affected areas. Be cautious and follow safety instructions when using solvents.
6. **Clean the Plunger**: Extend the plunger rod and wipe it down with a cloth soaked in warm, soapy water or solvent. Ensure all caulk residue is removed to prevent it from hardening and affecting future use.
7. **Rinse and Dry**: Rinse all parts with clean water to remove any soap or solvent residue. Dry thoroughly with a clean cloth to prevent rusting.
8. **Reassemble and Store**: Once all parts are clean and dry, reassemble the caulk gun. Store it in a dry place to keep it in good condition for the next use.
What accessories are available for caulk guns?
Accessories for caulk guns enhance their functionality and ease of use. Here are some common ones:
1. **Nozzle Tips**: These come in various shapes and sizes to control the flow and application of the caulk. They can be cut to different angles to suit specific tasks.
2. **Extension Tubes**: These are used to reach tight or awkward spaces that are difficult to access with a standard nozzle.
3. **Caulk Smoothers**: Tools like caulk finishing tools or spatulas help in smoothing out the caulk for a clean finish.
4. **Caulk Caps**: These are used to seal the nozzle between uses, preventing the caulk from drying out.
5. **Caulk Removers**: Tools designed to remove old caulk efficiently without damaging the surface.
6. **Dripless Mechanisms**: Some caulk guns come with or can be fitted with mechanisms to prevent excess caulk from oozing out after the trigger is released.
7. **Battery Packs**: For electric or battery-operated caulk guns, additional battery packs can be useful for extended use.
8. **Hanging Hooks**: These allow the caulk gun to be hung on a ladder or tool belt for easy access.
9. **Carrying Cases**: Protective cases for storing the caulk gun and its accessories, keeping them organized and safe from damage.
10. **Cleaning Tools**: Brushes and other cleaning tools help maintain the caulk gun and prevent clogging.
11. **Replacement Parts**: Such as plungers, rods, and springs, which can wear out over time and need replacement.
These accessories can significantly improve the efficiency and quality of caulking projects.
How do you prevent caulk from drying out in the gun?
To prevent caulk from drying out in the gun, follow these steps:
1. **Seal the Nozzle**: After using the caulk, ensure the nozzle is sealed tightly. Use a cap specifically designed for caulk tubes or wrap the tip with plastic wrap or aluminum foil, securing it with a rubber band or tape.
2. **Use a Nail or Screw**: Insert a long nail or screw into the nozzle. This helps block air from entering and drying out the caulk. Ensure it fits snugly to be effective.
3. **Plastic Wrap or Bag**: Wrap the entire nozzle and the tip of the caulk tube with plastic wrap or place it in a plastic bag. This adds an extra layer of protection against air exposure.
4. **Store Properly**: Store the caulk gun in a cool, dry place. Avoid areas with high temperatures or direct sunlight, as heat can accelerate drying.
5. **Release Pressure**: After use, release the pressure on the caulk gun by pressing the release lever. This prevents caulk from continuing to ooze out and drying in the nozzle.
6. **Use a Caulk Saver**: Consider using a caulk saver, a small device designed to fit over the nozzle and keep the caulk fresh.
7. **Short-term Storage**: For short-term storage, submerge the nozzle in water. This can help keep the caulk from drying out for a few days.
8. **Rotate Use**: If you have multiple tubes, rotate their use to ensure none are left unused for too long.
By following these steps, you can significantly extend the life of your caulk and prevent it from drying out in the gun.
What are the common problems with caulk guns and how can they be fixed?
Common problems with caulk guns include:
1. **Jammed Caulk Tube**: This occurs when the tube is not properly seated or the nozzle is clogged. Fix it by ensuring the tube is correctly placed and clear any blockages in the nozzle with a pin or wire.
2. **Inconsistent Flow**: This can be due to a faulty trigger mechanism or a clogged nozzle. Check the trigger for any damage and clean the nozzle. Adjust the pressure rod to ensure smooth operation.
3. **Dripping Caulk**: Often caused by residual pressure after releasing the trigger. Use a caulk gun with an automatic pressure release feature or manually pull back the pressure rod after each use.
4. **Difficult Trigger Pull**: This can result from a stiff mechanism or lack of lubrication. Apply a light machine oil to the moving parts and ensure the gun is clean and free of debris.
5. **Uneven Bead**: This may be due to inconsistent pressure or a damaged nozzle. Maintain steady pressure on the trigger and replace the nozzle if it is damaged.
6. **Broken or Bent Rod**: A bent rod can prevent proper pressure application. Replace the rod if it is bent or damaged.
7. **Poor Grip**: Slippery handles can make it hard to control the gun. Use a gun with ergonomic grips or add grip tape to the handles.
8. **Rust and Corrosion**: This can impede movement. Regularly clean and dry the gun after use, and store it in a dry place.
Regular maintenance and proper handling can prevent many of these issues, ensuring efficient and effective use of a caulk gun.